3 Replacing Hardware Components
Replacing the Floppy Drive
42 English
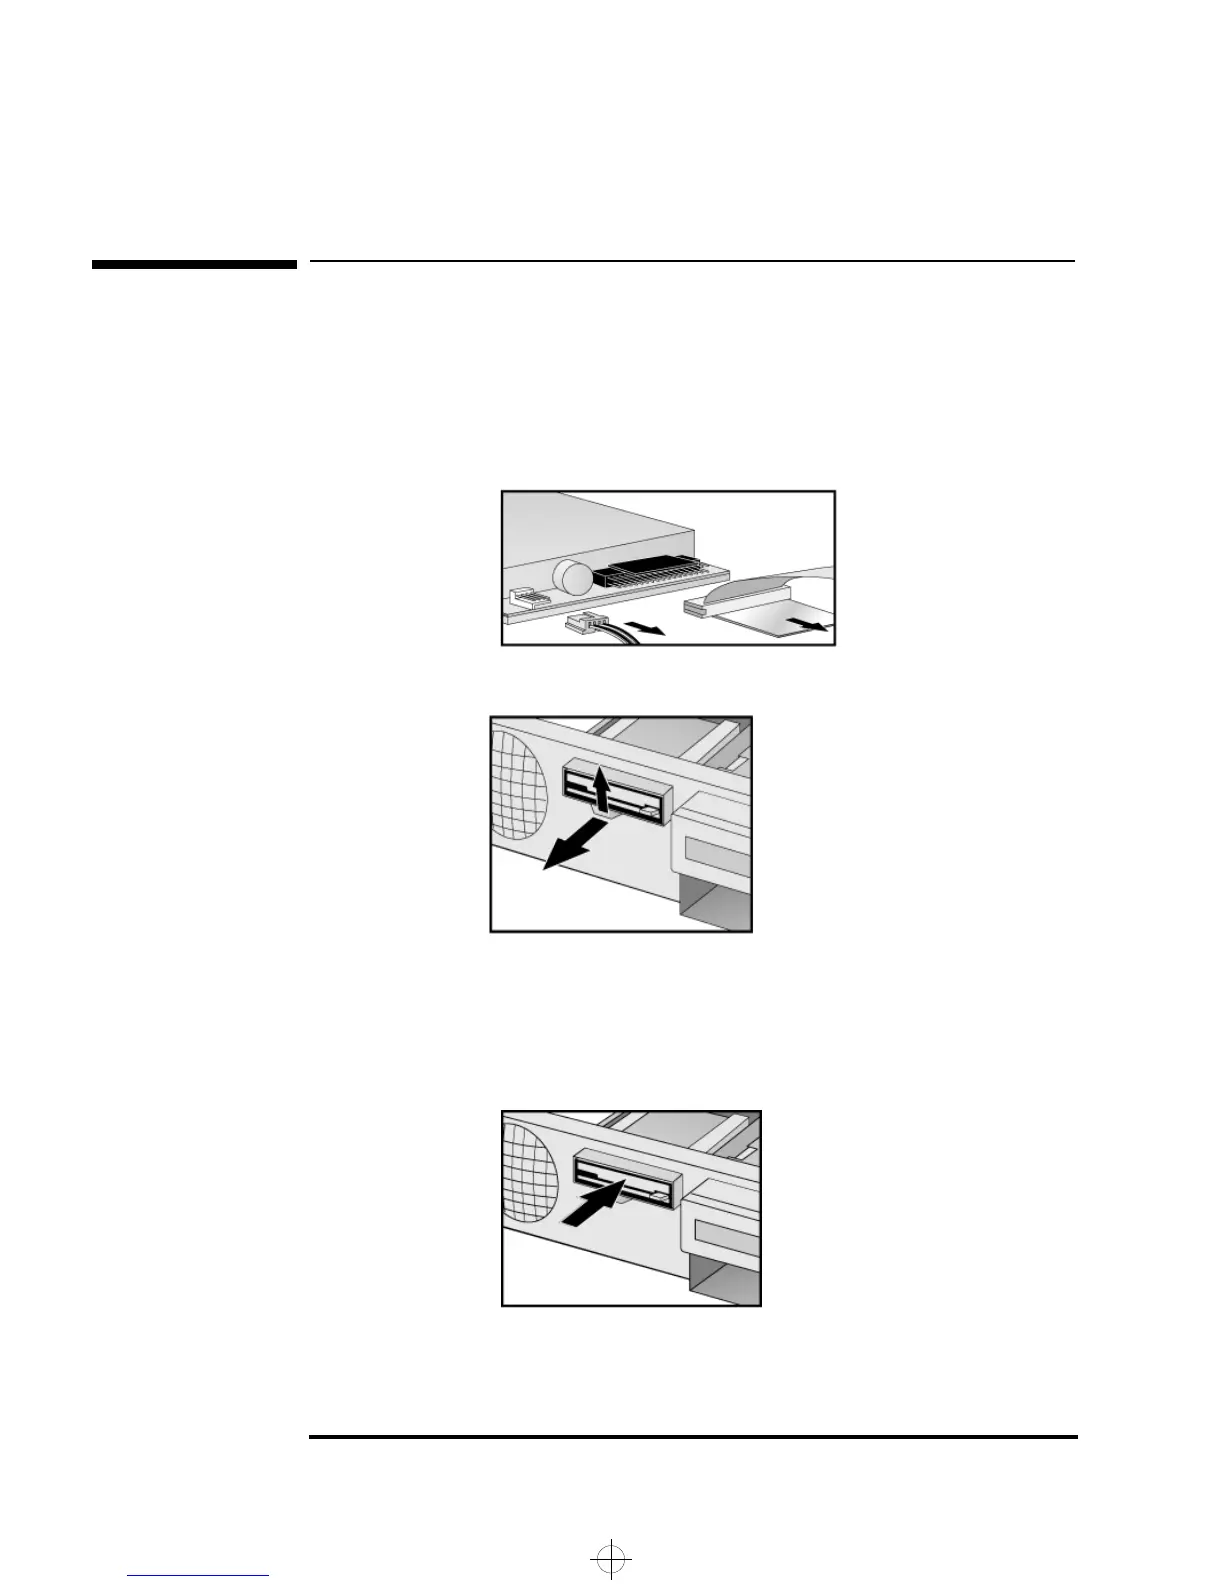
Replacing the Floppy Drive
In the Desktop
1 Remove the computer’s cover (described in this chapter).
2 Remove the drive’s connectors.
3 Lift the latch
➊ and slide out the floppy drive tray ➋.
4 Remove the tray’s screws and remove the old floppy drive.
5 Align the new floppy drive in the tray (with the correct orientation)
and replace the screws.
6 Slide the floppy drive tray back into the PC.
7 Attach the data and power connectors.
8 Replace the cover (described in this chapter).
➊
➋
gap.bk : gap-3.fb4 Page 42 Friday, January 15, 1999 5:03 PM
 Loading...