20
LP-505 REV. 4.29.14
3. Tighten the clamps using a screwdriver.
4. Ensure the pipe is secure before continuing installation.
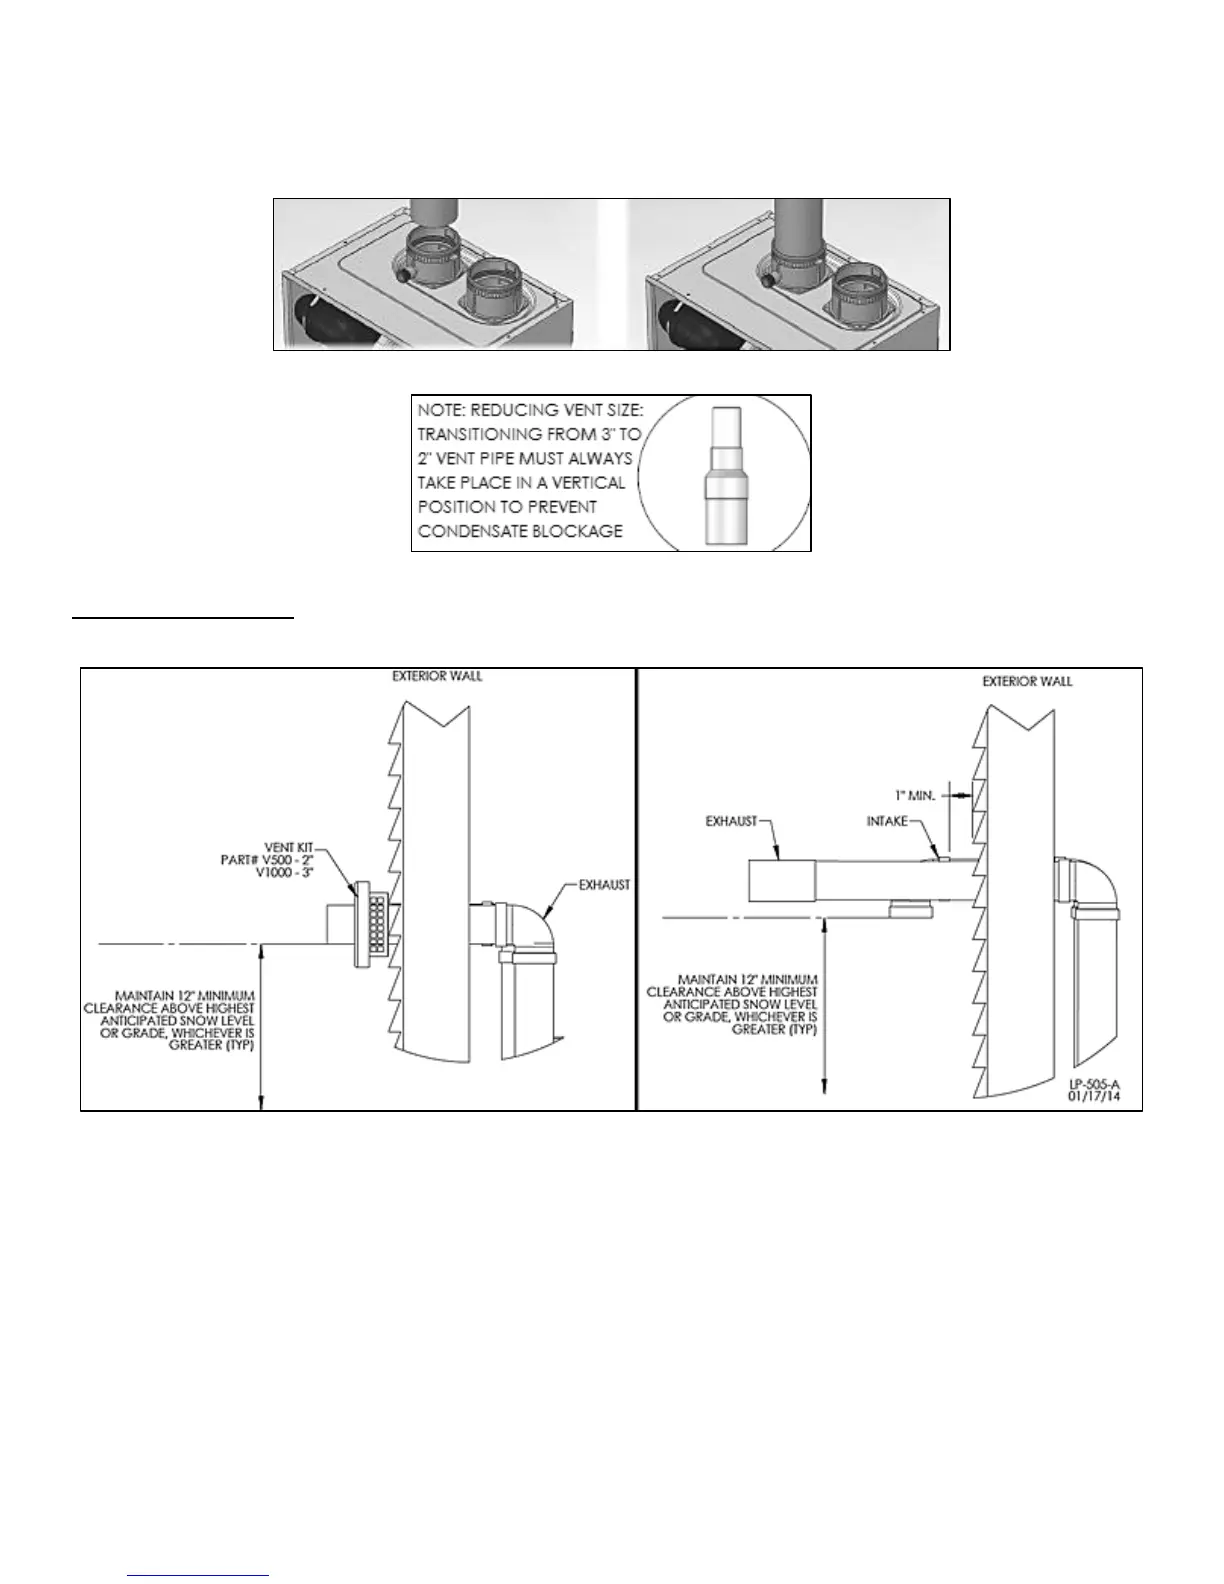
5. For 2” installations, install a reducing coupling in a vertical section of pipe. See Figure 7.
Figure 6 – Correct Installation into the Water heater Collar
Figure 7 – Transitioning from 3” to 2” Vent Pipe
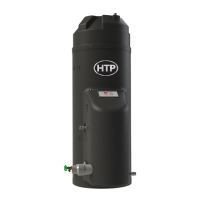
E. VENT TERMINATION
1. Horizontal Vent Terminations
Figure 8 – Direct Vent, Sidewall Vent Termination