2. In the Network Connections window, right-click Wireless Network Connection to
display a shortcut menu, and then select View Available Wireless Networks from
the shortcut menu.
3. Select the wireless network that is configured in Step 1 from the wireless network list,
and then click Connect in the lower right corner of the window.
4. In the displayed dialog box, enter the access password that is preset in Step 1, and
then click Connect.
After the password is verified, Connected appears on the icon of the wireless network in
the wireless network list, which indicates that your computer is connected to the
HG552d through wireless connection.
5.2 Configuring the Wireless Connection by the WPS
Button
If the wireless network adapter on your computer supports the WPS function, you can
connect your computer to the HG552d wirelessly as follows:
Step 1 Set the WLAN parameters of HG552d, and then set the Security to WPA-PSK,
WPA2-PSK or WPA-PSK/WPA2-PSK as prompted. For details, see the Step1 of
chapter 5.1 "Configuring the Wireless Connection by the Web Page."
The WPS function can be used only when the security mode of the WLAN is set to WPA-PSK,
WPA2-PSK, or WPA-PSK/WPA2-PSK.
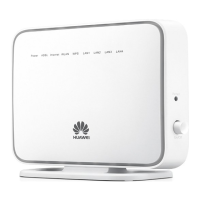
Step 2 Press the WPS button on the side panel to start the WPS negotiation of the HG552d.
Then the WPS indicator of the HG552d blinks.
Step 3 Enable the WPS negotiation function of the wireless network adapter within 2 minutes.
Wait for a few seconds, and then you can see the WPS indicator becomes solid on from
the blinking state, indicating that the HG552d is connected to your PC through the WPS
function. This state lasts 5 minutes. Then the WPS indicator turns off.
 Loading...


