Ver. 1.4 – 6-21
9
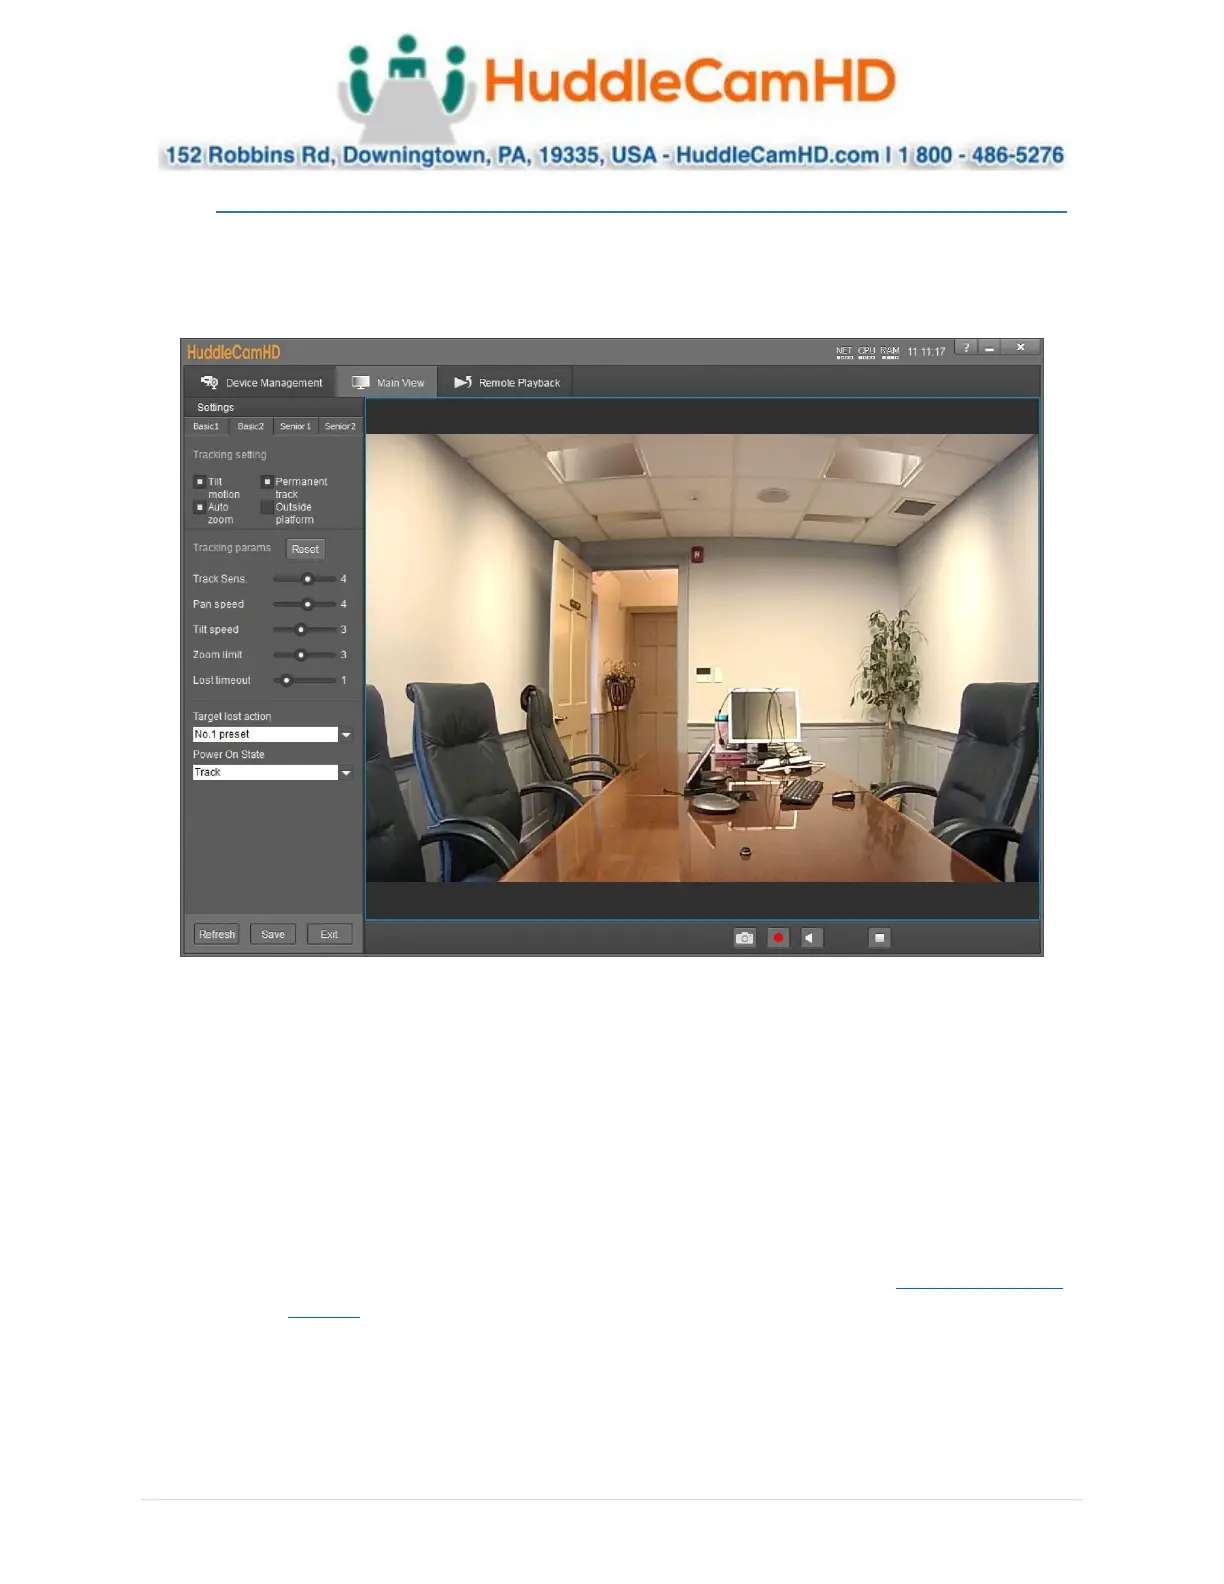
Configure Tracking (Continued) __ _ _____
4. Click “Save” to save the Tracking & Blocking zones.
5. Click “Basic 2” along the top left of the software to open the secondary page of tracking
parameters.
6. In Basic 2, you can adjust the Tracking limitations of the camera.
a. Tracking Settings: Enable/Disable Tilt Motion, Auto Zoom, Permanent Track, & Outside
Platform.
b. Tracking Parameters: Tracking Sensitivity, Pan Speed, Tilt Speed, Zoom Limit, & Lost
Timeout as required by your room.
c. Target Lost Action: Dropdown and select “No. 0 preset” to ensure the camera is
tracking properly.
d. Power On State: Select how the camera performs when powered on.
7. Click “Save” to save the adjusted settings.
8. When you’re finished adjusting the tracking parameters, click “Exit” to return to “Main View”.
a. For more information on the options available within Settings, view Configure Tracking
Settings on page 22.
 Loading...