INSTALLATION
4
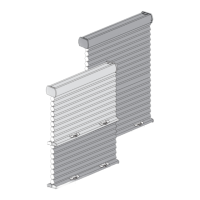
Mount the Installation Brackets — Inside Mount
Measure 2" from each jamb for bracket location.
If more than two installation brackets came with your order, space additional bracket(s)
evenly between the two end brackets and mark their location. Mount into wood
whenever possible.
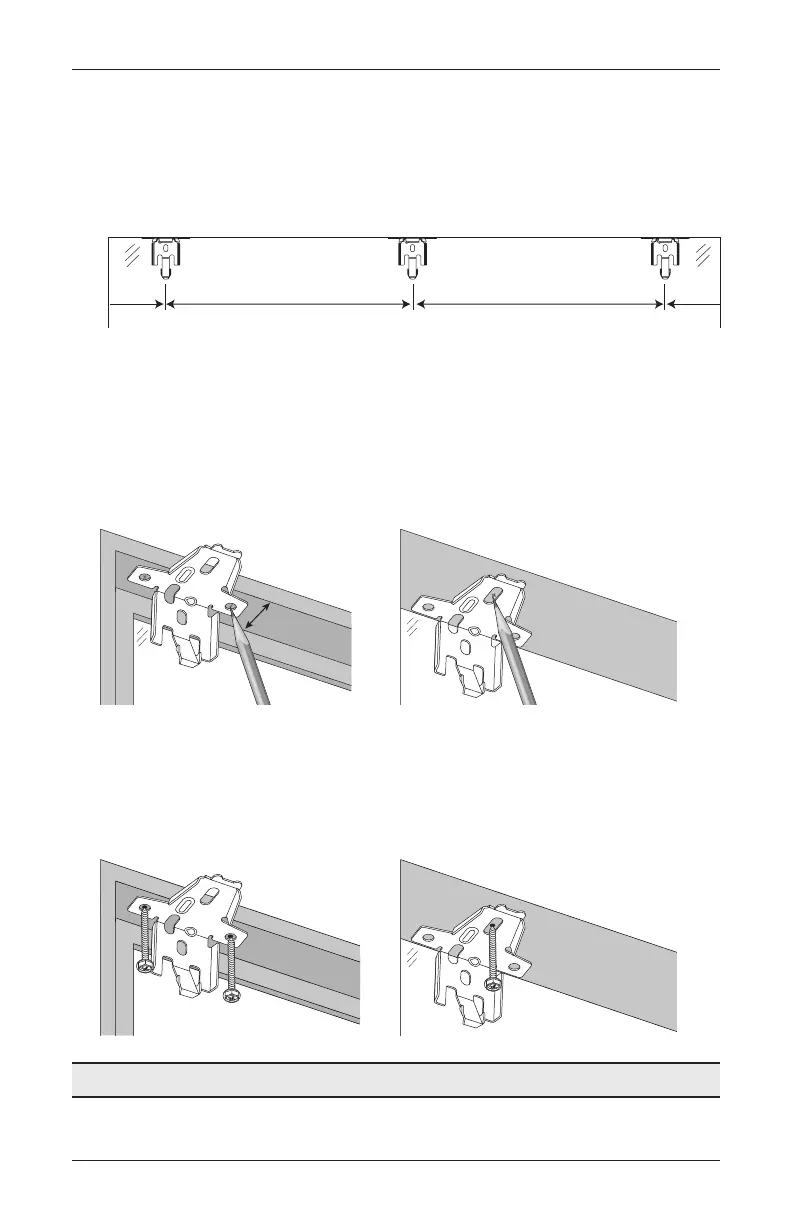
Center the brackets on your marks and mark the location of the screw holes.
The minimum casement depth for mounting the installation brackets is
1
⁄
2
". With
shallow casement depths, mark both of the winged screw holes.
The minimum casement depth for a fully recessed mount is 2
1
⁄
4
" for
3
⁄
8
" and
3
⁄
4
" pleat
sizes and 3" for the 1
1
⁄
4
" pleat size. Mark the center screw hole when depth permits.
IMPORTANT: The front edges of the brackets must be level and aligned to each other.
Drill the screw holes using a
3
∕
32
" drill bit.
CAUTION: Use drywall anchors when mounting into drywall.
Use a level to check that the mounting surface is level. Shim the brackets if necessary.
Attach the installation brackets using the screws provided.
Proceed to “Install the Shade” on page8.
Minimum
1
∕
2
"
Use Center Hole
When Depth Permits
2" Space Evenly
Space Evenly
2"
 Loading...