INSTALLATION
7
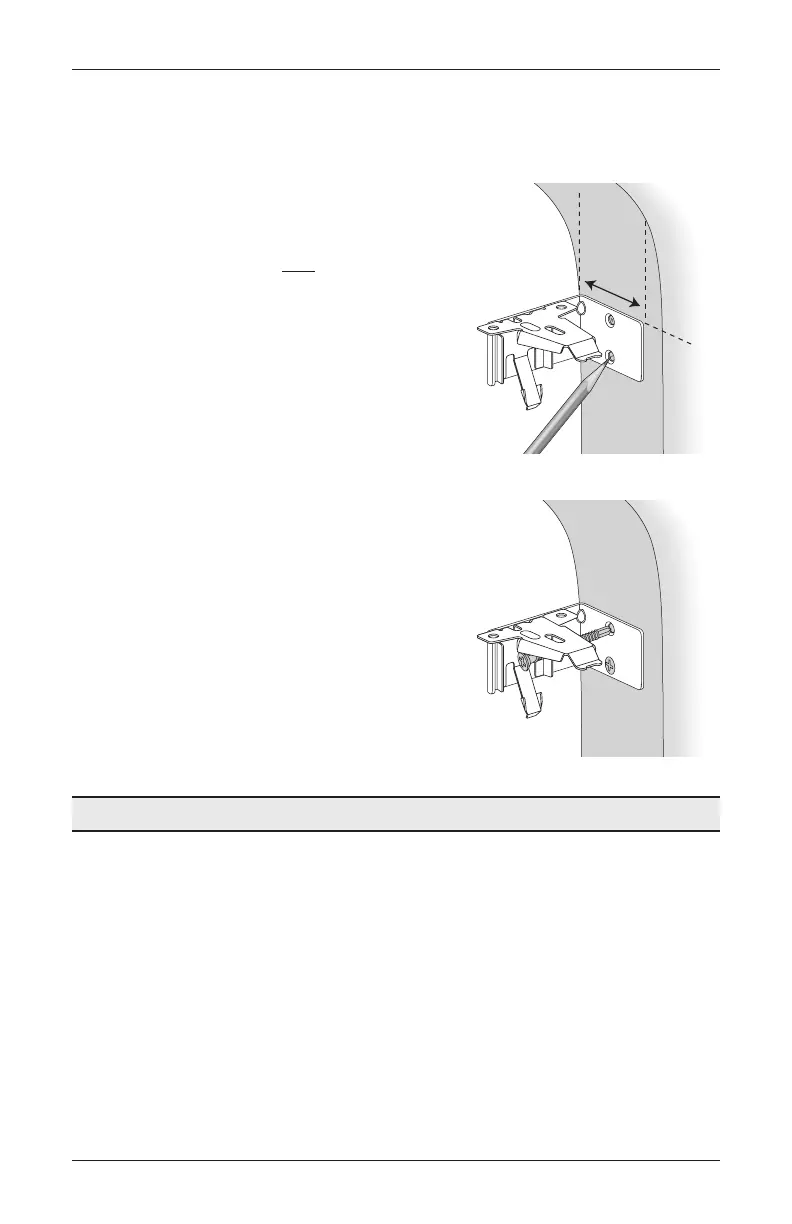
Mount the Installation Brackets — End Mount
End mount the headrail when conventional mounting techniques will not work — for example,
in an arched window opening.
Position the end mount brackets so that the
top of the attached installation brackets is at
the ordered height of the shade.
CAUTION: Both brackets must be installed
at the same depth and height.
Mark both screw holes.
The mounting surface must be vertical
and flat, not part of an arched curve.
Minimum mounting depth is 1
1
⁄
4
" for
3
⁄
8
"
and
3
⁄
4
" pleat sizes and 2" for the 1
1
⁄
4
"
pleat size. Minimum mounting depth for
a fully recessed end mount is 2
3
⁄
8
" for
3
⁄
8
" and
3
⁄
4
" pleat sizes and 3" for the 1
1
⁄
4
"
pleat size.
Drill the holes using a
3
∕
32
" drill bit.
Attach the end mount installation brackets
using the flat head screws provided.
IMPORTANT: Drywall mounting is not
recommended.
IMPORTANT: For instructions on installing
an arch over a rectangular shade, see the
Installation, Operation, and Care instructions
that came with your arch shade.
Proceed to “Install the Shade” on page8.
1
1
∕
4
"
Minimum
Shade
Height
1
1
∕
4
"
Minimum
Ordered
Shade
Height
 Loading...