INSTALLATION
9
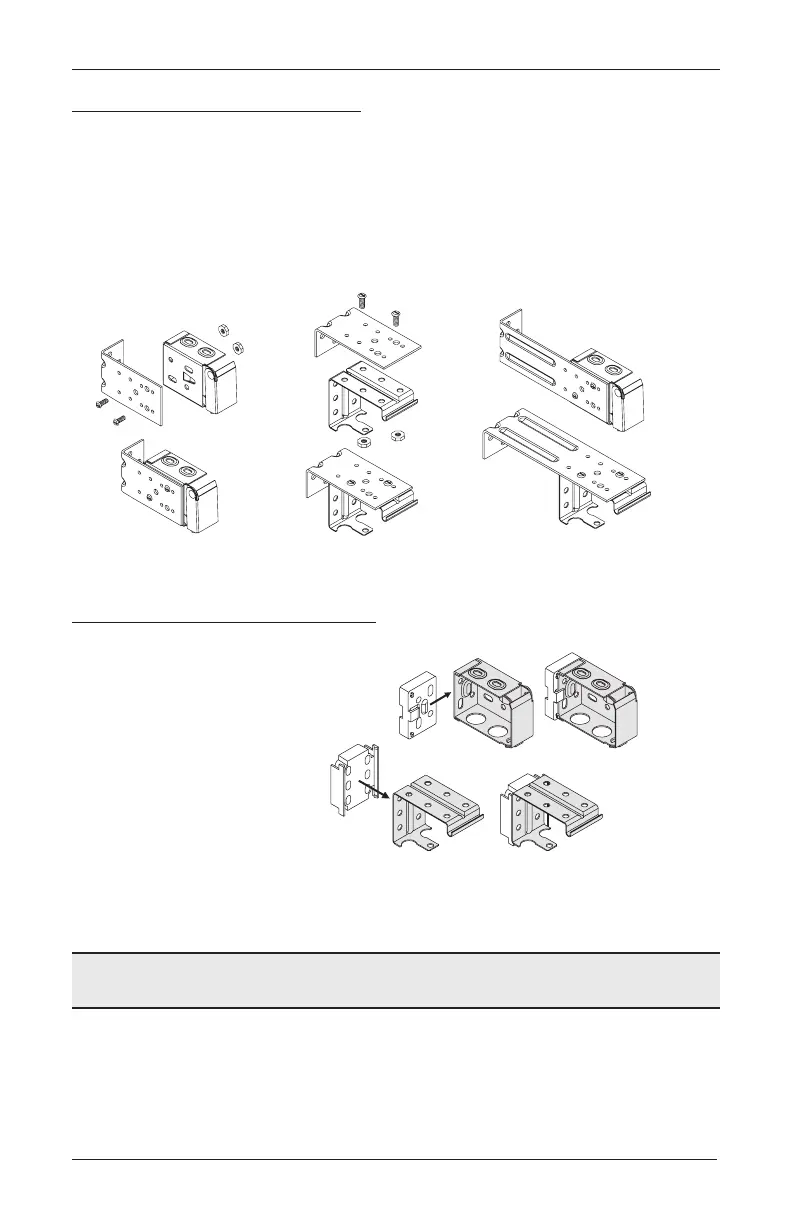
Extension Brackets (Optional)
Attach 2" or 4" extension brackets to the mounting surface in the same locations where the
end brackets and intermediate brackets would be attached.
Use the provided screws to mount each extension bracket.
IMPORTANT: The tops of the end brackets and intermediate bracket(s) must align.
Attach the installation brackets to the extension brackets using the screws and nuts
provided, as shown below.
Spacer Blocks for 2
1
⁄
2
" Slat Size
NOTE: Spacer blocks are required for the
2
1
⁄
2
" slat size and are optional for 1
3
⁄
8
" and 2"
slat sizes.
Attach a spacer block to each of
the two endbrackets.
If one or more intermediate
brackets is required (see chart
on page 4), attach a spacer
block to each intermediate
bracket.
If extension brackets will be used,
it is not necessary to attach spacer blocks.
Proceed to “STEP 2 — Connect the Power Cable” on
page 10.
End Bracket
with 2" Extension Bracket
Intermediate Bracket
with 2" Extension Bracket
End and Intermediate Brackets
with 4" Extension Bracket
End Bracket
Intermediate
Bracket
 Loading...