OPERATION
20
Resetting the Blind (If Necessary)
Basic Reset
The basic reset is used to reset the slats’ travel limits.
1. Press and hold the programmingl button for approximately 6 seconds. The blind will move
slightly. Release the programming button (the light flashes red).
2. The blind will tilt fully in one direction to set the first limit, then tilt in the opposite direction
to set the second limit. The slats will move slightly one more time to indicate that the travel
limits have been reset.
Resetting Blind Programming
The programming reset erases blind programming from memory, including group assignments,
preventing input devices from operating the blind. The primary use is to correct group and
network assignments during installation. The reset does not affect travel limits or the favorite
position.
1. Press and hold the programming button for approximately 12 seconds. The blind will move
slightly after 6 seconds, then again after 12 seconds. Release the programming button (the
light flashes red). The light then flashes a series of green and red to indicate that blind
programming is erased from memory.
2. Refer to “Joining a Blind to a Group” on page19 to program the blind to a group.
Complete the Installation
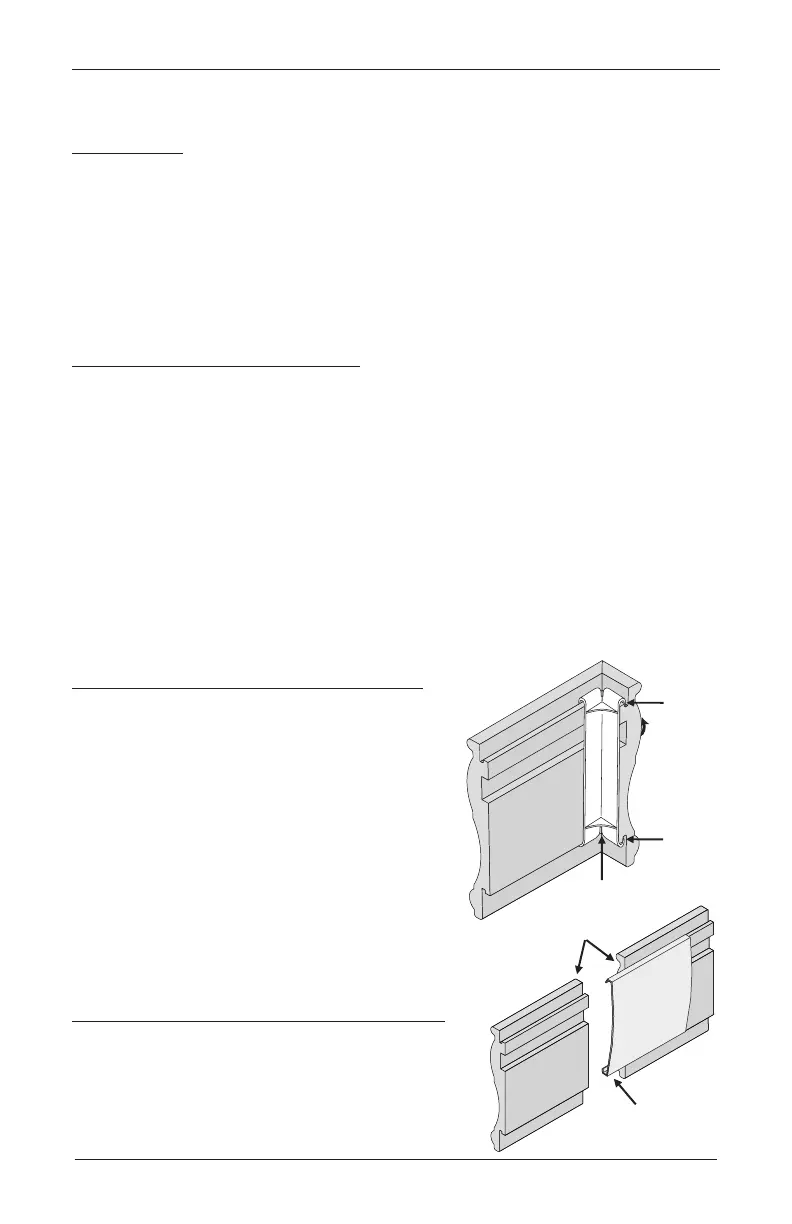
Attach the Corner Clips (If Required)
If the valance came with returns, connect the returns
to the valance using the corner clips provided.
The notches on the rear of the valance and returns
fit into the grooves of the corner clips.
Slide one end of each clip onto the rear of the
valance until the center of the clip aligns with the
edge of the miter cut at each end.
Slide a return onto each corner clip until its miter
is flush against the miter on the valance.
NOTE: Valance design varies by product.
Attach the Valance Splice (If Required)
For valances that are spliced, join the two mitered valance
pieces together by sliding the valance splice clip over the
back of the valance where the two halves meet.
Miters Meet
Valance
Valance
Return
(Cross-
Section)
Corner
Clip
Notch
Notch
Miters
Valance
Splice Clip

 Loading...