INSTALLATION
7
Mount the Installation Brackets — Outside Mount
To attach the end brackets, a flat vertical surface of at least 1
3
⁄
4
" is required for 1
3
⁄
8
", 2", and
2
1
⁄
2
" slat sizes.
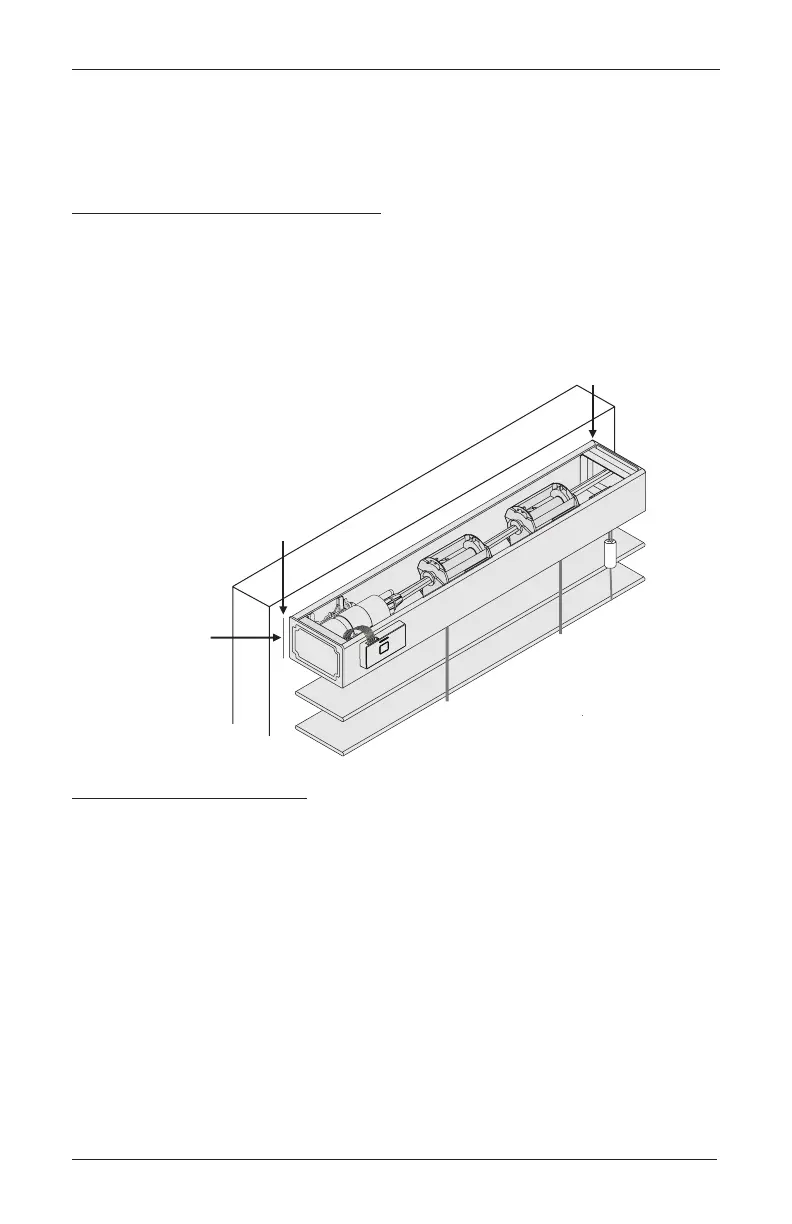
Mark the End Bracket Locations
Mark where the ends of the headrail will be located.
Center the headrail over the window opening at the desired height.
Use a pencil to lightly mark each end of the headrail.
Alternatively, measure the width of the headrail and use that
width to mark the headrail end points over the window opening.
Make a second mark
1
⁄
4
" to the outside of the headrail
end marks. The outer marks are where the outside
edges of the end brackets will be located.
Attach the End Brackets
NOTE: The illustrations in this section show spacer blocks mounted with the end brackets
for 1
3
⁄
8
", 2", and 2
1
⁄
2
" slat sizes. Spacer blocks are required for all outside mount 2
1
⁄
2
" blinds,
unless extension brackets are used. Spacer blocks are optional for 1
3
⁄
8
" and 2" slat sizes.
Align the outside edge of each end bracket with the outer marks and mark diagonal screw
holes.
Use a
3
⁄
32
" drill bit to drill holes for the mounting screws.
Mark
1
∕
4
" Out from
Ends of Headrail





 To Next Page