INSTALLATION
4
Mount the Installation Brackets — Inside Mount
■ Mark 2" – 3" from each jamb for bracket location.
➤ If more than two installation brackets came with your order, space additional bracket(s)
evenly between the two end brackets and mark their location. Mount into wood
whenever possible.
➤ Use pliers to break off the top tab of each installation bracket.
Save this tab once removed. It may be used as a shim, as described
later in these instructions.
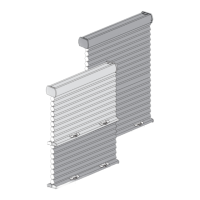
■ Two-On-One Headrail Shadings. Two additional installation brackets should be placed on
each side of the panel split.
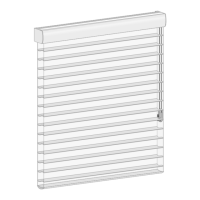
■ Decide whether the front or back set of installation bracket holes works best in your
application. Mark the location of the screwholes.
➤ The depth required for fully recessed mounting will vary
depending on the type of headrail and vane size. Refer to
the chart below for depth requirements.
Top limits should be equal
distance from the ends of headrail.
Space Evenly
Space Evenly
2" – 3"
2" – 3"
Jamb Jamb
p
b
Bottom
Space Evenly2" – 3" 2" – 3"
Jamb Jamb
Top Limits
Space Evenly
Panel Split
Minimum
Depth
See Chart
2" – 3"
Depth Chart for Bracket Placement
Headrail Type Minimum Fully Recessed
Classic 1" 3
5
/
16
"
Quartette
®
4" 1" 3
3
/
4
"
Note: Add
1
/
4
" to the minimum depth dimensions if the
optional back cover is used for inside mounts.

 Loading...