INSTALLATION
6
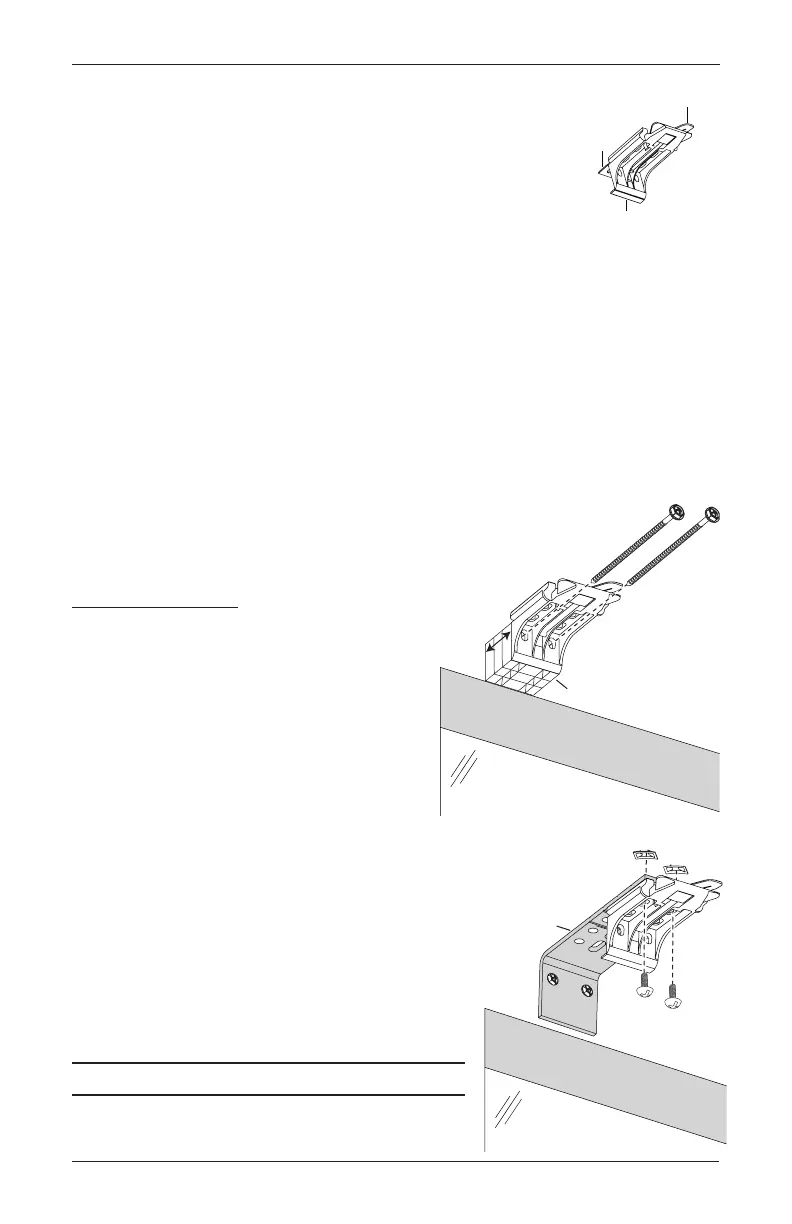
■ Use pliers to break off both top and bottom removable tabs from the
installation brackets.
■ Center each installation bracket on your marks and mark the location
of the screw holes.
CautIon: The rear of the spacer blocks/brackets must be flush against
a flat mounting surface. Do not mount brackets oncurved molding.
➤ A minimum 1
1
/
8
" flat vertical height is required to mount the installation brackets.
➤ The top of the installation brackets should be at the desired height of the shading. The
brackets should be level and aligned.
■ Use a
3
/
32
" drill bit to drill holes for the mounting screws.
Important: Use drywall anchors when mounting into drywall.
■ Attach the installation brackets using the screws provided.
Important: The front edges of the installation
brackets must be level and aligned to eachother.
Additional Clearance
■ If using
1
/
4
" or
1
/
2
" spacer blocks, attach
the spacer block(s) and installation bracket
to a flat vertical mounting surface with
#6screws long enough for asecure
installation.
Important: The maximum spacer block
allowance is 1
1
/
2
".
■ If using extension brackets, attach each extension
bracket to a flat vertical mounting surface.
➤ Attach an installation bracket to the underside of
each extension bracket using the provided screws
and speed nuts.
Proceed to “Install the Shading” on page 8.
p
b
Bottom
Tab
Spacer
Blocks
1
1
/
2
"
Maximum
Speed Nuts
Extension
Bracket

 Loading...