INSTALLATION
5
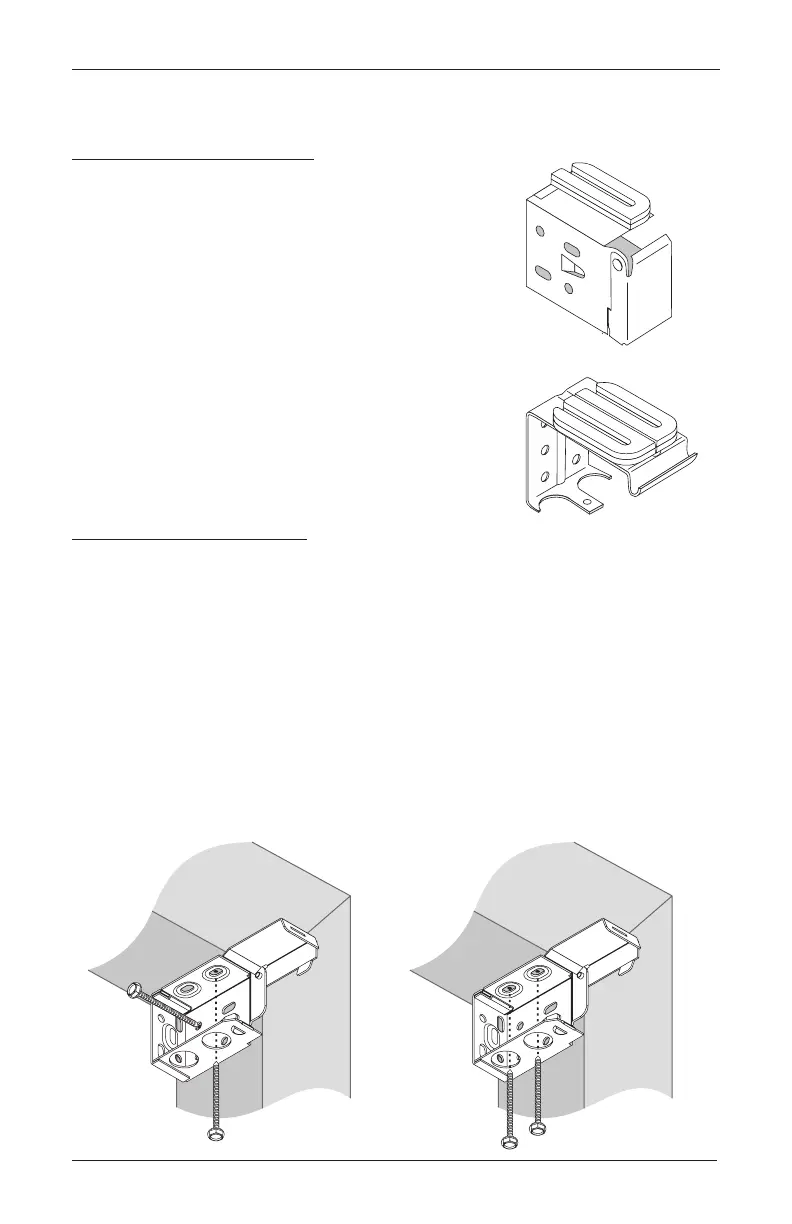
Mount the Installation Brackets — Inside or Ceiling Mount
Bracket Shims (Optional)
Bracket shims are used to gain clearance for valance
clips with inside or ceiling mounts. One shim for each
end bracket and two shims for each intermediate
bracket are included.
■
With each end bracket, first fold the shim and then
position it on top of the end bracket to gain the
required clearance.
■
With each intermediate bracket, stack two unfolded
shims.
NOTE: Bracket shims may also be used to level the
blind whenever the mounting surface is uneven.
The shims can be cut along their fold line to make
them thinner.
Attach the End Brackets
With inside or ceiling mounts, attach the two end brackets flush against the sides of the
window casement or to the ceiling. Choose the most appropriate of the following mounting
methods:
■
Side/Top Mount (Inside mount only): Mount the end brackets with one screw through
a side hole and one screw through a top hole, as shown below left.
■
Side Mount (Inside mount only): Mount the end brackets with two screws through
diagonal side holes.
■
Top Mount (Inside or ceiling mount): Top mount the end brackets with screws through
the two top holes, as shown below right.
■
Ceiling mount only: If the end brackets are flush with the back wall, attach them with
one screw through a top hole and one screw through a rear hole.
One Shim
Folded Over
End
Bracket
Intermediate
Bracket
T
Stacked
Intermediate
Bracket
Side/Top
Mount
Top Mount
1
3
∕
8
"
Side/Top
Mount
1
3
∕
8
"
Top Mount
 Loading...