5 HUSKYTOOLS.com
Please contact 1-888-HD-HUSKY for further assistance.
HOW TO CHANGE “TARGET TORQUE ALERT” AND “TARGET ANGLE ALERT”
PERCENTAGES
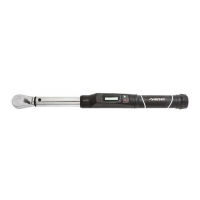
1. Power on the wrench as described on Page 3. Press “M” until the “PCt” mode is reached, then press “SET”.
2. The current value will flash on the screen.
3. Press “s” or “t” to select when the target torque alert will start. The target torque alert can start at a maximum of
50% to the target torque value or a minimum of 1% to the target torque value. For example, if your target torque is
100 ft-lbs and your target torque alert is set at 50%, the alert will start when you reach 50 ft-lbs. Press “SET” to save.
4. The screen will show “dEG” so the target angle alert can be adjusted.
5. Press “SET” to change the target angle alert setting. Press “s” or “t” to select when the target angle alert will start.
The target angle alert can start at a maximum of 50 degrees before the target angle or a minimum of 5 degrees before
the target angle. Press “SET” to save.
6. The wrench is ready to use.
HOW TO USE PRE-SET TORQUE VALUES
1. Power on the wrench as described on Page 3. Press “SET” then “M”. The setting number will show at the top of the
screen and the torque value will be flashing.
2. Press “s” or “t” to select the desired pre-set torque value and then press “SET”.
3. The wrench is ready to use.
HOW TO CHANGE PRE-SET TORQUE VALUES
Pre-Set Torque Values can only be selected in Peak or Peak Angle modes
1. Power on the wrench as described on Page 3. Press “SET” then “M”. The Pre-Set number will show at the top of the
screen and the torque value will be flashing.
2. Press “s” or “t” to select the desired pre-set torque value, then press for 3 seconds, after which the wrench will beep.
3. Now the pre-set number at the top of the screen will flash. Press “s” or “t” to select the desired torque setting, then
press “SET”. The new Pre-Set Value is saved into the Pre-Set options.
4. Press “SET” again to set the target torque to the new Pre-Set value.
HOW TO SET TORQUE WITH ANGLE
1. Power on the wrench as described on Page 3. Place the torque wrench on a stable flat surface to calibrate.
2. Press “M” until the “PA” mode is reached, then press “SET”.
3. The screen will show “OOOO” as the wrench calibrates, then will show last angle and torque value set.
4. If the desired angle and torque values are displayed, the wrench is ready to use.
5. If you want a different torque value or angle, press “SET” again.
6. To change the torque value press “s” or “t” to get to the required value, then press “SET”. The screen will show
“ANG”. If the target angle value previously displayed is correct, press “ ” to exit.
7. After setting the torque value, the screen will show “ANG”. Press “SET” to review or change the angle value.
Press “s” or “t” to get to the required angle value, then press “SET” again.
8. The wrench is ready to use.
9. Apply torque and rotate the wrench at a constant moderate speed until alerted to stop by the handle vibration, beeps
and LCD display.
Note: After reaching the target torque, the wrench will start recording the angle measurement. After reaching
both the target torque and target angle, the display will flash for 10 seconds then default to the last setting.
To take the next measurement press “ ” or wait until the display stops flashing.
SETTINGS
 Loading...