English – 36
Diagnosis and troubleshooting
WARNING!
The battery must always be removed
for service/repair work and may only
be replaced once the machine has
been completely assembled again!
WARNING!
Do not short circuit the battery!
Never unscrew the battery!
Never t a damaged battery!
Replace a damaged battery!
8 Diagnosis and troubleshooting
Fig 2
Fig 1
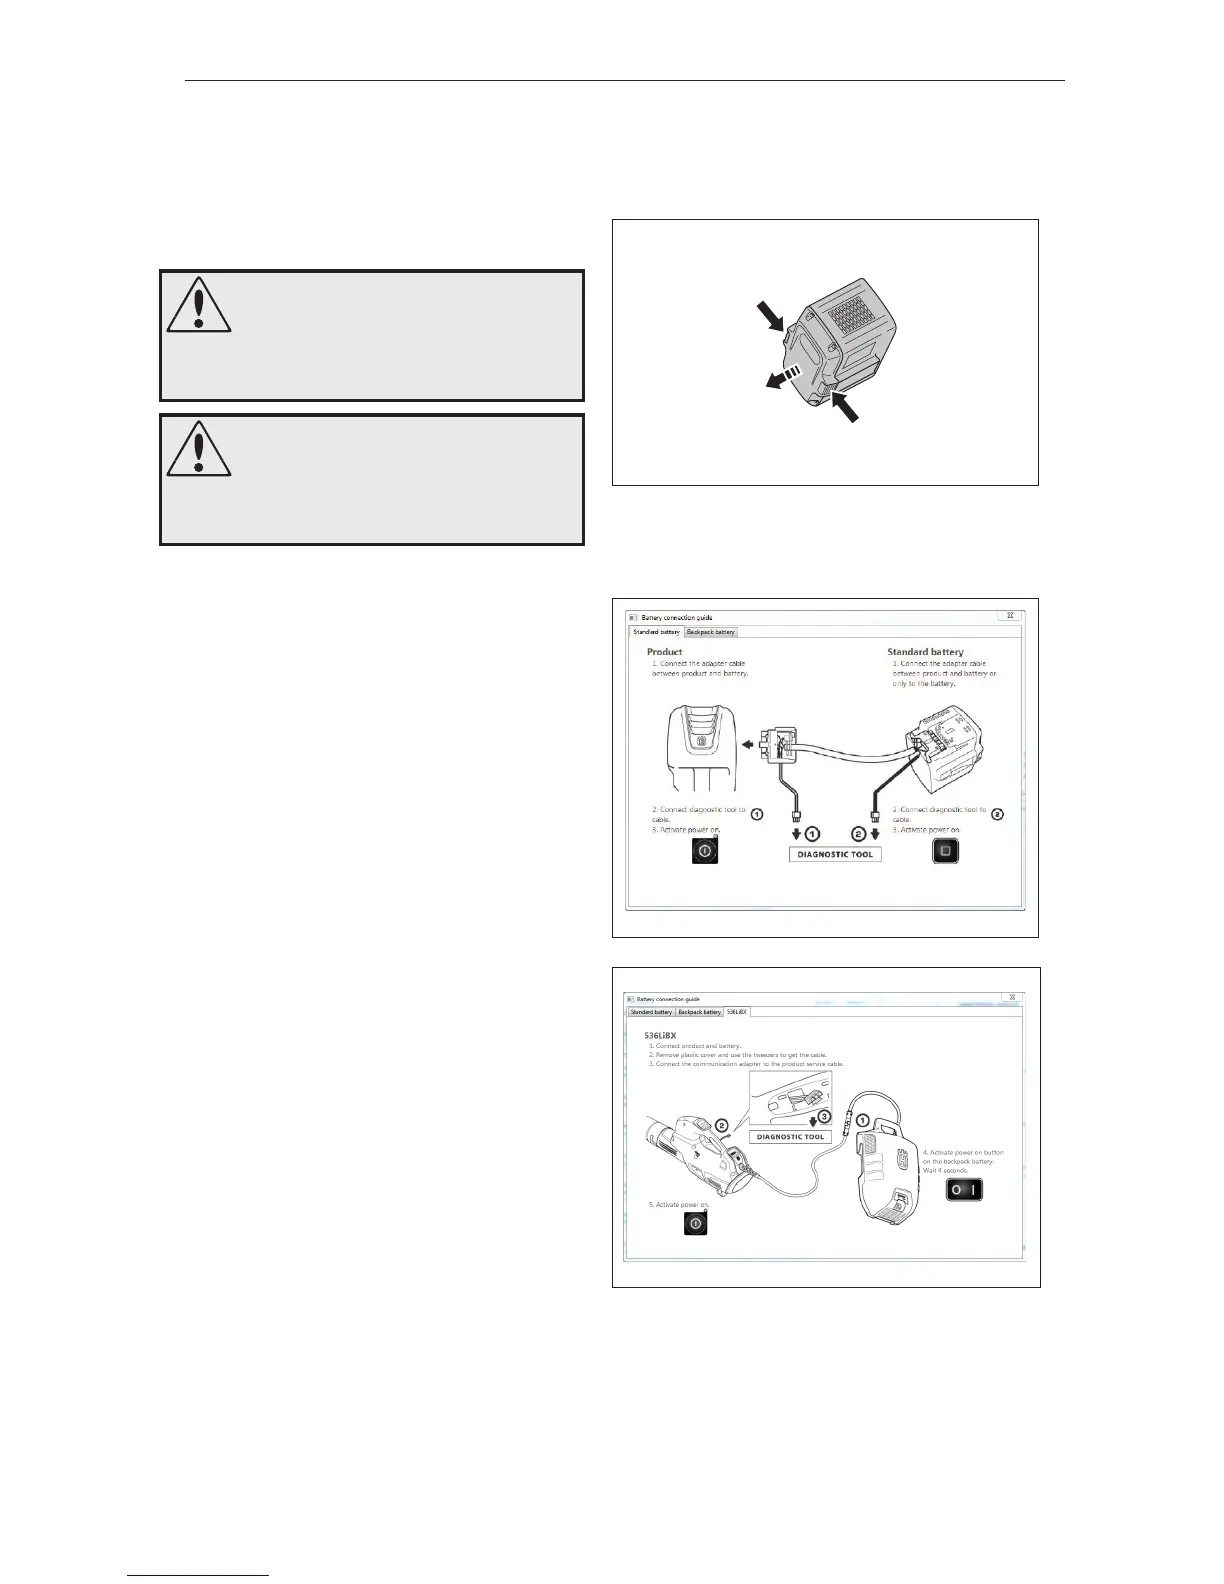
8.1 Remove the battery
Press in the catches and remove the battery.
See gure 1.
8.2 Connect Common Service Tool
1
(436LiB, 536LiB)
Connect the Common Service Tool (CST) adapter
cable to the battery and the battery connector on
the machine. Connect cable (A) to CST for trouble-
shooting the machine.
Connect cable (B) to CST for troubleshooting the
battery.
See gure 2
(536LiBX)
Connect the product with the battery.
Remove the plastic cover and use tweezers to
extract the service cable. See gure 3
Couple together the adapter cable for the Common
Service Tool (CST) with the product service cable.
2
Diagnose/troubleshoot according to the CST
instructions and make any necessary repairs as
instructed in the relevant chapter in this manual.
8.3 No signal to CST
1
Check that the contact on the battery and the bat-
tery contact on the machine are intact and clean.
Replace the battery or alternatively the main cable
on the machine if there is any damage to the con-
tact.
2
Check that the cable to CST is intact and clean.
Replace the cable if it is damaged.
3
Restart the computer/Reinstall the software.
8.4 Overhaul
Inspect the component parts of the machine. Re-
place damaged parts as described in the relevant
chapter.
2
1
1
A B
Fig 3