EasyManua.ls Logo

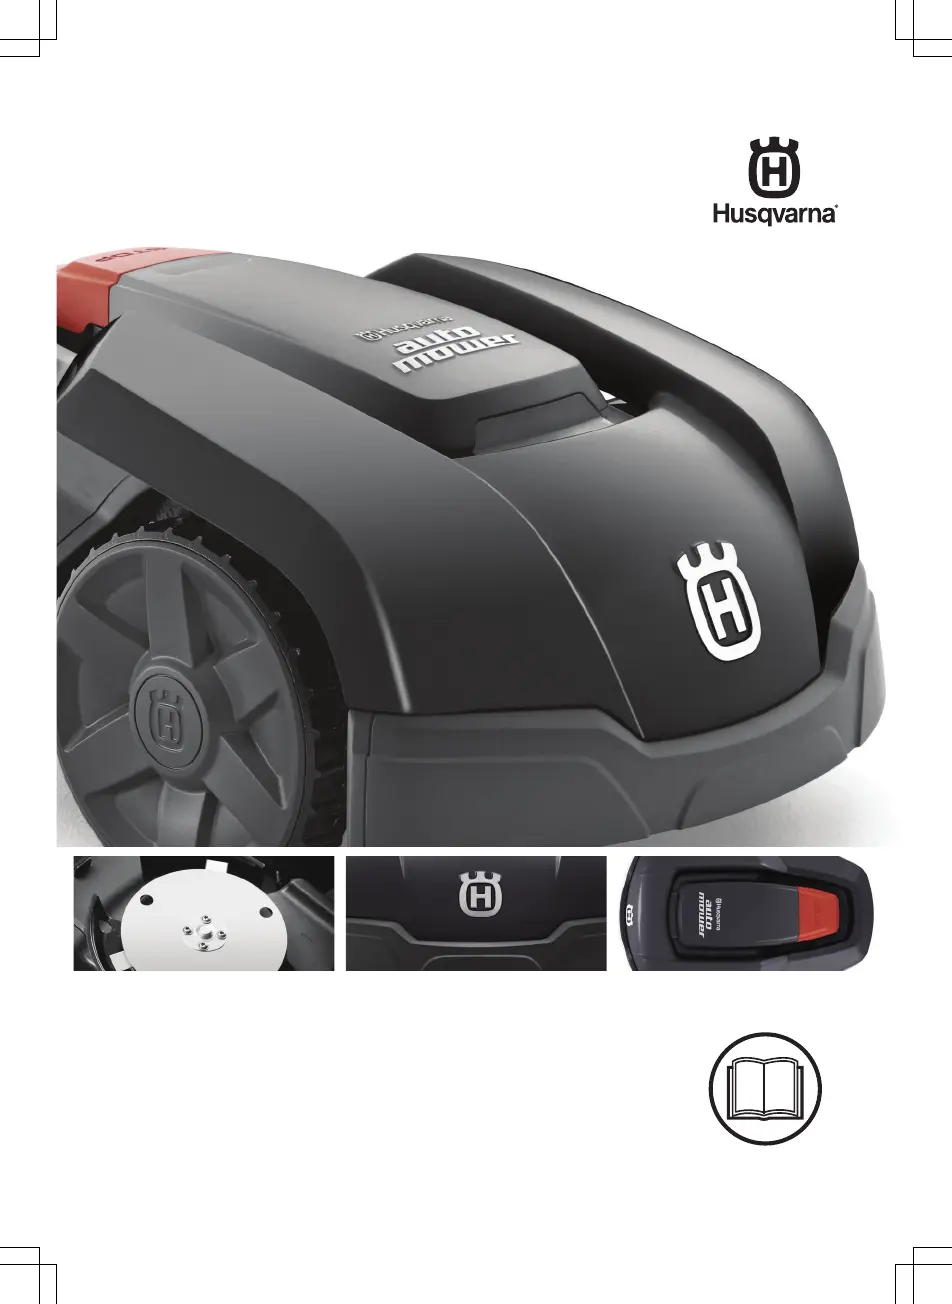
Husqvarna AUTOMOWER 105 - User Manual

Husqvarna AUTOMOWER 105
52 pages
Print Icon
To Next Page IconTo Next Page
Loading...
EN, English
Operator's manual
Husqvarna Automower
®
105
Read the operator's manual carefully and make sure that you
understand the instructions before you use the product.

Other manuals for Husqvarna AUTOMOWER 105

Questions and Answers

  • S
    Sabrina WrightAug 12, 2025
    How to fix a break in the boundary loop of my Husqvarna AUTOMOWER 105?
    • L
      laurasolisAug 12, 2025
      To fix a break in the boundary loop, find where the break is located. Replace the damaged section of the loop with a new loop wire, and splice it using an original coupler.
  • A
    Amanda McclureAug 16, 2025
    Why is my Husqvarna AUTOMOWER 105 Lawn Mower charging station showing a red flashing light?
    • J
      John McconnellAug 16, 2025
      A red flashing light on your Husqvarna Lawn Mower charging station indicates an interruption in the charging station’s antenna. Unfortunately, I cannot provide specific troubleshooting steps for this issue. Please contact your local Husqvarna representative for assistance.
  • J
    Jennifer BeckAug 19, 2025
    What to do if the Husqvarna Lawn Mower has a blue flashing light?
    • L
      Lindsey StevensSep 12, 2025
      If your Husqvarna Lawn Mower is showing a blue flashing light, it could be due to a couple of reasons. First, the boundary loop might not be properly connected to the charging station. Make sure the boundary wire connectors are correctly fitted. Alternatively, there might be a break in the boundary loop. If so, locate the break, replace the damaged section with a new loop wire, and splice it using an original coupler.
  • E
    Eric LeeAug 23, 2025
    How to find breaks in the loop wire of a Husqvarna AUTOMOWER 105 Lawn Mower?
    • J
      Jeffrey CooperAug 23, 2025
      If the loop wire of your Husqvarna Lawn Mower is broken, it's often due to unintentional physical damage, like accidentally cutting it while gardening, or stretching the wire too much during installation. To find the break, try halving the loop's distance where you suspect the damage. Keep halving the distance until you're left with a very short section of wire. This should help you pinpoint the location of the break.
  • W
    William AlvarezAug 27, 2025
    Why is the light flashing blue on my Husqvarna AUTOMOWER 105?
    • M
      mckenziegibsonAug 27, 2025
      A blue flashing light indicates that the boundary loop is not connected to the charging station. Ensure that the boundary wire connectors are properly fitted to the charging station.
  • L
    Linda AyersAug 31, 2025
    Why is the Husqvarna AUTOMOWER 105 Lawn Mower showing a blue flashing light?
    • A
      Amanda TurnerAug 31, 2025
      If the Husqvarna Lawn Mower displays a blue flashing light, it typically indicates a problem with the boundary loop connection or a break in the loop. First, ensure the boundary wire connectors are correctly attached to the charging station. If the problem persists, there may be a break in the boundary loop. Locate the break, replace the damaged wire section with a new one, and securely splice it using an original coupler.
  • B
    bgrantSep 4, 2025
    What to do if my Husqvarna Lawn Mower displays a solid red light?
    • A
      alyssa93Sep 4, 2025
      If your Husqvarna Lawn Mower shows a solid red light, this indicates a fault within the charging station's circuit board or an incorrect power supply. In this case, you should contact your local Husqvarna representative for assistance.
  • C
    Christina WallaceSep 7, 2025
    Why is my Husqvarna AUTOMOWER 105 Lawn Mower showing a red flashing light?
    • A
      Amanda WilcoxSep 7, 2025
      If the Husqvarna Lawn Mower is displaying a red flashing light, it means there's an interruption in the charging station's antenna. Contact your local Husqvarna representative for assistance.

Summary

Introduction to Automower

Product Description and Mowing

Overview of the robotic lawn mower, its mowing technique, and battery operation.

Product Components and Symbols

Identification of all parts of the robotic lawn mower and accessories.

Navigation and Manual Guidance

Explains symbols, manual usage, menu structure, and keypad.

Safety Information

General Safety and Definitions

Essential safety precautions, user responsibilities, and safety classifications.

Operational and Battery Safety

Guidelines for safe operation, battery handling, and electrical safety.

Product Handling and Storm Safety

Procedures for lifting, moving, maintenance, and safety during thunderstorms.

Installation Guide

Installation Overview and Preparations

Introduction to installation, main components, and general preparations for setup.

Charging Station and Wire Placement

Criteria for selecting locations for the charging station and power supply.

Boundary Wire Installation

Instructions for installing the boundary wire in various terrains and scenarios.

Guide Wire and Work Area Setup

Setting up secondary areas and guide wire placement for optimal navigation.

Installing Accessories and Wire Positioning

Tools, installing station/wires, and positioning wires with stakes or burying.

Initial Setup and Product Configuration

Post-installation checks, basic settings, and accessing the product menu.

Timer and Installation Settings

Configuring timer schedules, calculating settings, and adjusting guide width.

Advanced Settings and Customization

Setting remote start, testing functions, and drive past wire parameters.

Security and System Settings

Configuring security levels, PIN codes, and loop signals.

General Product Settings

Adjusting time, date, language, country, and resetting user preferences.

Operation Guide

Starting and Operating Modes

How to start the product and explanation of operating modes.

Stopping, Switching Off, and Timer

Procedures for stopping, switching off, and managing timer/standby modes.

Charging and Cutting Height Adjustment

Instructions for charging the battery and adjusting the cutting height.

Maintenance Procedures

Cleaning and Chassis Care

Guidelines for cleaning the product's body, wheels, and chassis.

Blade Replacement and Battery

Steps for replacing blades and information about the battery.

Winter Service Recommendations

Advice on servicing the product before winter storage.

Troubleshooting Guide

Fault Messages and Symptoms

Explains common fault messages and symptoms with their causes and actions.

Information Messages and Indicator Lights

Explains information messages and the meaning of charging station indicator lights.

Finding and Repairing Wire Breaks

Steps to locate and repair breaks in the loop or boundary wires.

Transportation, Storage, and Disposal

Transportation and Storage Guidelines

Regulations for transport and recommendations for product storage.

Battery Removal and Disposal

Procedures for removing the battery and general disposal advice.

Technical Data

Product Specifications and Electrical Data

Detailed technical specifications, dimensions, and electrical system data.

Performance and Environmental Data

Information on noise emissions, mowing performance, and IP classifications.

Warranty Information

Warranty Terms and Exclusions

Details of the product's warranty coverage, conditions, and excluded faults.

EC Declaration of Conformity

Compliance with EU Directives

Statement confirming the product's compliance with relevant European Union directives.

Husqvarna AUTOMOWER 105 Specifications

General IconGeneral
Cutting Width17 cm
Cutting Height20-50 mm
Area Capacity600 m²
Battery TypeLi-ion
Typical Charging Time50 min
Typical Mowing Time on One Charge70 min
Weight6.7 kg
Maximum Slope25 %
Battery Capacity2.1 Ah
Battery Voltage18 V
Weather ResistanceYes
Boundary Wire RequiredYes
Smart ConnectivityNo
Blade TypePivoting Razor Blades

Related product manuals