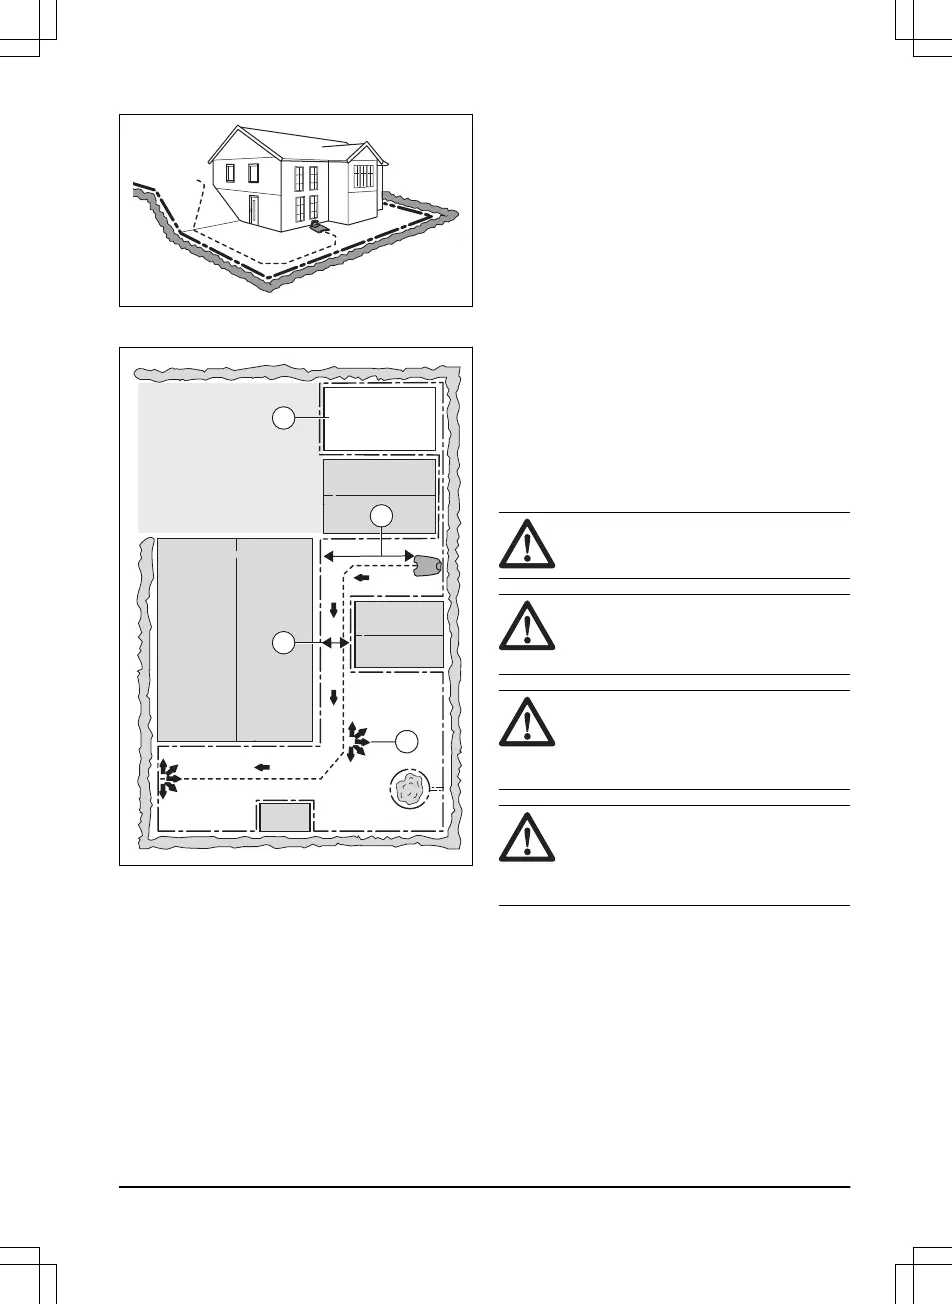
• If the charging station is put in a small area
(A), make sure that the distance to the
boundary wire is at a minimum 3 m / 10 ft.
• If the work area has a passage (B), the
minimum distance between the boundary
wires is 2 m / 6.6 ft. if no guide wire is
installed. With a guide wire installed through
the passage, the minimum distance between
the boundary wires is 60 cm / 24 in.
• If the work area has areas which are
connected by a narrow passage (B), you
can set the product to leave the guide wire
after a certain distance (C). The settings can
be changed in
Remote start 1 on page 24
.
• If the work area includes a secondary area
(D), refer to
To make a secondary area on
page 18
. Put the product in the secondary
area and select operating mode
Man
.
3.5 Installation of the product
3.5.1 Installation tools
• Hammer/plastic mallet: To simplify putting
the stakes into the ground.
• Edge cutter/straight spade: To bury the
boundary wire.
• Combination pliers: For cutting the boundary
wire and pressing the connectors together.
• Adjustable plier: For pressing the couplers
together.
3.5.2 To install the charging station
WARNING: Obey national regulations
about electrical safety.
WARNING: The product is only to be
used with the power supply unit
supplied by Husqvarna
®
.
WARNING: Do not put the power
supply at a height where there is a risk
it can be put in water. Do not put the
power supply on the ground.
WARNING: Do not encapsulate the
power supply. Condensed water can
harm the power supply and increase
the risk of electrical shock.
1285 - 004 - 16.04.2020
Installation - 19

 Loading...