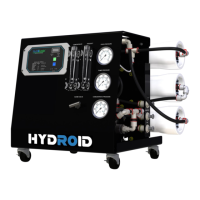
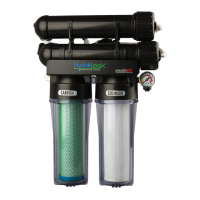
6) Pay close attention to the flow direction arrows on the filter housings when installing new
filters.
7) Remove the old filter from the filter housing. Long nose pliers may be necessary to pull
the old filter out of the filter housing. A slight rocking motion or forceful tug may be
required to remove the filter from the filter housing.
8) Lubricate the brine seal and O-rings on the new filters with provided silicon lubricant
packet. Do not use a petroleum–based lubricant.
9) Apply the same lubricant to the inside of the housing below the groove for the locking
crescents, where the filter brine seal will make contact when inserted.
10) Install filter with brine seal location depicted in the flow chart below.
11) The filter should stop when fully seated in the bottom end plug.
12)
Re–install the end plugs by gently and evenly pushing them onto the filter housing.
Ensure that you do not pinch or fatigue any O–rings while re–installing the end plug.
Push the end plug in until it is seated just below the groove for the locking crescents, as
shown on previous page.
13) Reinstall the locking crescents and securely tighten the screws.
14) Reconnect any fittings that may have been disconnected when the filter housings were
disassembled. If changing carbon filter, go to page 15, step 4 (filter flush). If replacing
membrane, continue to step 14.
15) To start–up the system, please refer to the System Purging/Initial Start–Up section of
this User’s Manual (pg. 15).