ALL PRESSURE GAUGES MUST READ ZERO BEFORE BEGINNING THIS
PROCEDURE. TURN THE SYSTEM OFF, DISCONNECT THE POWER, AND
BLEED ALL WATER PRESSURE FROM THE SYSTEM
1) Perform this procedure one filter housing at a time to preserve the correct connections
as you replace the filters.
2) Select the filter housing to be replaced.
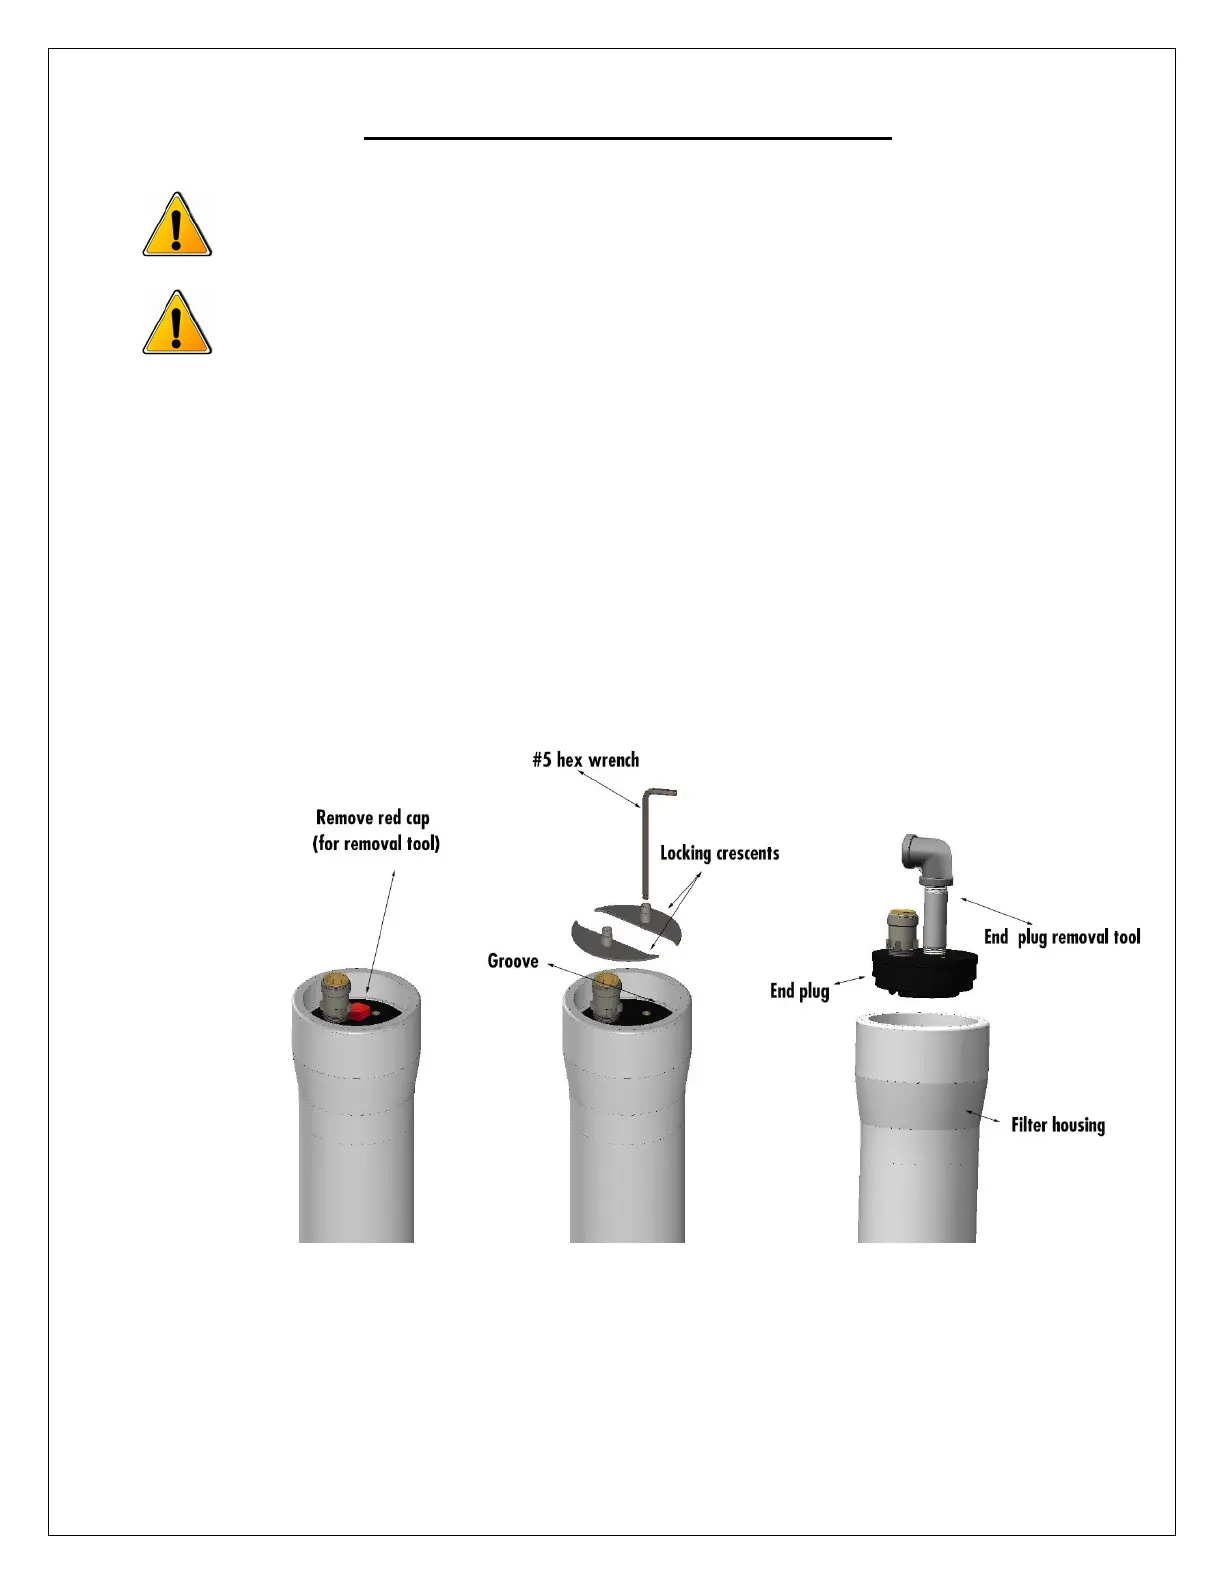
3) Remove red locking clip
4) Disconnect the fittings from the filter housing by simultaneously:
a) Pushing the grey collet toward the filter housing.
b) Pulling the tube from the collet.
5) Unscrew and remove the two locking crescents using a #5 hex wrench. Remove red
cap and thread the removal tool into the end plug (center hole) to hand-tightness. Pull
the removal tool outward to remove the end plug from filter housing. Set the end plug
aside in a clean area where the O-ring will not pick up dirt or debris.