MAINTENANCE
powermax1650 Service Manual
3-25
0
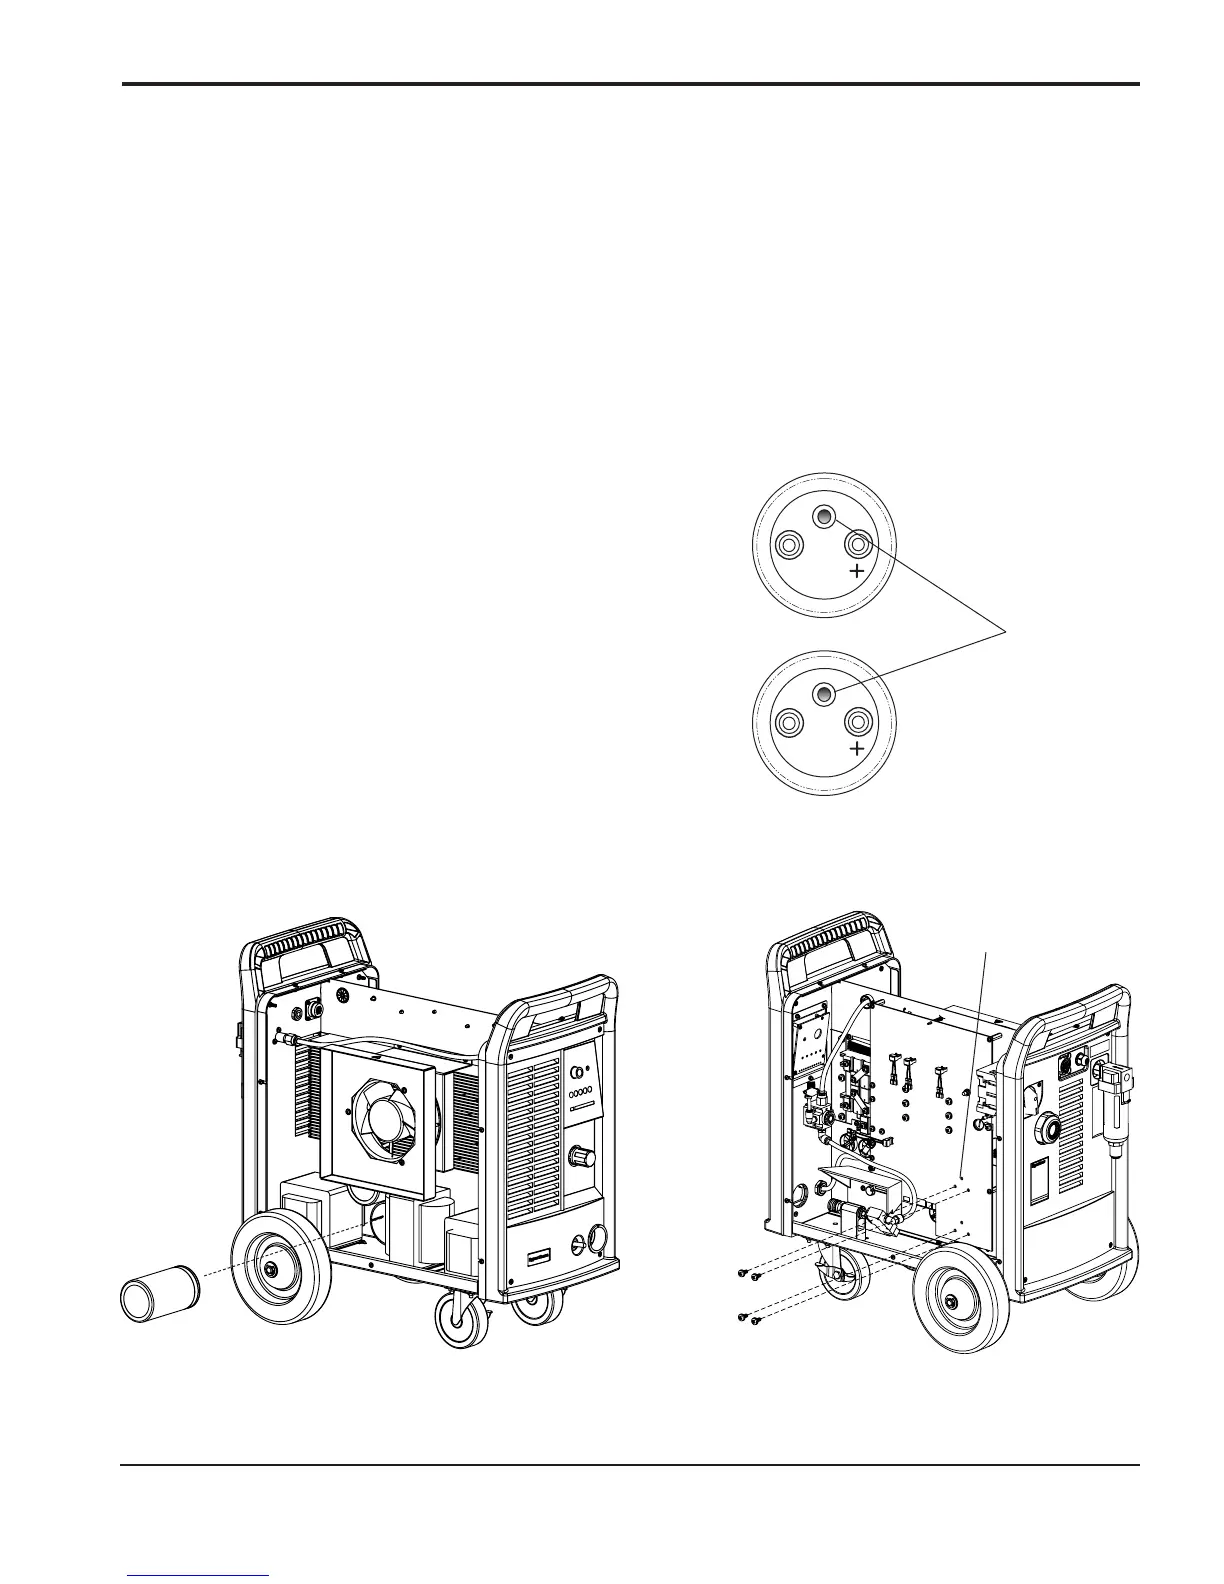
Capacitor Replacement
Removal – Refer to figure below.
Disconnect electrical power and gas supply before removing the power supply cover.
Remove screws securing capacitor to power board.
Remove capacitor from fan side of power supply.
Remove lower capacitor first. Then the upper capacitor may be tipped down and removed.
Installation – Refer to figure below.
Align bleeder hole on capacitor with view hole
on power board.
Install new capacitor and secure with 2 screws.
Tighten screws to 30 inch pounds (36 kg cm).
Install the power supply cover.
Remove and install
capacitors from fan side.
Correct orientation of bleeder hole
Remove and install screws
from power board side.
Bleeder hole
View hole
 Loading...


