STEP 1
Remove the drill template and lift the Hypervolt out of the box. Separate the front cover putting it safely to one side. Leave the LED Plate attached.
Find a clean flat surface protected from extremes of weather if possible (Discolouration of the enclosure may happen if exposed to strong UV light for extended
periods). Use the cardboard drilling template supplied with your Hypervolt to mark out the mounting holes for the back box (B). A metal template is available.
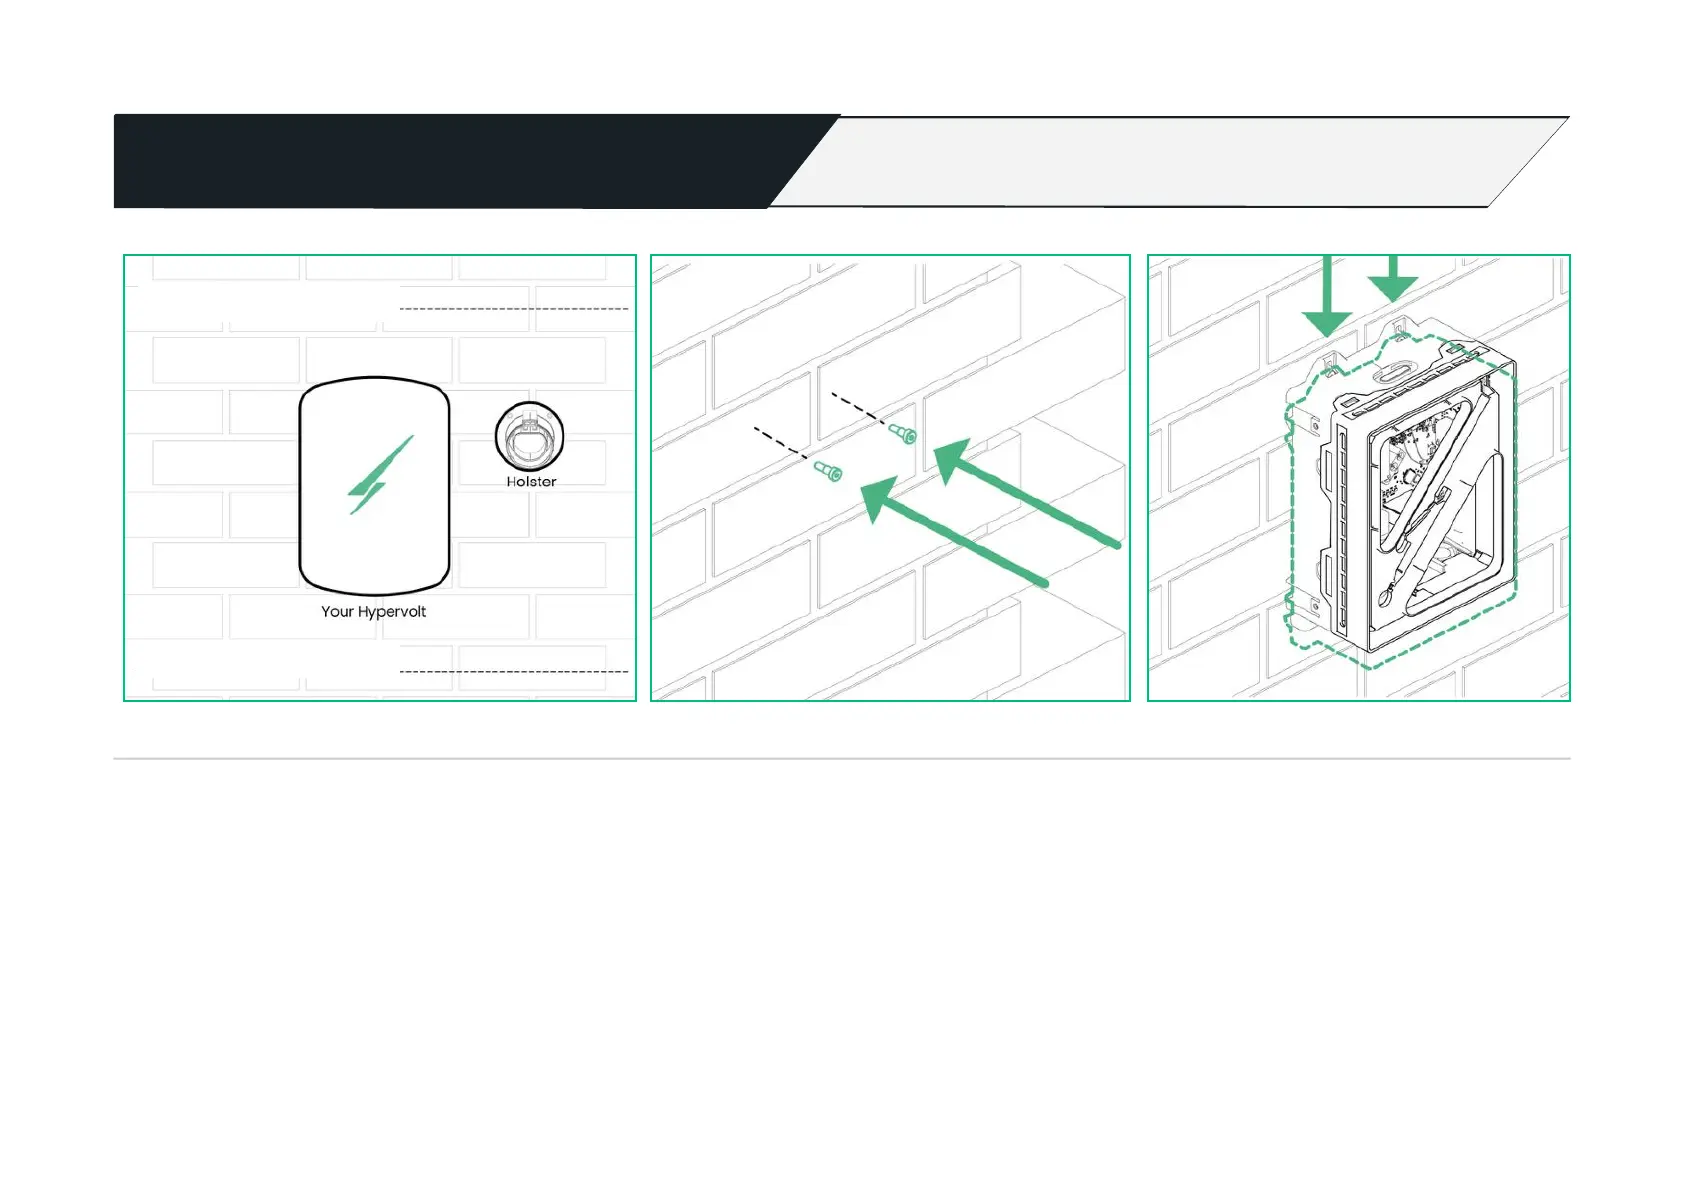
Your Hypervolt unit and accompanying holster should be fixed between 0.5m and 1.5m above the ground. See picture for recommended holster mounting
position.
Drill out all 4 fixing holes and fit the top 2 screws (13) leaving them ≈10mm out. For brick the recommended would be to use a 5.5mm SDS drill, Red plugs &
4x40mm screws. Hang the Hypervolt on to the top two screws.
 Loading...