Before Use
Charging the Battery
l Read the Safety Information Booklet before
charging.
l Use the approved charger to charge the battery.
Before initial use, make sure to charge the battery. You
can charge either the standalone battery or the radio with
battery attached. It is recommended that the radio remain
turned off during charging.
To charge the battery, do as follows:
1. Insert the output connector of the power adapter into
the port on the back of the charger.
2. Plug the power adapter into a power outlet.
3. Place the battery into the charger.
The LED indicator on the charger shows the charging
status, as described in the following table:
LED Indicator Charging Status
Flashes red slowly No battery is placed on the charger.
Glows red The battery is being charged.
Glows orange
The battery is charged to 90% or
above.
Glows green The battery is fully charged.
Flashes red rapidly The battery fails to be charged.
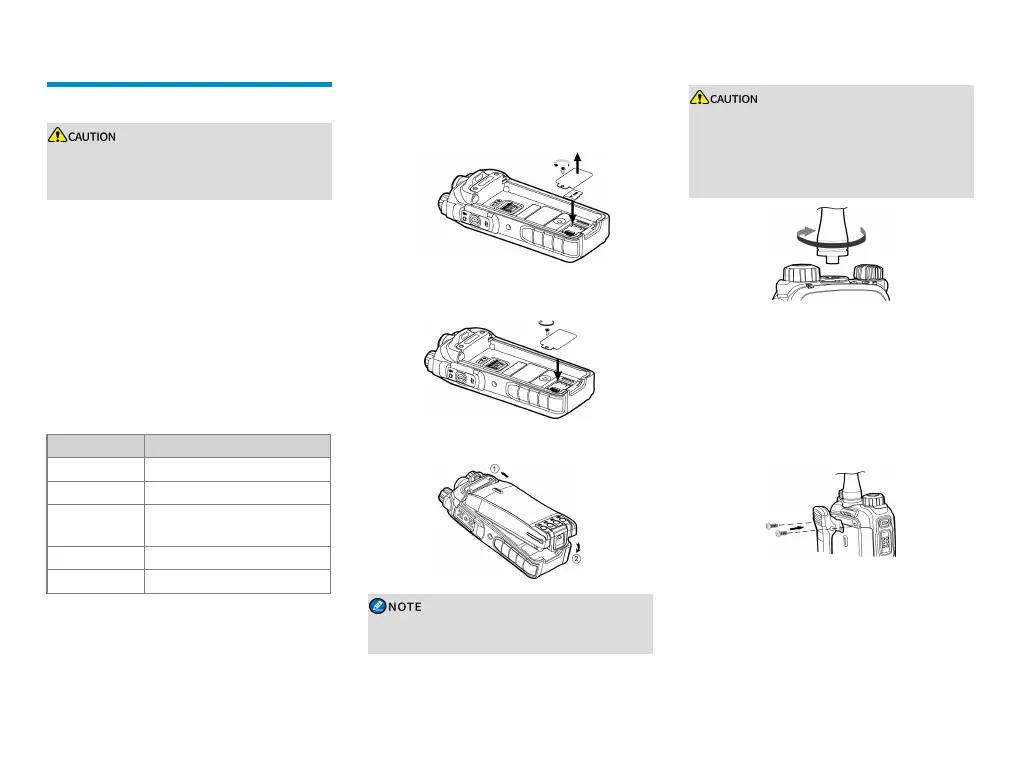
Installing the TF Card
If the TransFlash (TF) card is applicable to your radio
and you have an available TF card, install the TF card as
follows:
1. Loosen the screw on the TF card cover, and then
remove the cover.
2. Place the TF card in the card slot.
3. Put the card cover and screw back in place, and then
use the screwdriver to tighten the screw.
Attaching the Battery
To remove the battery, make sure that the radio is
turned off, and then lift the battery latch.
Attaching the Antenna
l Do not hold the radio by the antenna and swing
it. This may affect the antenna performance and
shorten the life span of the antenna.
l Avoid excessive strength or destructive rotation
when installing the antenna.
Attaching the Belt Clip
1. Use a screwdriver to remove the screws on the back
of the radio.
2. Align the screw holes on the belt clip with those on
the back of the radio.
3. Install the screws into the holes, and then use the
screwdriver to tighten them.
7

 Loading...