3
LED Indicator
Indicator
LED
Indication
Repeater Status
Digital Mode
Indicator
Blue Working in Digital mode
Analog Mode
Indicator
Yellow Working in Analog mode
Slot A Tx
Indicator
Red
Analog Mode: transmitting
Digital Mode: Slot A
transmitting
Slot A Rx
Indicator
Green
Analog Mode: receiving
Digital Mode: Slot A is
receiving
Slot B Tx
Indicator
Red
Digital Mode: Slot B
transmitting
Slot B Rx
Indicator
Green
Digital Mode: Slot B
receiving
Alarm Indicator Red
Abnormal operation and
the LED segment display
gives the corresponding
prompt
Before Use
Instruction
Operation Environment
The repeater must be installed in a dry and well-
ventilated place with ambient temperature of -30
℃
–
+60
℃
and relative humidity of not more than 95%.
Caution: In lightning storm, DO NOT
carry the repeater on the backpack
outside, so as to avoid the lightning
strikes which will cause bodily injury.
Voltage Check
Check whether the input voltage is within the operating
voltage of the repeater (power supply:13.6V
±
15%).
Note: To ensure the waterproof
performance of the repeater, please
do not disassemble it without
authorization. You can refer to
Safety Information Booklet for more
information.
Assembling Power Supply
Management System (Optional)
If outdoor backpack power supply management system (
with ibuilt-in battery) is needed, ensure you’ve purchased
it and the multi-functional bracket (see the model number
in the “Optional Accessories” chapter). You can contact
your dealer for purchasing them.
Installation Tools
Tools required for installing the portable repeater include
a cross head screwdriver and a T10 torx screwdriver.
Assembling Steps
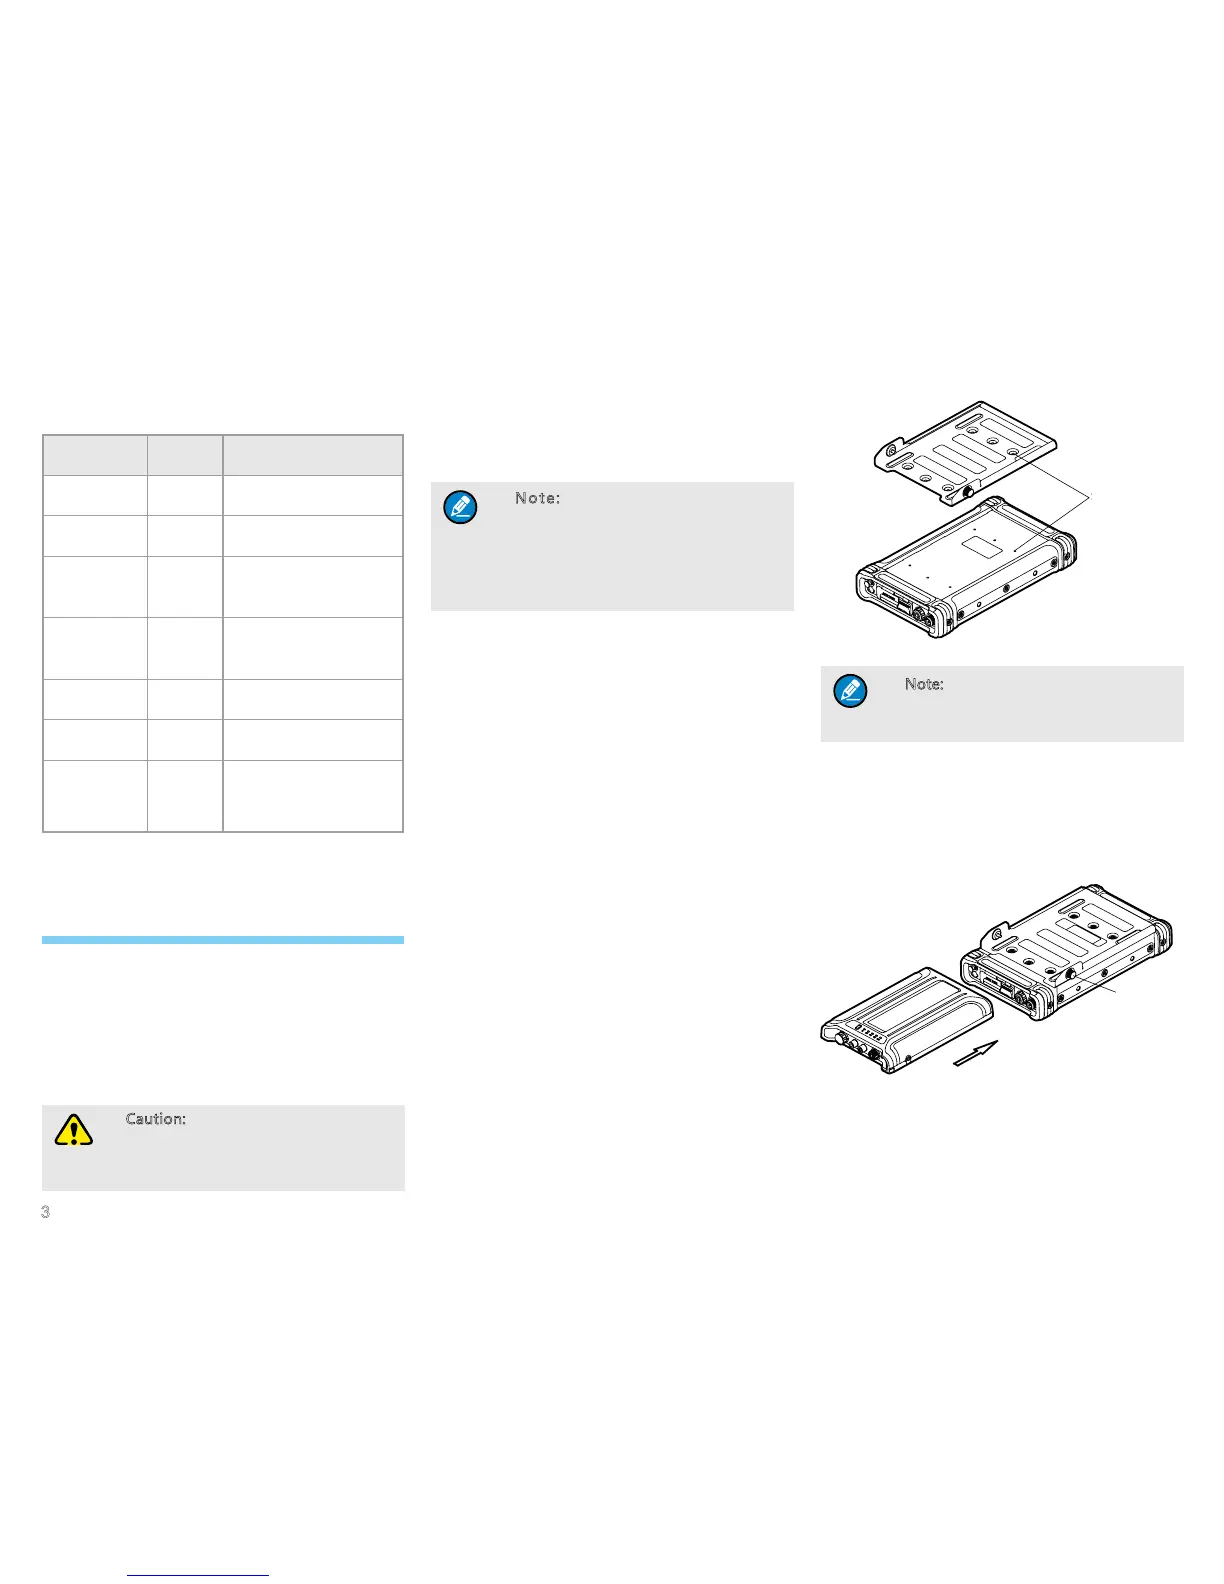
Step 1 Assemble the multi-functional bracket.
1. Place the repeater horizontally with its back (the side
with the product information label) upwards.
2. Put the multi-functional bracket horizontally on the
back of the repeater as shown in the gure below,
and align the screw holes on the bracket to those of
the repeater.
Screw holes
3. Secure the bracket with six M3*6 screws.
Note: Make sure the M3*6 screws are
with spring washer to secure the screws
before use.
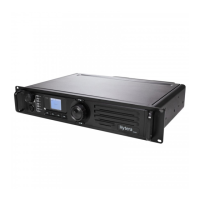
Step 2 Assemble the power supply management
system.
1. Push the power supply management system along
the slots of the bracket slowly to the bottom of the
bracket, with the front of the system upwards. See
the following gure.
2. Fasten the screws on the bracket to secure the
system.
Step 3 Connect the system to the repeater with the
power cord as shown in the following gure.
Screw holes
Screw
Screw