header of a column, all the settings in the rows below are filled in au-
:
If you want to configure another data type, beginning with a specific row, then change
the data type in the first concerned row. Now, click on the “Data type“ header. In all the
rows below, the data type is changed automatically.
t to have calculated the addresses automatically depending on the selected
data type: Configure the correct
address in the first row (usually 0) and then
Address“ header. Now, considering the selected data types, the addresses are filled in
n sequential order. Similar functions are also available for the other col-
project effort can be reduced.
13. If required, select a scaling value of the signals in the “Gain“ and “Offset“ columns if
required, for converting the signals into physical units.
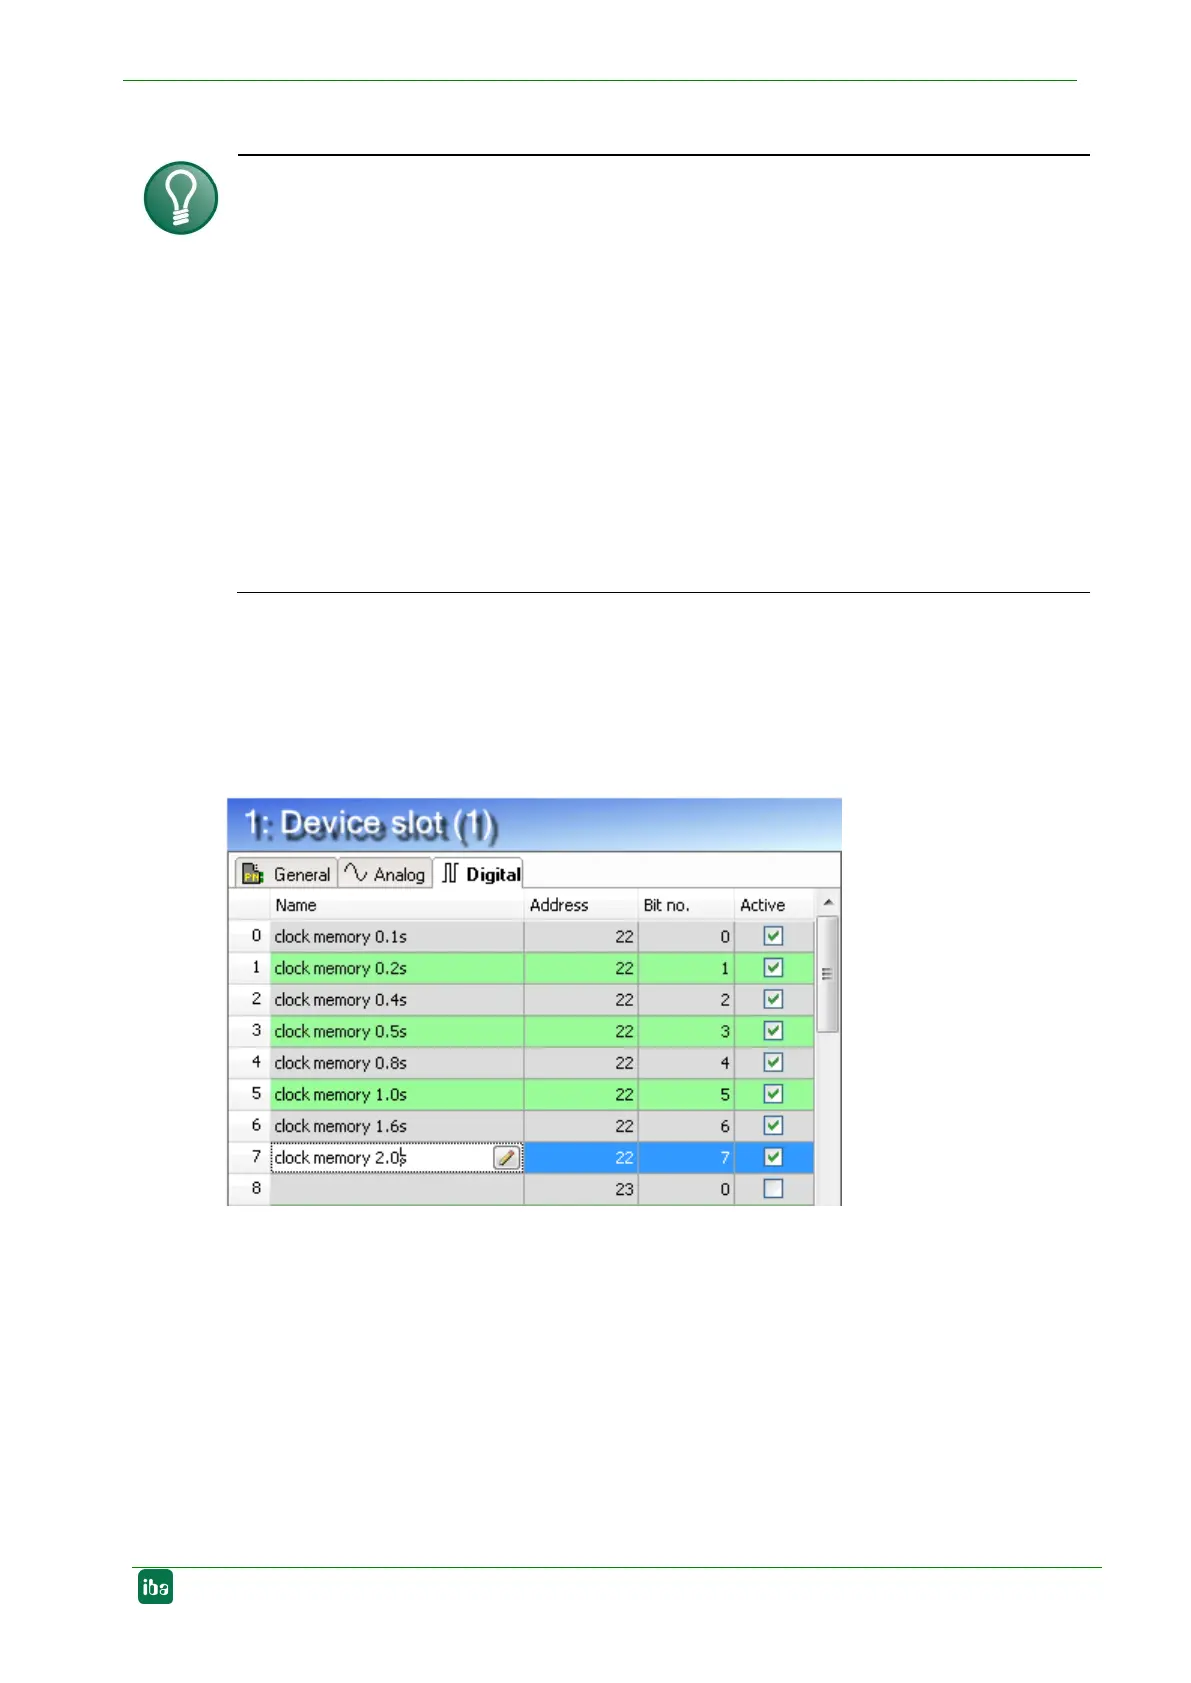
14. For the digital signals on the “Digital“ tab, proceed as described above. A data type
is not defined. The address offset is given in 1-byte-steps. The individual signals are
addressed via the bit numbers 0 to 7.
9.1.2 Configuration as sniffer
In pure sniffer mode, the device is integrated into PROFINET via the TAP interface, see
chapter 8.4.
1. In the I/O Manager in ibaPDA, integrate the device as described in chapter 9.1.1,
steps 1 - 7. Add a sniffer module under the node "X42: TAP”. To do this, right-click on
the ibaBM-PN device, select "Add module" from the context menu and select the
module "Sniffer" from the list. Or mark the node "X42: TAP" and select the module
"Sniffer" from the list via the context menu "Add module".