2. Remove the disk drive as a resource:
a. Log in as root user or use CE Login.
b. At the command line, type diag and press Enter.
c. Press Enter to continue.
d. On the Function Selection display, select Task Selection.
e. Select Hot Plug Task.
f. Select RAID Hot Plug Devices.
g. Select the adapter that is connected to the array that contains the disk drive you want to replace
and press Enter.
h. Select Commit.
i. On the Identify and Remove Resources display, select Identify.
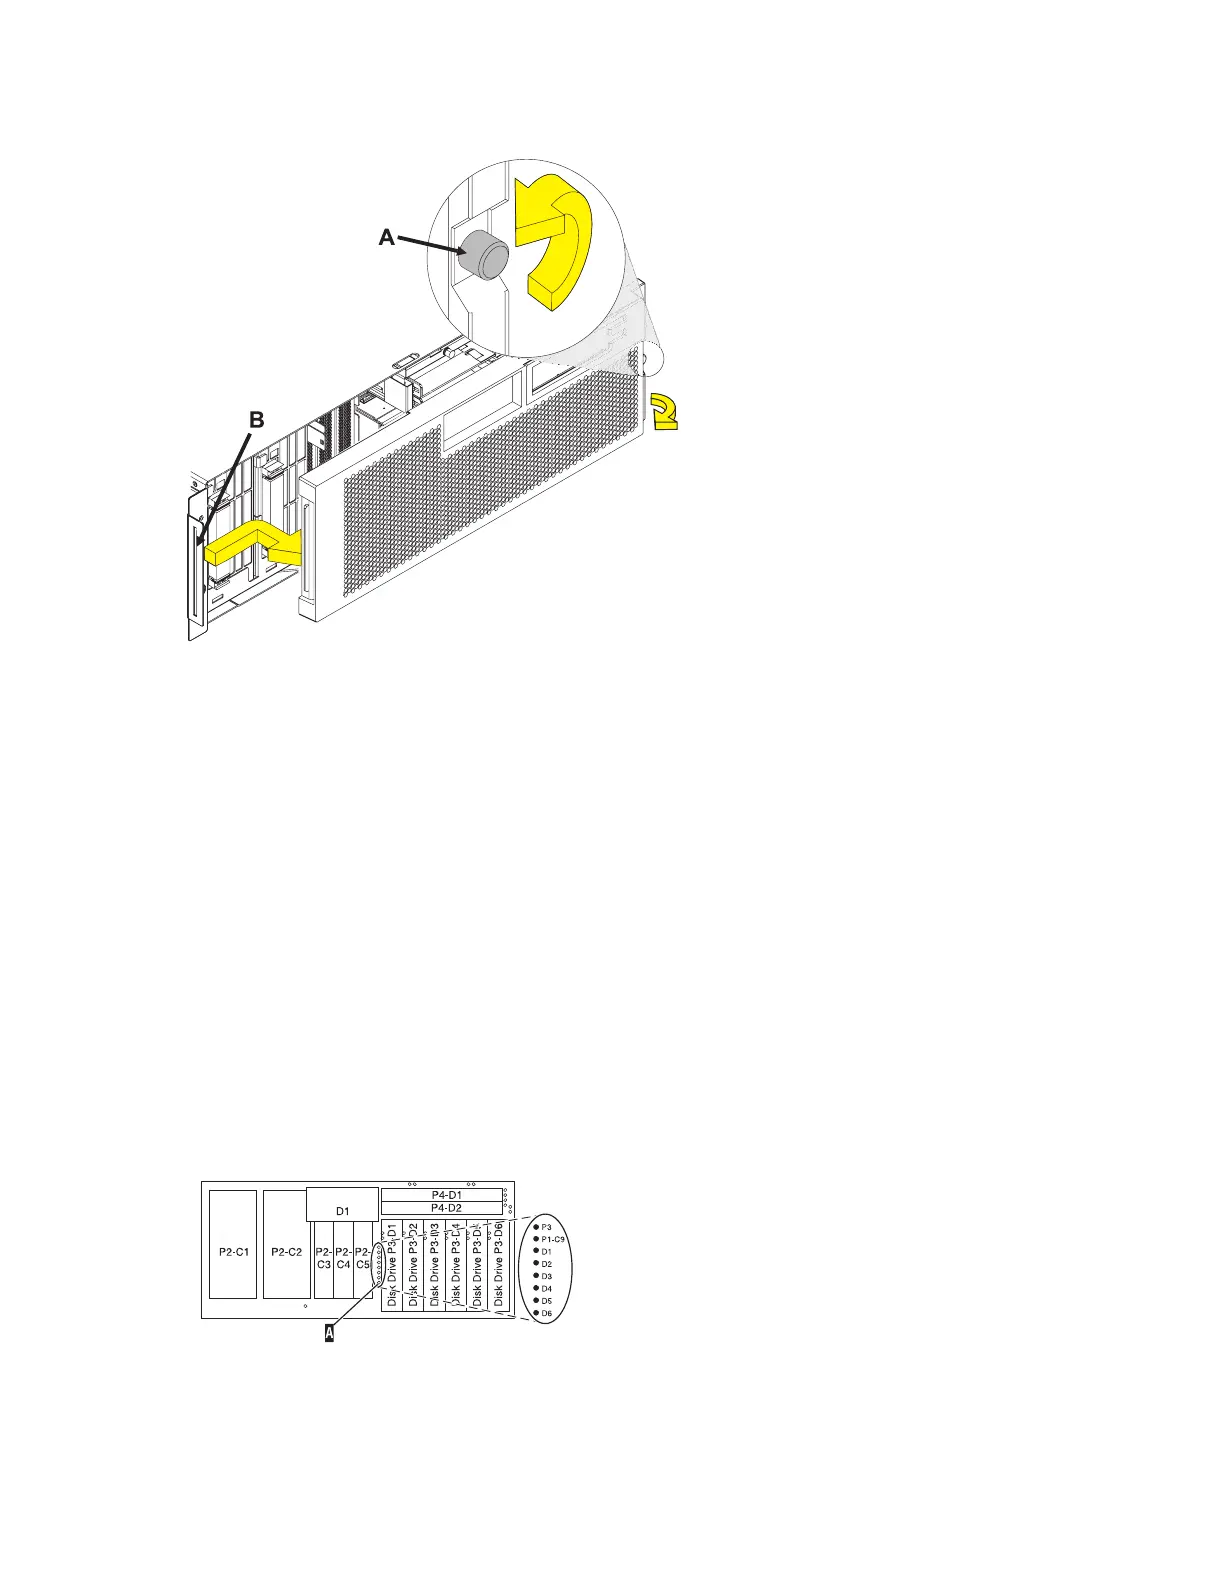
j. Select the disk drive you want to remove and press Enter.
The disk drive slot enters the identify state. The concurrent maintenance light for the slot begins
flashing. The following figures show the locations of the concurrent maintenance lights A. Verify
that the flashing light corresponds to the location for the disk drive you want to remove, and press
Enter.
The disk drive slot exits the identify state.
Note: If the disk drive slot is not in the Remove state, contact your next level of support.
k. On the Identify and Remove Resources display, select Remove.
Common service procedures 81
 Loading...