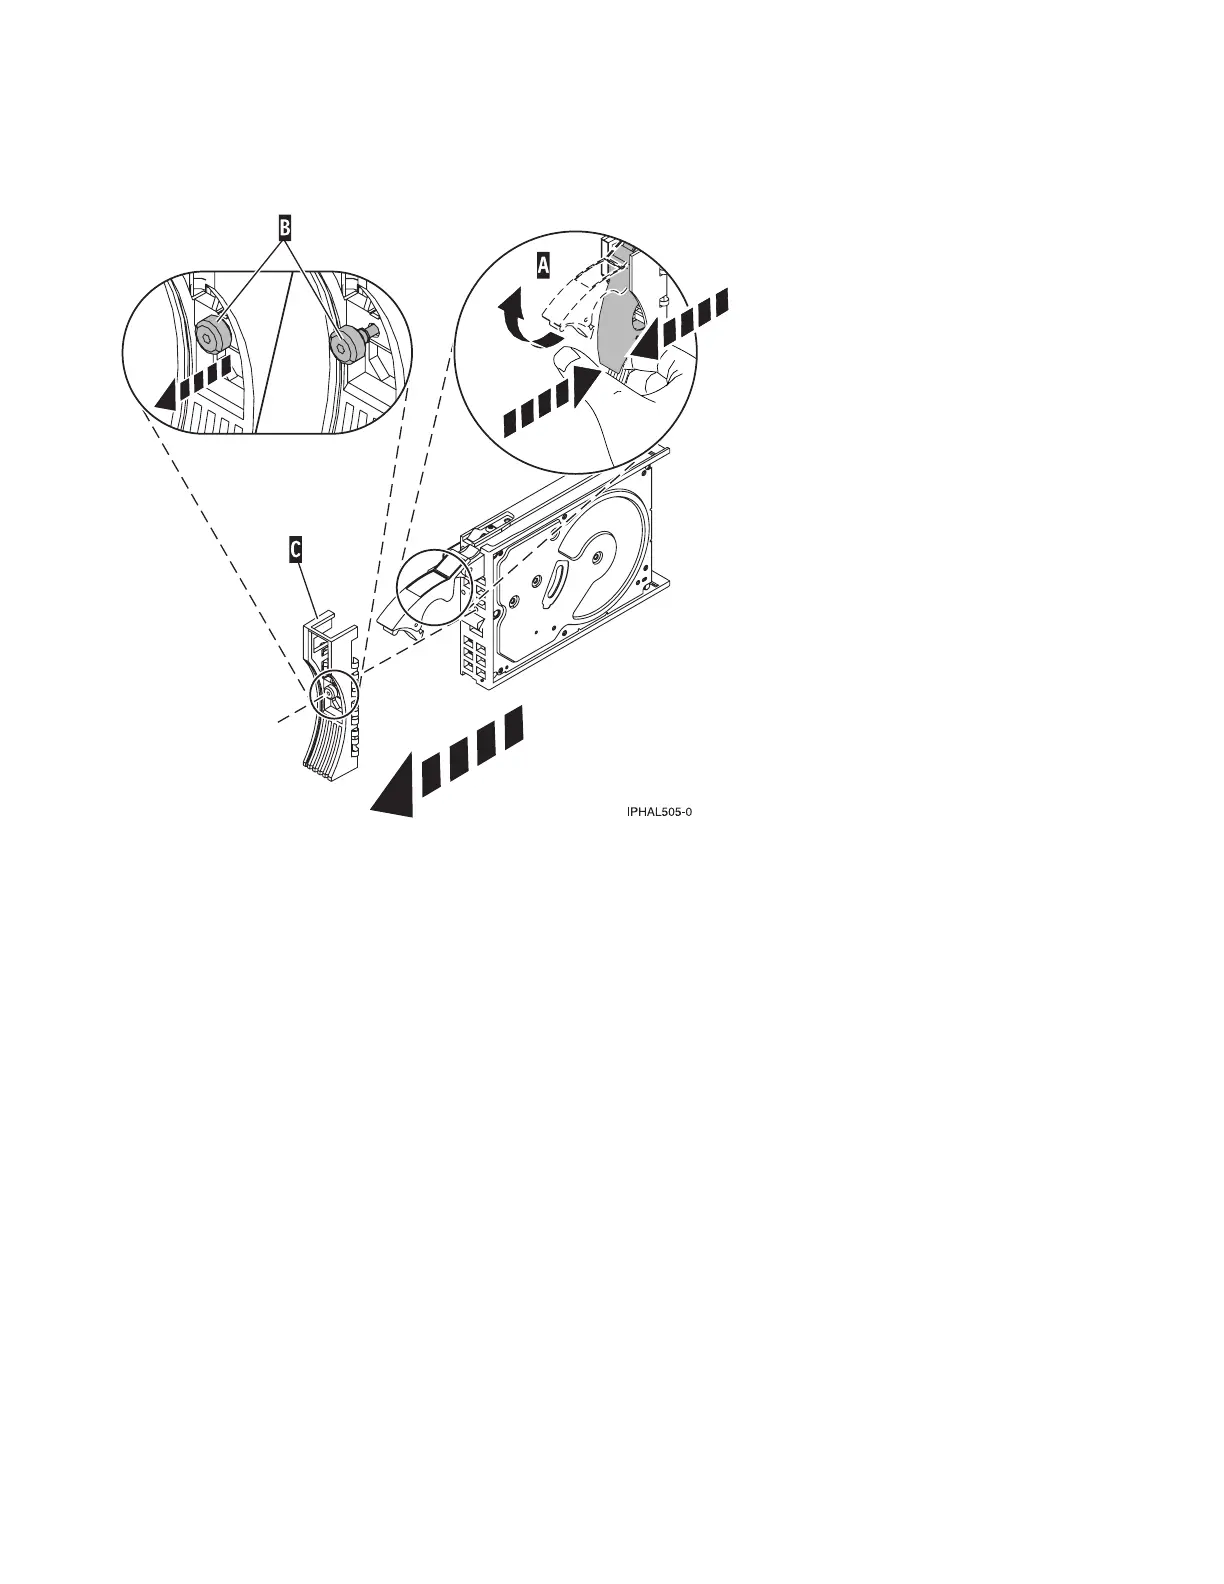
9. Loosen and pull out on the thumbscrew (B) to release the disk-drive bezel (C) from the disk drive,
as shown in the following figure.
10. Press Enter on the IBM Power RAID Configuration Utility to indicate that you have removed the
disk drive.
Replacing the disk drive
1. Find the package that contains the new disk drive.
Attention: Disk drives are fragile. Handle them with care.
2. Remove the disk drive from its protective package.
3. Unlock the disk drive handle by squeezing and pulling it out toward you before you install the disk
drive. If the handle is not all the way out, the disk drive will not slide into the system or expansion
unit.
4. Follow these steps to install the disk-drive bezel on the replacement disk drive:
a. Attach the bezel (A) to the disk drive, as shown in the following figure.
b. Press in and then tighten the thumbscrew (B) to secure the bezel to the disk drive.
Figure 31. Removing a disk-drive bezel
94
 Loading...