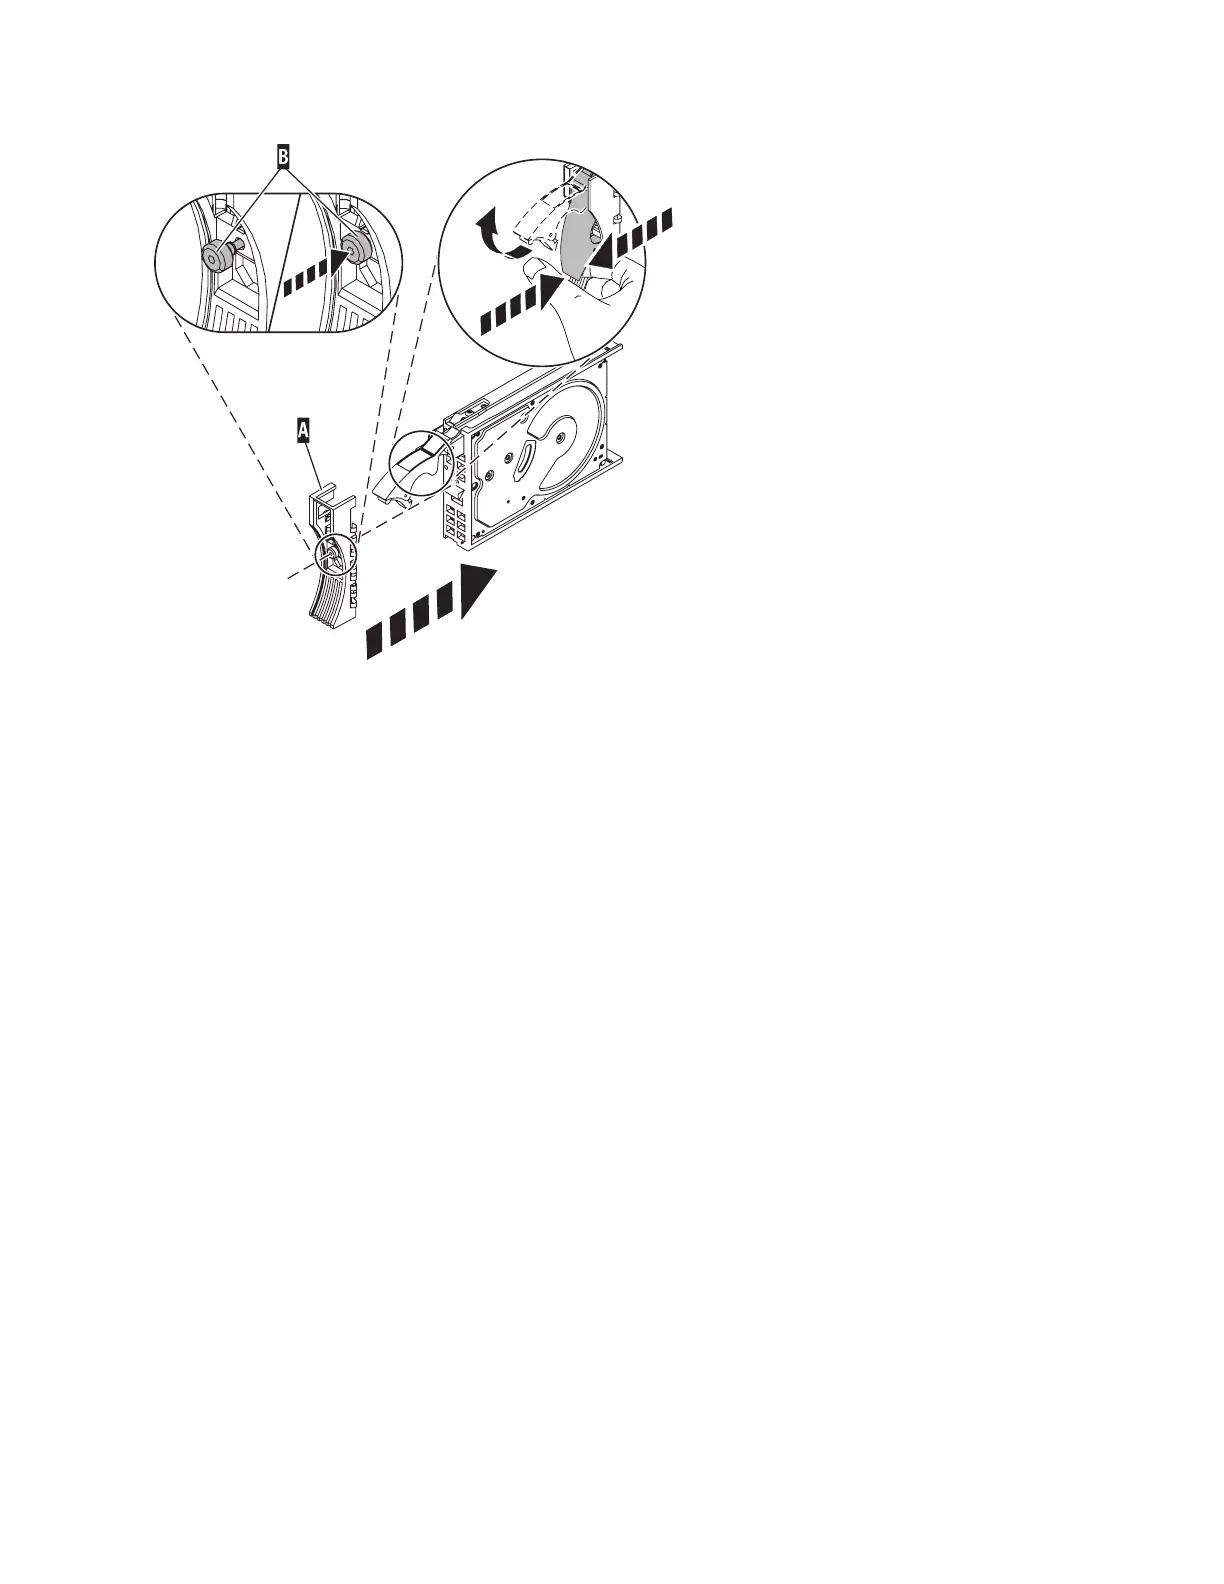
5. Install the disk drive:
a. Support the bottom of the disk drive as you align it with the guide rails in the system unit. Do not
hold the disk drive by the handle.
b. Slide the disk drive into the system until it stops.
c. Push the disk drive handle in until it locks.
Note: It is important to ensure that when installing a disk drive, that the drive is fully seated and
all the way into the system.
d. Reconnect the power source.
e. Power on the unit, and then go to Verifying a repair. This completes this procedure.
Replacing the disk drive using AIX
Use this procedure to remove and replace a disk drive concurrently with the AIX operating system.
1. Access the unit by:
a. Open the front rack door.
b. Loosen the thumbscrew (A) on the right side of the cover.
c. Slide the cover to the right and remove it from the system unit slot (B).
80
 Loading...