3 - 1
SECTION 3 DISASSEMBLY INSTRUCTION
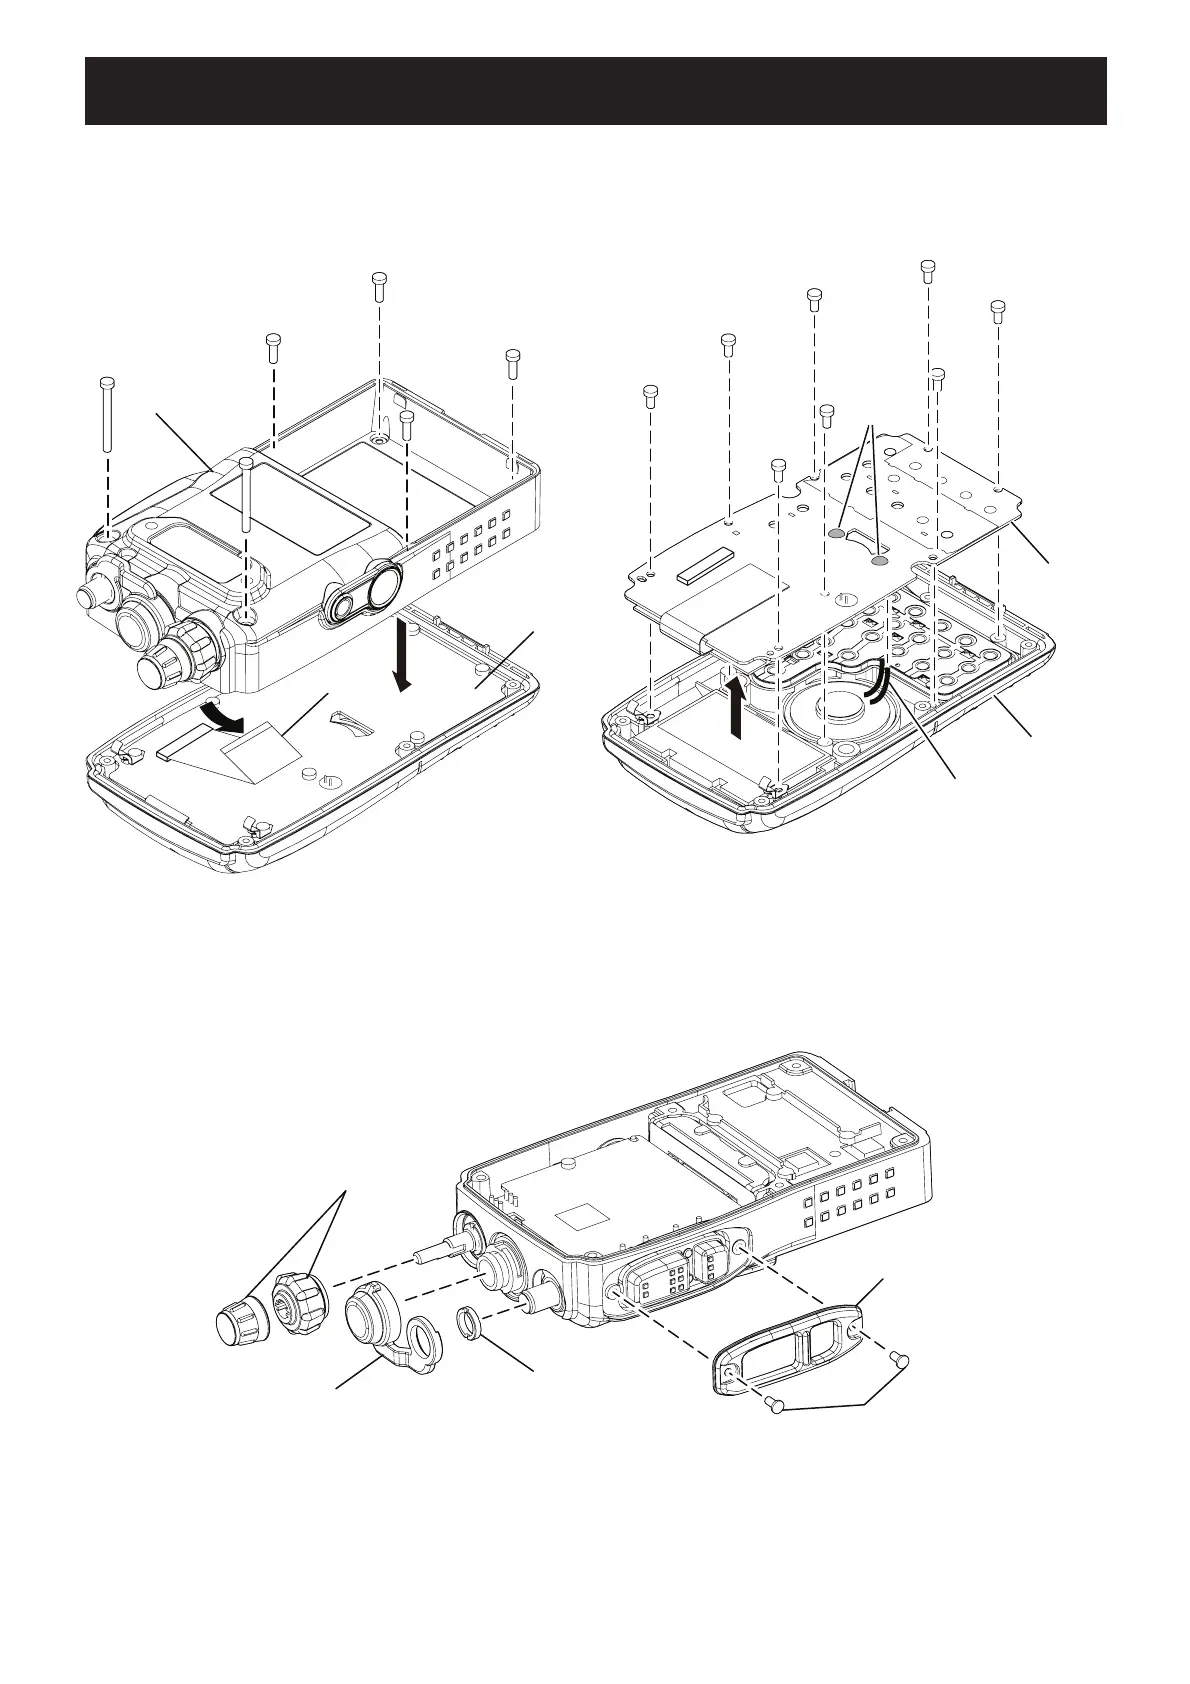
1. Removing the front panel
q Unscrew 6 screws from the CHASSIS.
w
Disconnect the flat cable between MAIN UNIT and
FRONT assembly, and remove the FRONT assembly from
the CHASSIS.
3. Removing outer parts
q Remove the dial knobs.
w Remove the rubber cap, and unscrew the ANT nut.
e Unscrew the side screws, and remove the side panel.
2. Removing the FRONT UNIT
q Unscrew 8 screws from the FRONT UNIT.
w Unsolder 2 points to remove the speaker leads, then
remove the FRONT UNIT from the front panel.
Flat cable
FRONT assy
CHASSIS
Unsolder
2 points
Speaker leads
FRONT UNIT
Front panel
ANT nut
Rubber cap
Dial knobs
Side panel
Side screws
(Contiued to next page)