- 42 -
AP 40
from its position.
Latch
②
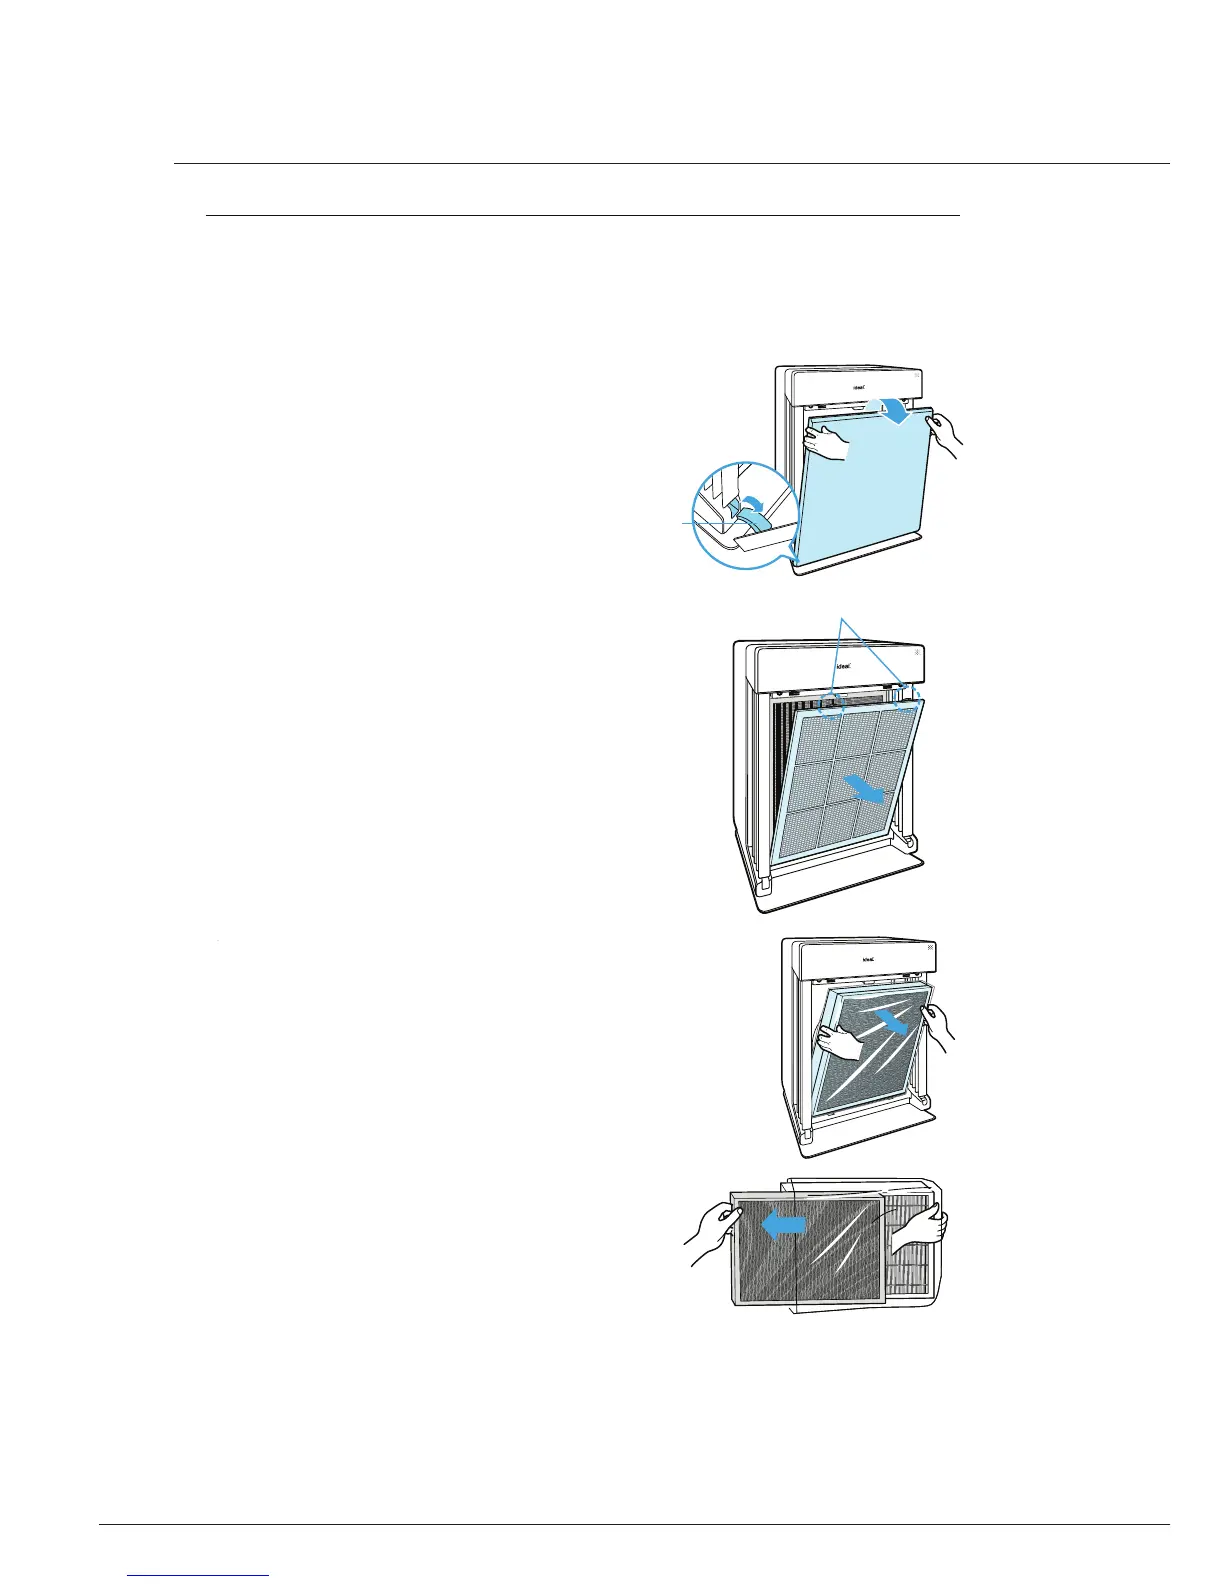
Press the tabs on the top edge to
remove the Pre-filter.
Tabs
③
The Carbon deodorization filter and
the Anti-microbial HEPA filter must be
removed in that order by pulling on the
numbered tags at the top.
x
Remove the
Carbon deodorization lter
before removing the
Anti-microbial HEPA
lter.
Press the tabs on the top edge to
remove the
CleanCel
®
Pre-fi lter
The
Carbon deodorization fi lter and
the
Anti-microbial True HEPA fi lter
must be removed in that order by pulling
on the numbered tags at the top.
Remove the
Carbon deodorization
fi lter before removing the
Anti-microbial True HEPA fi lter.
①
Remove the front panel by grasping
its upper edge and gently pulling
forward.
x
To remove the front panel, the latch
at the lower edge of the panel must
be released from its position.
Latch
②
Pull out the new filters covered in
plastic wrap.
③
Remove the plastic wrap from the
new filters.
x
Operating the unit without removing
the plastic wrap from the lters may
cause abnormal noise, deformation, or
re from overheating.
2.
Installing filters
This product comes with all of the required filters. The protective plastic wrap must be
removed from the filters before use.
Ú Operating the unit without removing the plastic wrap may result in product failure.
Unplug and make sure the unit is turned off before installing filters.
A
B
C
D