16
icos - Installation & Servicing
INSTALLATION
13
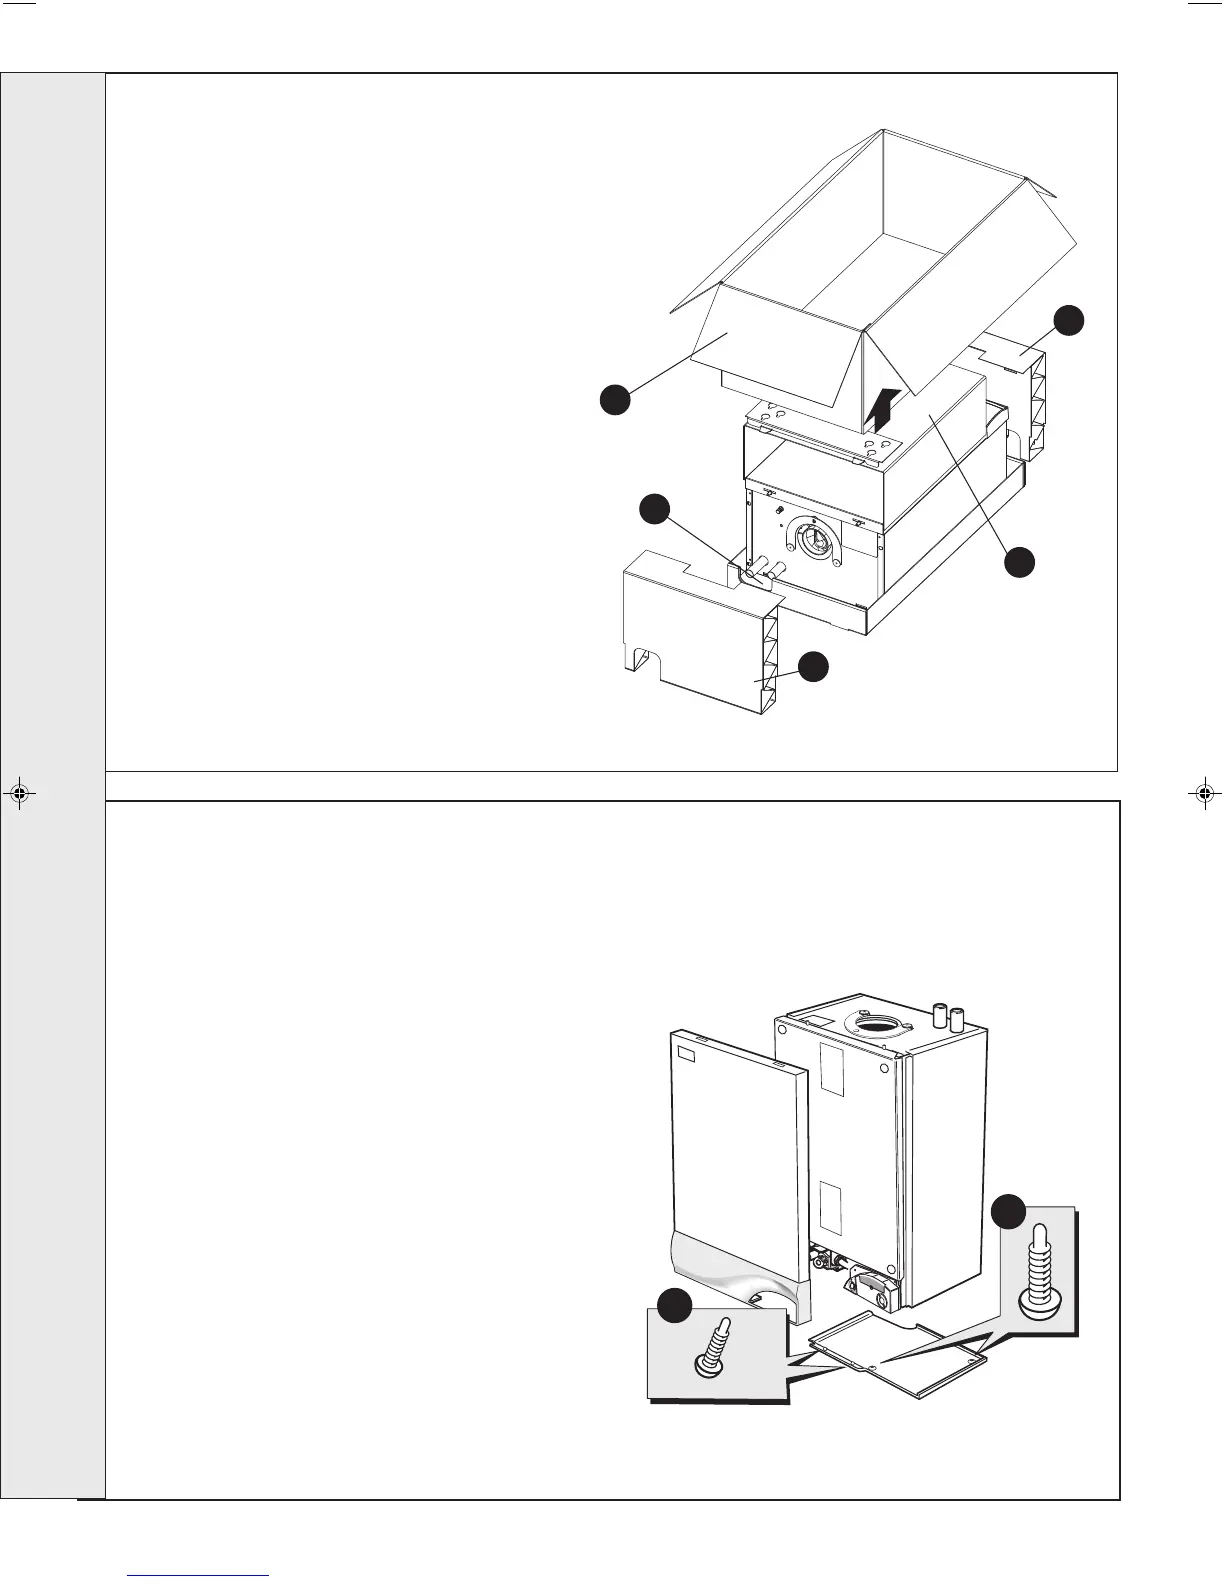
FRONT AND BOTTOM PANEL REMOVAL
1. To remove the front panel remove the 2 screws from the
bottom panel.
2. Lift the panel up and off the top pegs.
3. To remove the bottom panel remove the 2 screws.
4. Pull the RH side of the panel down. Slide it to the right
and withdraw.
nm 7802
3
1
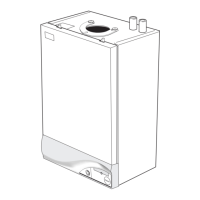
1. Ensure the boiler is stood correctly, as marked on
the carton.
2. Cut and remove the strapping.
3. Fold back the top flaps to gain access to the wall
mounting plate, literature and wall mounting card
template.
4. Remove the instructions and read thoroughly before
unpacking the product.
5. When ready for installation lift off the outer sleeve.
6. Remove the top protection packing/template and
save for further use.
7. Remove the two packaging ends.
8. Remove the hardware pack from under the pipes
and keep in a safe place.
12
PACKAGING REMOVAL
3
8
6
7
7
5
nm9282
INSTALLATION
 Loading...