33
INITIAL LIghTINg
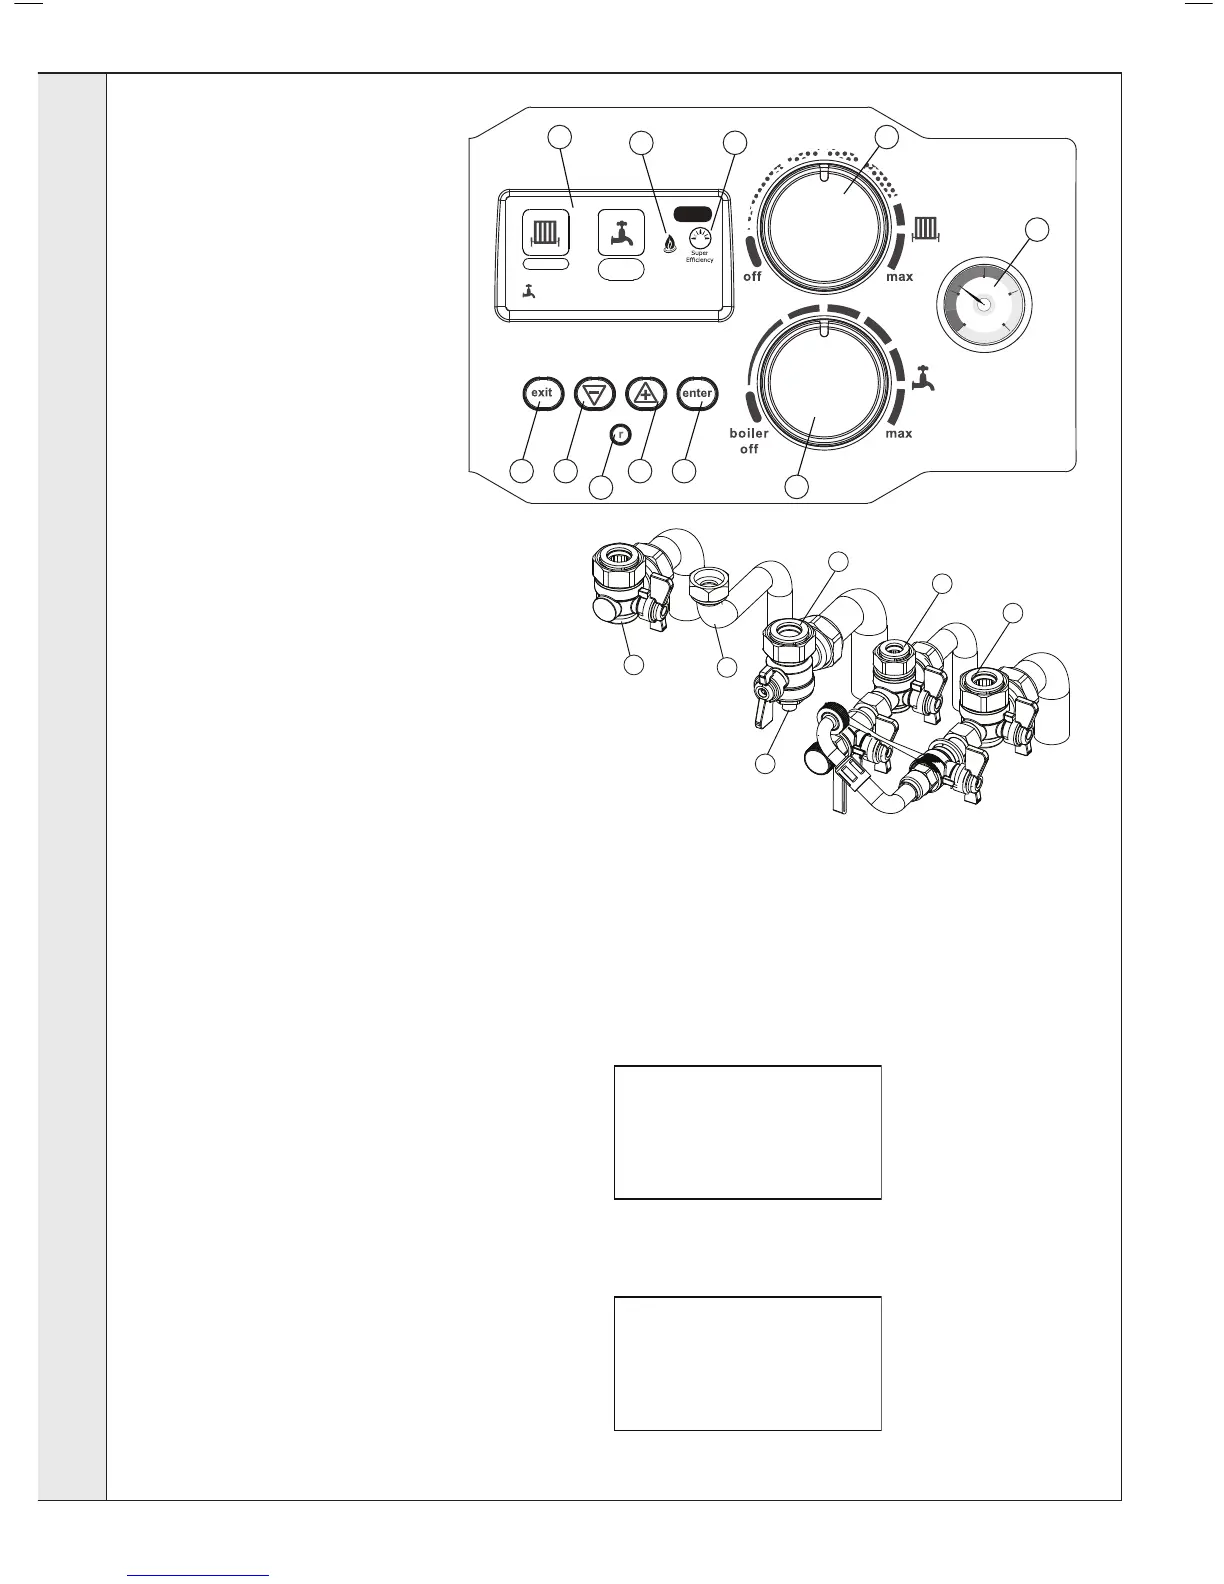
Legend
A. Boiler Status
B. Exit Button
C. Down Button
D. Up Button
E. Enter Button
F. Reset Button
G. CH Temperature Control
H. DHW Temperature Control and Off
Switch
J. Burner On indication
K. Pressure Gauge
L. Boiler in Full Condensing Mode
M. CH Flow Isolating Valve
N. Gas Inlet Pressure Test Point
P. Gas Service Cock
Q. DHW Inlet Valve
R. CH Return Isolating Valve
S. DHW Outlet
2
1 3
40
ON
ON
Priority
A
J
G
K
B C D
F
E
L
H
Press Enter
for
MENU
pREpARATION FOR IgNITION
1. Check that the electrical supply is OFF.
2. Check that the system has been lled and that
the boiler is not air locked.
3. Ensure that the automatic air vent cap is open.
Refer to Frame 70.
4. To assist with venting the air from the system,
refer to Frame 37 Vent System. This function
operates the boiler to ensure efcient venting of
the boiler and system.
5. Ret the boiler front panel. Refer to Frame 45.
6. Check that the drain cock is closed and that the
CH (M & R) and DHW (Q) isolating valves are
OPEN.
7. Check that the DHW Temperature Control Knob
(H) is turned fully anti-clockwise into the off
position.
8. Check that the gas service cock (P) is OPEN.
9. Slacken the screw in the inlet pressure test
point (N) and connect a gas pressure gauge via
a exible tube.
INITIAL IgNITION
1. Switch the electricity supply ON and check all internal and
external controls are calling for heat.
2. Set the CH Temperature Control (G) to max and set the DHW
Temperature Control (H) to max. The boiler will now go
through its ignition sequence until the burner is established.
3. If the boiler has not lit, after 5 ignition attempts, the following
screen will be displayed.
 Loading...