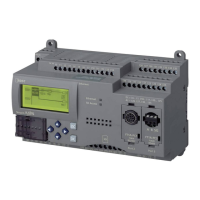
Do you have a question about the IDEC FC4A-C10R2 and is the answer not in the manual?
Guidelines for optimal installation location, environmental conditions, and mounting orientation.
Precautions and guidelines for proper input wiring, including wire separation and type.
Guidelines for connecting relay, transistor sink, and transistor source outputs, including fuse recommendations.
Details on power supply requirements, voltage ranges, and wiring precautions for CPU modules.
Describes how to connect the MicroSmart to a Windows PC via RS232C port 1 or port 2.
Explains operations to start and stop the MicroSmart, including using the start/stop inputs.
Overview of special functions programmed via Function Area Settings, including input filters and protection.
Details the high-speed counter function, its configurations, and operation modes.
Methods to protect the user program from reading, writing, or both, using passwords.
Lists available allocation numbers for operands, including I/O, internal relays, and timers.
Detailed allocation numbers for I/O, internal relays, and special internal relays across CPU module types.
Comprehensive list of basic instructions, their symbols, functions, quantity of bytes, and see page references.
List of advanced instructions, including group, symbol, name, data type, quantity of bytes, and see page references.
Table showing which advanced instructions are applicable to different CPU module types.
Moves 16-bit data from a source operand to a destination operand, with repeat operation capability.
Compares two 16-bit data operands and turns on output if they are equal.
Compares two 16-bit data operands and turns on output if they are unequal.
Compares two 16-bit data operands and turns on output if the first is less than the second.
Compares two 16-bit data operands and turns on output if the first is greater than the second.
Compares two 16-bit data operands and turns on output if the first is less than or equal to the second.
Compares two 16-bit data operands and turns on output if the first is greater than or equal to the second.
Performs binary addition of two 16-bit data operands, setting carry or borrow flags.
Performs binary subtraction of two 16-bit data operands, setting carry or borrow flags.
Performs binary multiplication of two 16-bit data operands, storing the 32-bit result.
Performs binary division of two 16-bit data operands, storing quotient and remainder.
Performs bit-by-bit logical AND operation on two 16-bit data operands.
Performs bit-by-bit logical OR operation on two 16-bit data operands.
Performs bit-by-bit logical exclusive OR operation on two 16-bit data operands.
Shifts 16-bit data to the left by a designated quantity of bits.
Shifts 16-bit data to the right by a designated quantity of bits.
Rotates 16-bit data to the left by a designated quantity of bits.
Rotates 16-bit data to the right by a designated quantity of bits.
Converts 16-bit binary data designated by S1 into BCD data.
Converts BCD data designated by S1 into 16-bit binary data.
Converts 16-bit binary data into ASCII data.
Converts ASCII data into 16-bit binary data.
Converts BCD data into ASCII data.
Converts ASCII data into BCD data.
Turns designated outputs/relays ON/OFF at predetermined times and days of the week.
Details specifications for RS232C and RS485 user communication modes.
Instructions for connecting RS232C devices to port 1 or port 2 using adapters or modules.
Instructions for connecting RS485 devices to port 2 using communication modules or adapters.
Details on configuring transmit instructions including start delimiter, BCC, and end delimiter.
Details on configuring receive instructions including receive format, start delimiter, and skip.
Explanation of user communication error codes and their causes.
Disables interrupt inputs and timer interrupt designated by source operand S1.
Enables interrupt inputs and timer interrupt designated by source operand S1.
Sets the format for XY conversion, defining linear relationships via coordinate points.
Converts an X value to a corresponding Y value using a linear relationship defined by XYFS.
Converts a Y value to a corresponding X value using a linear relationship defined by XYFS.
Generates pulse outputs from Q0 with frequency determined by source operand S1.
Generates pulse outputs from Q1 with frequency determined by source operand S1.
Generates pulse outputs with selectable frequency and pulse width ratio.
Generates output pulses with frequency changing in a trapezoidal pattern.
Sends out a pulse output of high frequency, decreasing to creep frequency upon deceleration input.
Implements PID control algorithm with auto tuning for proportional, integral, derivative parameters.
Stores parameters for PID instruction, including operation mode, frequencies, and gains.
Selects PID action, auto tuning, or both, based on stored values.
Enables or disables linear conversion for scaling process variable to actual engineering units.
Determines the amount of proportional action in the PID control.
Reduces offset by providing integral action, determining the amount of integral action.
Adjusts process variable to set point by modifying manipulated variable based on rate of change.
Executes auto tuning to determine PID parameters.
Controls PID action, auto/manual mode, and output limits using internal relays.
The target process variable value to which the PID action adjusts the process variable.
Uses analog input data as the process variable, converted to a digital value.
Stores the manipulated variable calculated by the PID action.
Demonstrates PID control for a heater, including auto tuning and temperature monitoring.
Dialog box for programming parameters for analog I/O modules using ANST macro.
Dialog box for setting PID parameters for the PIDST instruction.
Important notes and precautions for using the PID instruction correctly.
Measures ON duration of start input and stores it as preset value for timer instruction.
Describes reading/writing data to intelligent modules while CPU is running or stopped.
Reads data from intelligent module while CPU is running.
Writes data to intelligent module while CPU is running.
Reads data from intelligent module while CPU module is stopped.
Writes data to intelligent module while CPU module is stopped.
Details analog input parameters including signal type, data type, min/max values, and filter.
Details analog output parameters including signal type, data type, min/max values, and data.
Details electrical specifications, communication cable, maximum slave stations, and refresh mode.
Instructions for setting up a data link system using RS485 communication adapter or module.
Shows data register allocation for master and slave stations for data communication.
Procedure for setting up data link master station parameters in WindLDR.
Procedure for setting up data link slave station parameters in WindLDR.
Step-by-step guide for setting up and operating the data link system.
Instructions for setting up a 1:N computer link system using RS485 adapter/module.
Ensures matching communication settings between CPU module and WindLDR for monitoring or downloading.
Describes procedures to monitor MicroSmart operating status using WindLDR.
Describes modem mode for communication between MicroSmart and data terminal equipment via telephone lines.
Instructions for connecting a modem to the MicroSmart using RS232C communication adapter/module.
Lists special data registers allocated for modem mode settings like protocol and initialization string.
Procedure for sending initialization strings, ATZ command, and dialing telephone numbers.
Procedure for sending initialization strings and ATZ command to answer incoming calls.
Provides solutions for common modem communication problems.
Steps to program modem communication settings using WindLDR.
Step-by-step guide for operating the modem mode, including initialization and communication.
General information about AS-Interface, a field bus for controlling sensors and actuators.
Details the master and slave requirements for setting up an AS-Interface network.
Procedure for assigning unique slave addresses using WindLDR or pushbuttons.
Methods for configuring slaves using pushbuttons or WindLDR.
Steps to configure slaves using Auto Configuration or Manual Configuration in WindLDR.
Monitoring slave operating status, output statuses, and parameter image using WindLDR.
Procedure to change output statuses and parameters of AS-Interface slaves.
Lists error codes and their meanings when errors occur during AS-Interface master operation.
Describes operation modes (connected, local) and sub-modes for the AS-Interface master module.
Describes AS-Interface operands (internal relays, data registers) for controlling and monitoring the bus.
Shows allocation numbers for AS-Interface operands (I/O, status, parameters) in EEPROM.
Describes procedures to determine causes of trouble and take actions.
Procedure to read error codes and messages using WindLDR.
Procedure to clear error codes from the PLC Status dialog box.
Lists common error causes and recommended actions for troubleshooting.
Diagram for troubleshooting when the ERR LED is on.
| Category | Controller |
|---|---|
| Manufacturer | IDEC |
| Model | FC4A-C10R2 |
| Input Voltage | 24 VDC |
| Number of Inputs | 6 |
| Number of Outputs | 4 |
| Output Type | Relay |
| Communication Ports | RS-232 |
| Data Memory | 640 KB |
| Operating Temperature | 0°C to 55°C |
| Humidity | 10% to 90% (non-condensing) |