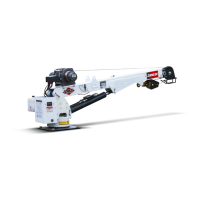
Specications 13 Crane Reference
4004i - Manual # 99904386
Crane Installation (99904394)
In addition to meeting the chassis requirements noted in the Technical Data section of this manual, make sure
there is sucient room for mounting the crane, and the platform is strong enough to support the crane and rated
load. Install the crane only on an IMT designed and approved truck body. The body must be designed to sustain
the forces imposed by the crane when lifting the full rated load. Install the body on the chassis before installing the
crane. Refer to the following table for parts referenced in the following crane installation drawings.
ITEM NO. PART NO. DESCRIPTION KIT NO. QTY
1. 51721572 ELECTRIC CRANE BODY INSTALLATION 1
2. 91721647
HARDWARE KIT- 3203I/4004I ELEC CRANE BODY
INSTALLATION
1
3. 91721751
HARDWARE KIT- 5005I ELEC CRANE BODY
INSTALLATION
1
5. 51725572 DRAWING-CRANE & WINCH ASSEMBLY 3203I REF
6. 60251272 BRACKET-SWITCH 300 AMP ELEC CRANE 1 & 4 1
7. 70734331 SWITCH-300A KEYED BATTERY DISCONNECT 1 & 4 1
8. 72042097 LEVEL INDICATOR LEVEL 1 & 4 1
9. 77040209 TERMINAL-RING NI .38 STUD 1 WIRE 1 & 4 1
10. 77040529 TERMINAL-RING NI .31 STUD 1-2 WIRE 4 9
11. 77441116 FUSEHOLDER-HIGH AMP2 BOLT WITH COVER 4 2
12. 77441219 FUSE-225 AMP 4 2
13. 89044276 CABLE-#1 WELDING 1 & 4 35 FT
14. 89392333 TUBE-HEAT SHRINK AMP 1 & 4 0.50 FT
15. 72060208 CAP SCREW .75-10X 2.50 HH GR8 Z 2 4
16. 72601862 NUT .75-10 HEX NYLOC GR8Z 2 4
17. 72063116 WASHER .75 N FLAT H ASTMF436Z 2 8
18 72060002 CAP SCREW .25-20X .75 HH GR5 Z 2 & 3 4
19. 72060634 SCREW-MACHINERY #10-24X .50 RDH 2 & 3 4
20. 72062000 NUT .25-20 HEX 2 & 3 4
21. 72062106 NUT 10-24 HEX NYLOCK 2 & 3 4
22. 72063001 WASHER .25 FLAT 2 & 3 8
REV. E 20120918
TO INSTALL THE CRANE:
1. To install the crane: Use a lifting device capable of lifting the weight of the crane as indicated in the Technical
Data section of this manual. Attach fabric slings to the crane lower boom, centered approximately 18
inches (46 cm) from the mast hinge. Make certain the crane is well balanced on the slings by slowly lifting
approximately 6” (15 cm) o the ground. Lift the crane and apply a bead of waterproof compound, such as
silicon based caulk, to the bottom of the base. Move the chassis under the crane and lower the crane into the
desired position.
NOTE:
Install the 3/4-10x2.5” mounting cap screws (item # 15) and 3/4” washers (item #16) to secure the crane base to the
truck body (see gure on next page). Torque the cap screws to 280 ft-lb.
2. The electrical power switch (item #7) provides power for the crane. Install the switch onto the power unit cover.

 Loading...