Control Unit Installation Page 2.3 - 1 2.3
2.3 TS-LLD CU Installation & Wiring
Control Unit ( CU ) Installation Steps
Follow the installation steps (below) and in the order that they appear:
DANGER
Electrical Shock Hazard. BEFORE installing, servicing or
working on this equipment, turn off all submersible pump power (240 VAC) and
pump relay coil / dispenser power at the electrical panel. Tag, secure / lockout
these circuit breakers in the off position to prevent accidental or unauthorized
circuit breaker closure. Failure to turn off power will result in severe injury or
death ! Check all wiring terminals for the absence of power before proceeding.
Note: Circuit breaker contact(s) can stick closed even when the circuit breaker
lever is in the off position.
You must know the dispense line number, product dispensed, and which pump
relay box (motor control box) is associated with this line.
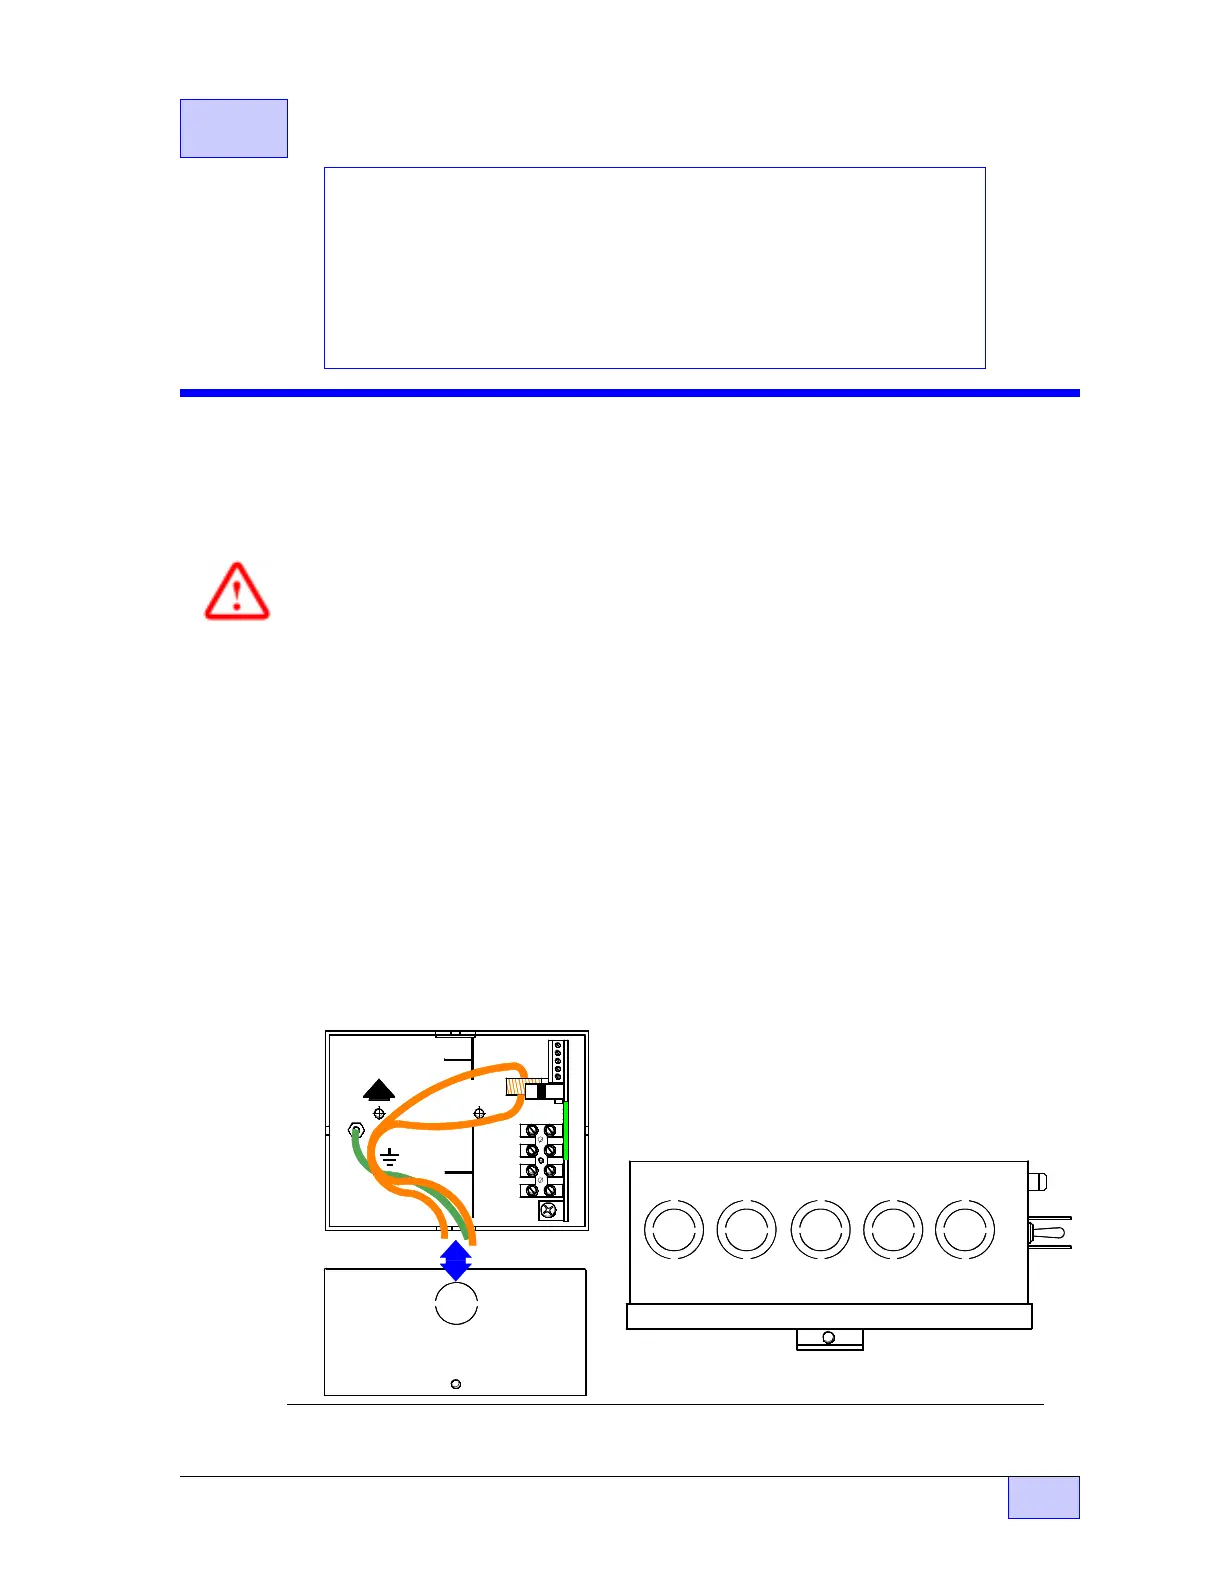
1) Select an accessible mounting location for the control unit (see Figures 2.3-1 &
2.3-3), and remove the appropriate conduit knockouts. The CU is usually
mounted above the pump relay box (shown here)... other locations are possible.
Figure 2.3-1 CU Internal & Bottom Views, and Relay Box Top View
1 485A
2 485B
3 DSY1
4 DSY2
5 ALARM
1 110V
2 NEU
3 P -OUT
TB 1
4 P -IN
F1
UP
SIG RTN
TB 2
INTERNAL VIEW
CU ENCLOSURE
BOTTOM VIEW
REM OVE
KNOCKOUT
FOR 1/2 INCH
ELECTRICAL
FITTING
AT BOTTOM
KNOCKOUTS FOR ELECTRICAL FITTINGS
TOP VIEW SHOWN
Contents:
• Control Unit Installation Steps (Location, Product Configuration,
TS-2000 Configuration, Mounting the Control Unit, Relay Box &
Control Unit Wiring TABLE 2.3-1)
• Wiring Diagrams & Schematics (Pump Control Relay Box,
Single Phase 240 VAC, 3 Phase 240 VAC, 3 Phase RedJacket BigFlo,
3 Phase 240 VAC - FE Petro - STP & IST applications)
• Final Installation Steps
NOTE
☞