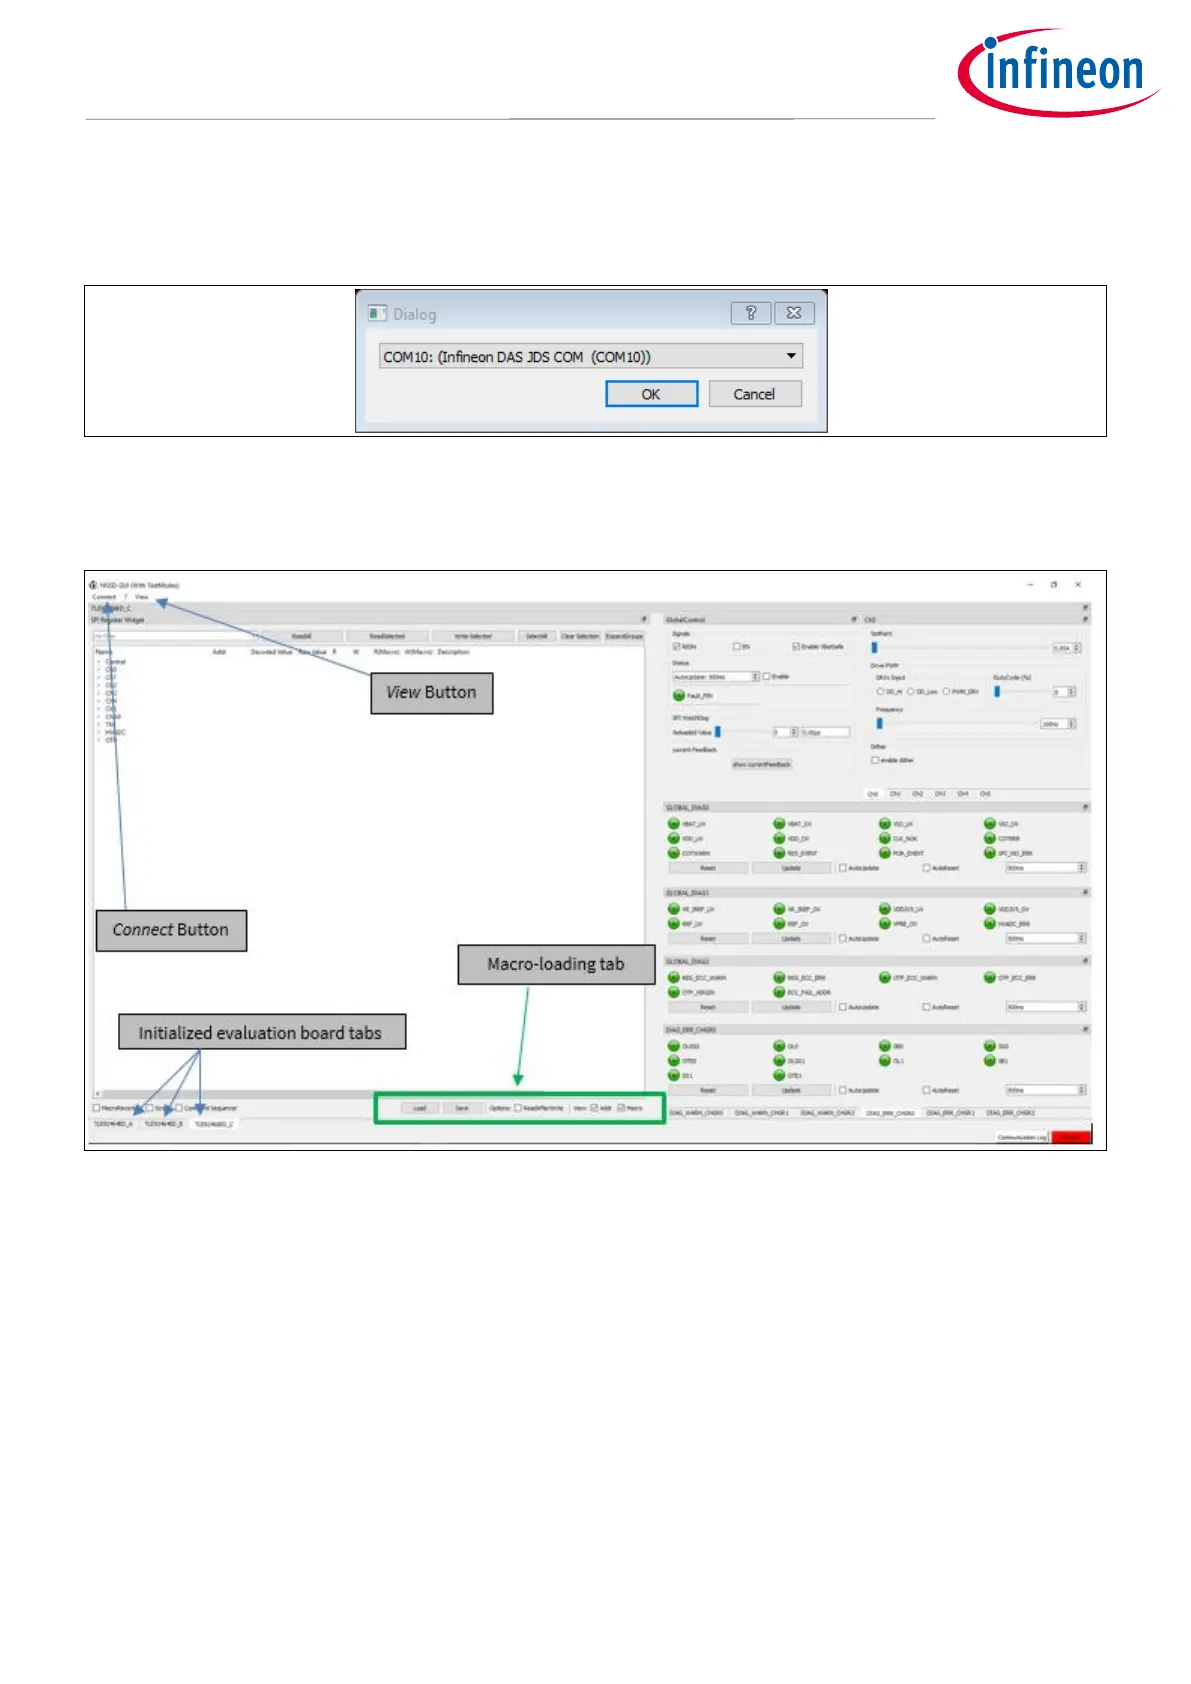
After selecting the connection-PCB or microcontroller board from the first drop-down menu, a prompt pops up
for selecting the COM port for the USB- Serial interface. Locate the correct port in the ‘Ports’ section of the
Device Manager on your PC’s Control Panel.
Figure 25 COM port selection
Once the correct COM port is identified, the GUI starts up in its default state, see Figure 26.
Figure 26 Main window overview
The Connect button in the top left corner opens the slot-selection menu. Next to it is the View menu which
offers different layout options for the main window, such as hiding certain widgets or tabs, as well as saving the
layout preferences. The bottom left corner has three buttons for switching across the three tabs corresponding
to the three evaluation boards.
One useful feature of this GUI is its ability to load and run a user-written macro sequence, as an alternative to
utilizing the evaluation board tabs. The user can write a command sequence by activating the Macro Recorder
indicated by as Macro loading tab in Figure 26.
2.4.2 Evaluation Board Tabs
If selected, each EvalBoard gets their own Tab in the MainWindow, which contains all available controls for that
particular board. The Tab for the TLE9246x family of devices is structured in 5 main widgets as can be seen in
Figure 27.