19
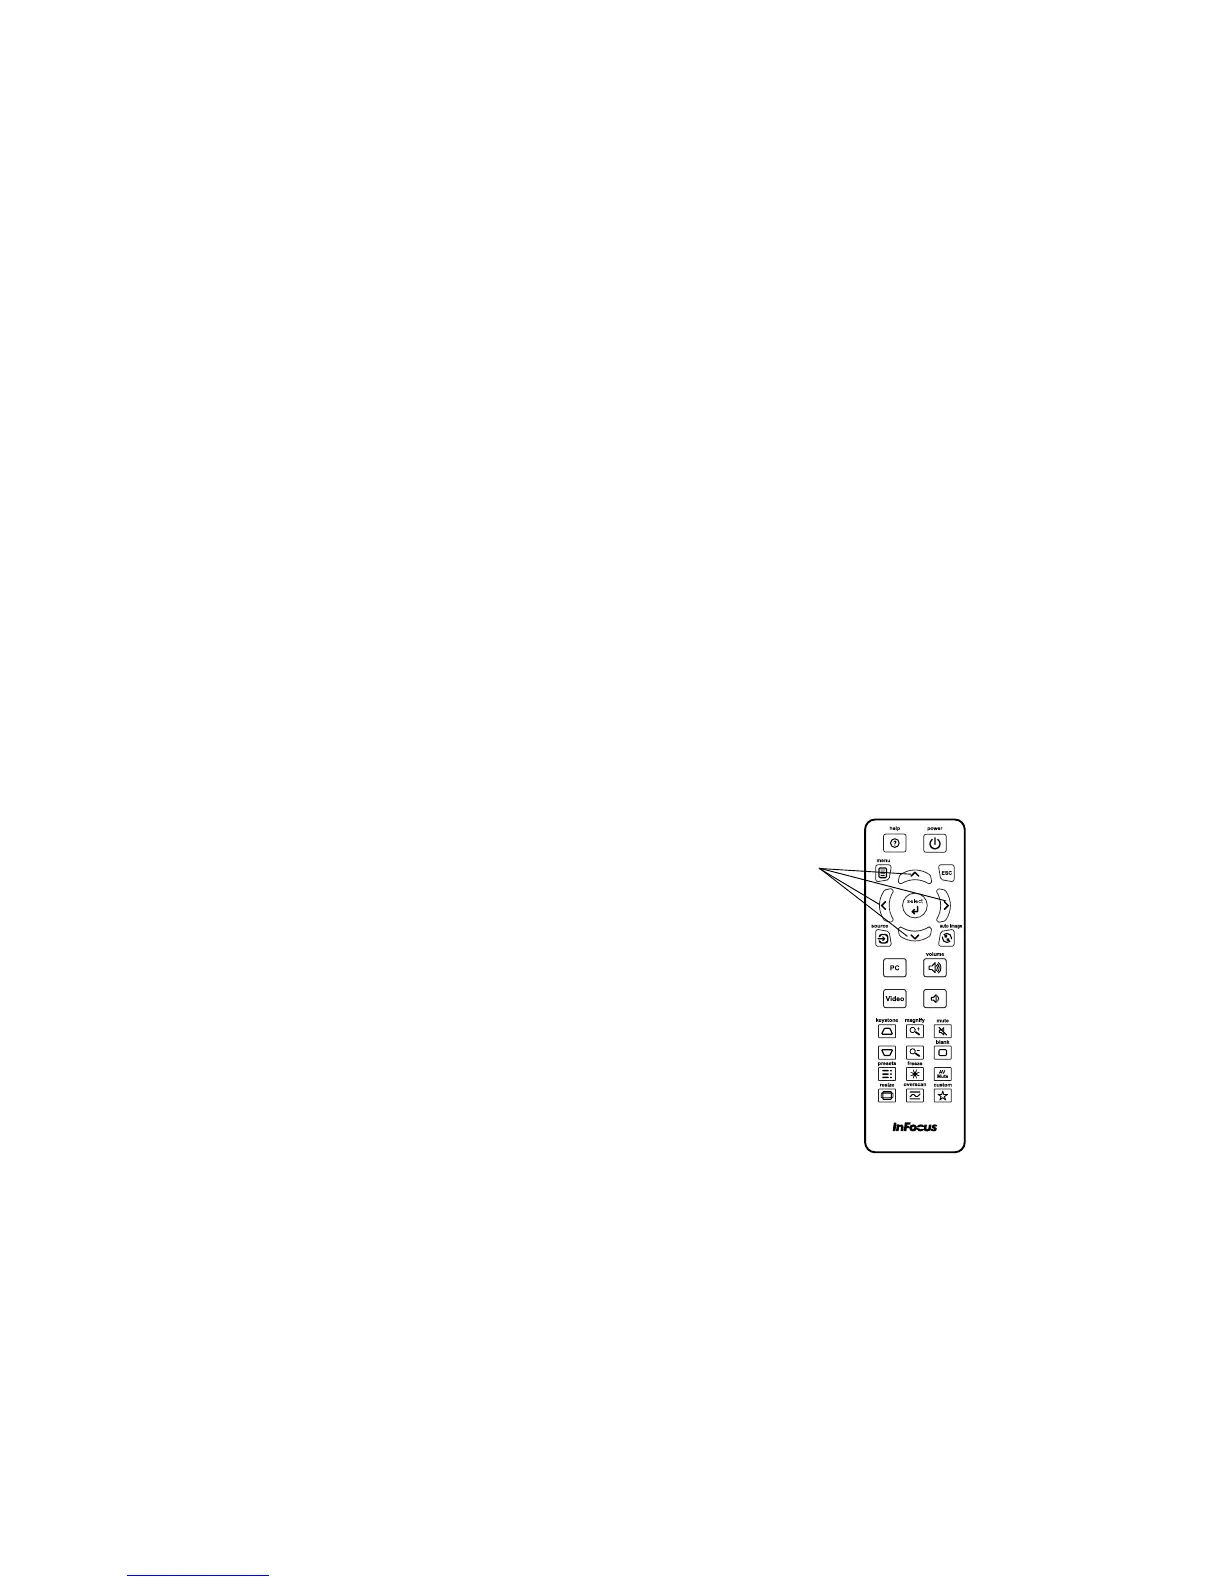
Using the remote control
The remote uses two (2) AAA batteries (not provided). They are easily installed by
removing the cover from the remote’s back, aligning the + and - ends of the
batteries, sliding them into place, and then replacing the cover.
Caution:
• When replacing the remote batteries, be aware that using batteries other
than
AAA batteries may risk severe damage to the remote. When disposing
of the batteries, be sure to do so in an enviromentally proper manner.
• If the remote control gets wet, wipe it dry immediately.
•
Avoid excessive heat and humidity.
• Ensure the batteries' polarity (+/-) is aligned correctly.
• Do not mix new and old batteries together, or mix different types of batteries
together.
• Replace the batteries as soon as they run out.
• Remove batteries from the remote control when storing or not in use for a
prolonged period.
To operate, point the remote at the front of the projector (not at the computer).
The range of optimum operation is about 15 feet (4.5m).
Press the remote’s Po
wer button to turn the projector on and off (see page 11
for shutdown info).
Press the remote’s Menu button to open the projector’s menu system. Use the
arrow buttons to navigate, and the Select button to select features and adjust
values in the menus. See page 24 for more info on the menus.
The remote also has:
• Vol
ume buttons adjust the sound.
• Cu
stom button that can be assigned to a special function, like Blank Screen
or Freeze (see page 27).
• Sou
rce button brings up a menu of all possible sources allowing the user to
switch the active source.
• Blank button to blank the screen.
• Presets button to select stored settings (see page 25).
• Mu
te button to silence the audio.
• Auto Image button to resynch the projector to the source.
• Resi
ze button to switch among aspect ratios (see page 25).
• Help button to get help with connecting sources and improving the picture.
•ESC but
ton to go back to previous OSD menu.
• PC button to cycle thr
ough the Computer sources.
• Video button to cycle through Composite/S-Video/HDMI input sources.
• Ke
ystone buttons adjust the squareness of the image
• Ma
gnify buttons magnify and reduce the projected picture size.
• Freeze button to pause the projected image.
• Overscan bu
tton remove noise around the video image.
• AV Mute
button blanks the projected image and mutes audio.
Troubleshooting the remote
• Make sure the batteries are installed in the proper orientation and are not
dead.
• Make sure you’re pointing the remote at the projector or the screen, not the
computer, and are within the remote range of 15 feet (4.5m). For best results,
point the remote at the projector.
navigation
buttons