5
SETTING UP THE PROJECTOR
1 Place the projector on a flat surface.
• The projector must be within 10 feet of your power source
and within 10 feet of your computer.
NOTE: An optional extension
cable, sold separately, lets you
increase the distance between the
projector and your computer to 50
feet. See “Accessories” on
page 53.
•
If you want to project from behind a translucent screen, set
up the projector behind your screen. See “Rear Projection”
on page 40 to reverse the image.
• If you are installing the projector on the ceiling, see the
LitePro 610/620 Ceiling Mount Installation Guide for recom-
mendations. To turn the image upside down, see “Ceiling”
on page 39. The Ceiling Mount Kit is sold separately. See
“Accessories” on page 53.
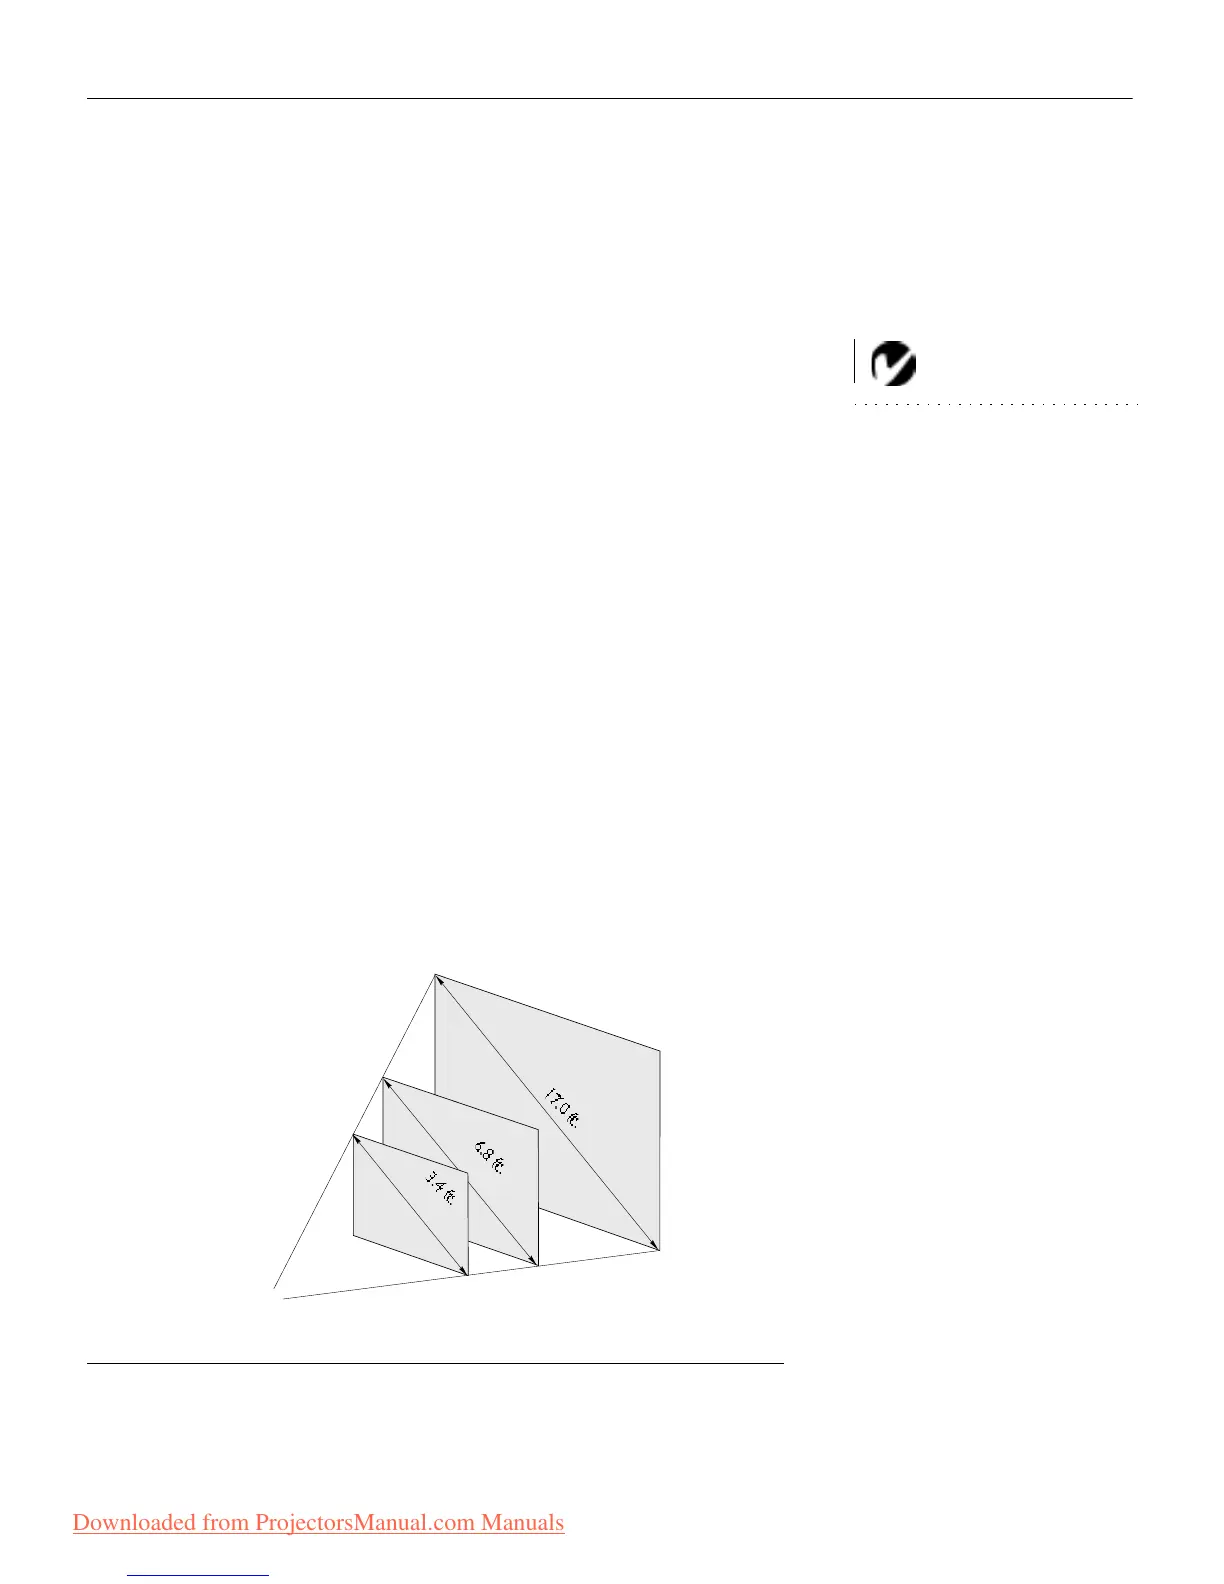
2 Position the projector the desired distance from the screen.
• The distance from the lens of the projector to the screen
determines the size of the projected image. Figure 2 shows
three projected image sizes for the 610; Figure 3 shows
image sizes for the 620. For more information, see “Pro-
jected Image Size” on page 60.
3 Make sure the projector and your computer are turned off.
FIGURE 2
Projected image size for LitePro 610
5 ft.
10 ft.
25 ft.
PROJECTOR
Downloaded from ProjectorsManual.com Manuals