22
Setting up the Projector
4Turn on your monitor if you’ve connected it.
5 Turn on your computer. The computer image should display
on the projection screen.
NOTE: With some computers,
the order in which you power up
the equipment is very important.
We recommend that you always
turn on the computer LAST.
•
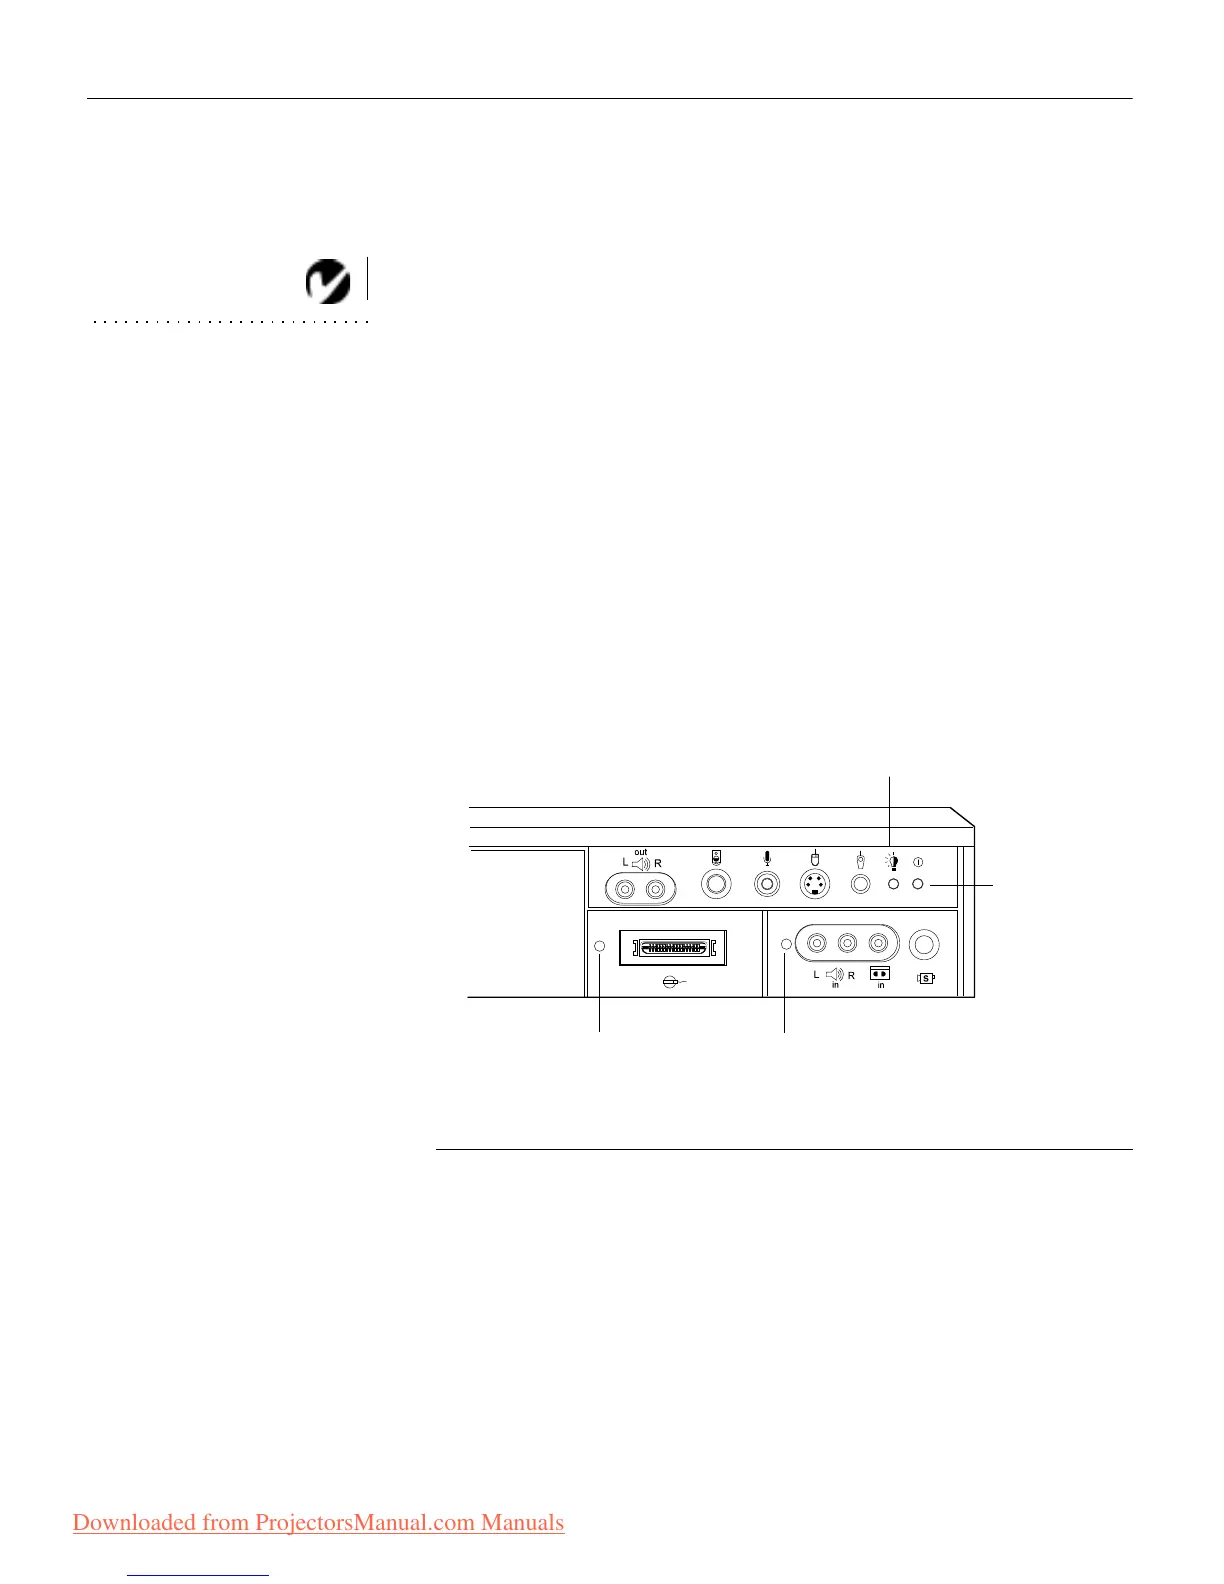
The computer source indicator LED displays a solid green
indicating the computer source is active (Figure 23).
• If necessary, use the brightness buttons on the remote con-
trol or keypad to adjust the brightness. You can make fur-
ther adjustments to the image from the projector’s on-
screen menus. To open the menus, press the menu button
on the remote control or keypad. Then select the Display
menu or the Image menu. For more information about the
menus, see page 32.
• If you don’t want to hear the sound from your computer or
video player, press the mute button on the remote control
or keypad. (Pressing mute does not mute the microphone.)
FIGURE 23
Indicator LEDs
video source
indicator LED
computer source
indicator LED
power/standby
indicator LED
lamp module
indicator LED
Downloaded from ProjectorsManual.com Manuals
 Loading...