©2011, Attendance on Demand
®
, Inc. Information in this document is subject to change without notice.
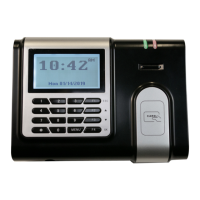
It is important that the finger is placed on the platen in the same manner every time. See
Understanding Biometric Technology and Enrollment on page 12 to ensure enrollment is successful.
During the enrollment process, if the finger is not placed on the platen within 10-15 seconds after the
message “Place Your Finger Firmly” or “Place Your Finger” is displayed, the message “Operation
was Not Successful. Please Try Again Later” followed by “Enrollment Failed” is displayed.
6. Once the enrollment is successful, the message “Completed. Thank you!” is displayed. Otherwise, the
message “About to Try Again.” is displayed.
7. Depending on the configuration, enroll other fingers or other employees or press ESC to exit the
menu.
8. The finger can be tested immediately after the enrollment. Place enrolled finger on the platen. If the
finger is read successfully, the employee’s badge number and the message “Transaction Accepted” is
displayed on the screen. If the finger read is not successful, error message “Unable to Identify” is
displayed with the score number.
9. Once the enrollment is successful, the employee badge number is displayed with the score number on
the screen. The score reflects how accurately your hand is placed on the platen and should average
above 80.
To enroll employee use the designated function key:
1. Press the function key to access the Enrollment Menu. Enroll Employee is highlighted.
2. Press OK.
3. Follow the instructions on how to enroll an employee using the time clock configuration menu in
Enrolling Employees on page 13.
Punching In or Out
After employee fingers are enrolled in the system, they can punch.
1. (For Verify mode) Enter the employee badge number in this step or in step 3.
2. (For Verify mode or Identify mode) Place enrolled finger on the platen. It is important that the finger
is placed on the platen in the same manner every time.
3. (For Verify mode) Enter the employee badge number in this step or in step.
4. If the finger is read successfully, Employee name and “Transaction Accepted” are displayed on the
screen.
If the finger read is not successful, error messages are displayed, such as “Access Denied”.
Customized messages can be displayed for different situations, such as “Double Punch”, or “Not a
member of this unit”. Make sure the employee is enrolled using the correct badge.