© MASS ELECTRONICS Pty Ltd 2008
Page 2
DS 9.02 - M2K02 - Micro2000 Controller
August 2013
Approvals
The Micro2000 series controllers conform to:
• Electromagnetic emission and immunity requirements according
to standards EN55011 (CISPR11) and EN50082 for CE Marking and
C-Tick Labelling.
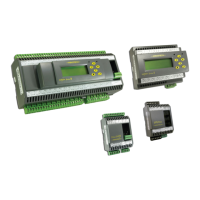
Installation
1. The Micro2000 should be mounted on DIN rail in cabinets
approved for switchgear or industrial control equipment. It
should be mounted in a dry and clean location, free of excess
vibration. Maximum terminal cable entry is 1.5mm² wire.
2. Wire in accordance with INNOTECH connection diagrams and
local bylaws or refer to your local distributor.
3. Connect the 240VAC supply to the correct terminals on the
controller, observing the correct polarity of the connections.
Connect the EARTH to the correct terminals on all units.
4. The maximum wire length between the control station and the
controller should not exceed 50 metres. The wiring between
these devices should not be run in parallel with conductors
carrying high current.
Fault Representation
1. If the Control Station display reads "HELP", this is due to
a communications error between the Controller and the
Control Station. Check the interconnecting screened cable
for continuity or short circuits. As a result of this failure, the
controller will shutdown aer 1 minute.
2. If the Control Station reads "SEN FAIL", this is due to an open
circuit room Temperature Detector. To test the detector,
disconnect it from the room and connect it directly to the
controller.
3. If the Control Station reads "no FLO", there has been no Flow
Verify Signal feedback from the Pump Interlock Module. The
fault will occur if a flow signal is not received within 30 seconds
of a Call signal.
Pump Interlock Operation
The M2K02 is equipped with a 3 wire pump interlock system. This
system should be used with a Micro2000 Pump Interlock Module
(M2KPI see datasheet DS9.19).
When Compressor One is called for, the controller will send a "Call"
signal to the Pump Interlock Module. The Pump Interlock Module
will enable the pump and send back a "Verify" signal when flow has
been achieved. When the controller receives the "Verify" signal, it
can enable Compressor One. When Compressor One is turned o,
the Call signal will stay on for the time set in Parameter 17 (CW Run
On Time). This allows the pump to run on for the time selected.
Multiple M2K02 controllers connected in parallel use the same 3
wire Pump Interlock system and can be connected to the one Pump
Interlock Module (M2KPI). For further information, refer to the M2KPI
datasheet.
Inputs
1. INPUT 1 Temperature Sensor Input: (Range 5 - 35°C.)
This input is used to read the current temperature.
2. INPUT 2 - Selectable Dry Contact Digital Input:
Using Parameter 14, Input 2 can be either be a Door Switch, AC
Fault Input, a External Disable Input, or an External Aer Hours
Input.
AC Fault
If "AC" is selected in Parameter 14 and Input 2 is "ON" the
Micro2000 will display "AC FAIL" and continue to operate in it's
current mode. Aer the fault is rectified, the display will revert
back to its previous state.
External Disable
If "dIS" is selected in Parameter 14 and Input 2 is "ON" the
Micro2000 will shut down all outputs and display "OFF". Aer
All Digital Inputs have a 5 second delay before they are
registered.
Outputs
Relay #1 Fan (16A Relay. Common and Normally Open Contact)
Relay #2 Heat 1 (10A Relay. Common and Normally Open Contact)
Relay #3 Heat 2 (10A Relay. Common and Normally Open Contact)
Relay #4 Cool 2 (2A Relay. Common and Normally Open Contact)
Relay #5 Cool 1 (2A Relay. Common and Normally Open Contact)
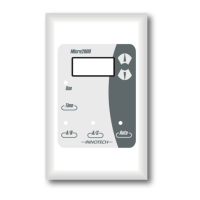
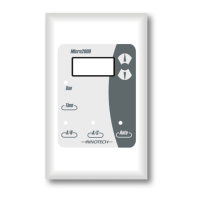
Push Buttons
The normal control button use is described below:
1. The "Auto" button is used to enable or disable the
programmed schedules. When the Auto "LED" is on the
schedules are enabled, when it is o they are disabled.
2. This button has three selectable modes of operation.
Normal Aer Hours
If Parameter 6 (Aer Hours Adjustable) is set to "O" ,
pressing the button will instruct the Controller to run for
the time set in Parameter 5 (Aer Hours Run Time).
Adjustable Aer Hours Run Time
When the button is pressed and Parameter 6 is set to "On", the
controller will display the amount of time in hours it will run for.
The user can adjust this time by using the and buttons.
The Controller will run for the amount of time chosen aer the
button is pressed again or a period of 5 seconds where
no buttons are pressed.
Manual Override
When Parameter 5 is set to "On", the button can be used
to change the current state of the controller. It can be used
to override any programmed schedules. For example if the
Controller has been turned on by a Schedule, the button
can be used to force the controller O until the next scheduled
"On" time. Similarly if the controller is O, the button
can be used to force the controller On, until the next scheduled
"O" time.
If the Schedules are disabled via the button, the
button has a normal On/O function.
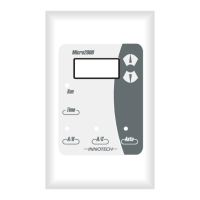
3. This button can be used to select either Vent mode (Fan
only runs) or Condition Mode (Full control).
4. By pressing this button the Current Time will be
displayed for 10 seconds before returning to the default
display.
the disable input is removed, the Micro2000 will continue to
operate in its previous state.
External Aerhours
If "AH" is selected in Parameter 14, Input 2 is used as an
external toggle Aer Hours switch. It operation is the same as
the button on the front panel. See Push buttons section
for more information.
Door Switch
If "Door" is selected in Parameter 14 and Input 3 is "ON" for the
time set in Parameter 15 (Door Open Time), then the
Micro2000 will display "Door" and will go into Standby Mode. In
Standby mode the Dead Band is increased by the
adjustable value in Parameter 16 (Door Reset Dead Band). If
Parameter 16 reads 10°C, there is a 5°C dead band either side of
the setpoint. However if Parameter 16 is set to 0 (O) then the
Micro2000 will shutdown all outputs. Aer the door is closed the
Micro2000 will continue to operate in is previous state.
3. INPUT 3 - Pump Interlock Verify Signal:
See Pump Interlock Operation section for more detail.
This product should only be installed by qualified personnel.
 Loading...