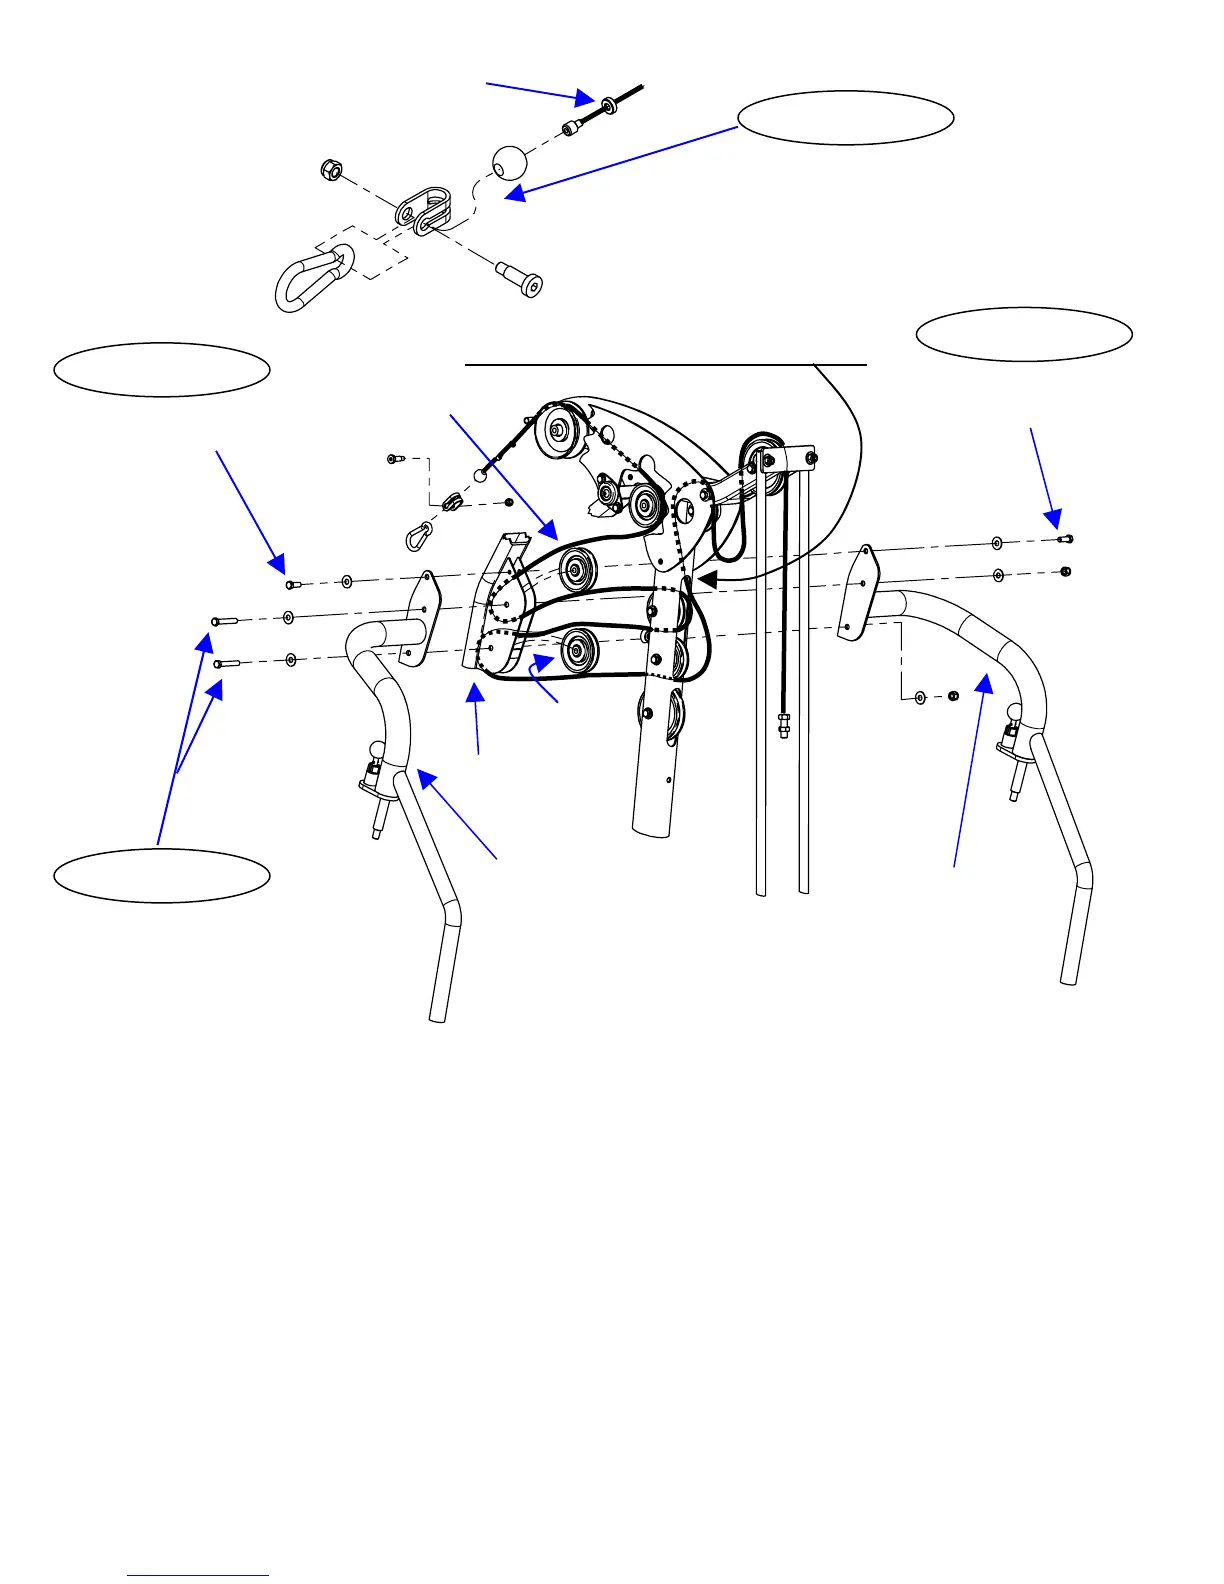
NOTE: Once Assembled, slide rubber
washer against plastic ball
1 – Plastic Ball
1 – Cable “U” Bracket
1 – 1 ¼ “ Shoulder Bolt
STEP 17
1 – Spring Clip
1 – 5/16” Lock Nut
NOTE: CABLE GOES INSIDE FRAME TUBE
1 – ½” Hex Bolt
STEP 15b
1 – ½” Hex Bolt Pulley 13 1 – 3/8” Flat Washer
STEP 15a
1 – 3/8” Flat Washer
Pulley 14
Press Arm Mount
Left Press Arm Right Press Arm
STEP 16
2 – 3 ½” Pulleys
2 – 2 ¼” Hex Bolts
4 – 3/8” Flat Washers
2 – 3/8” Lock Nuts
Steps 15a & 15b:
Attach Left and Right Press Arms to Press Arm Mount using: Two (½” Hex Bolts)
Note: Finger Tighten Only Two (3/8” Flat Washers)
Step 16:
Begin by running upper cable from back of machine to front
as shown in the diagram. Next, slide pulleys 13 & 14 into
the Press Arm Mount as cable is routed. Secure Left and Right
Press Arms using: Two (2 ¼” Hex Bolts)
Four (3/8” Flat Washers)
Two (3/8” Lock Nuts)
Step 17: Assemble Cable End by sliding one plastic ball onto the end of the cable. Next slide
the cable end into the side of the cable “U” bracket. Finally, attach spring clip to “U” bracket
using a 1 ¼” shoulder bolt and 5/16” lock nut. Wrench tighten bolts in steps 15a -17 now.
Page 15