Intel
®
Galileo Board Getting Started Guide
8 Order Number: 329685-006US
8. Select your board
Select Tools > Board > Intel
®
Galileo.
Note: If the IDE was closed and then reopened, it will default to a board that was
previously selected. You may need to explicitly select Intel
®
Galileo.
9. Select your serial port
Select the serial device of your board from the Tools > Serial Port menu.
Windows: Use the COMx number assigned earlier. You can retrieve the port number
by navigating to:
Start > Control Panel > System and Security > System > Device Manager
Look under Ports (COM & LPT) to see which COMx is assigned to Gadget Serial.
Linux: Use /dev/ttyAMC0
OS X: Use /dev/cu.usbmodemnnnnn
10. Upload the program
Click the Upload button in the IDE and wait a few seconds. If the upload is successful,
the message Done uploading. will appear in the status bar.
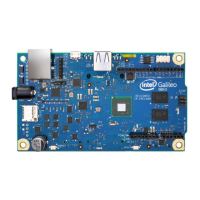
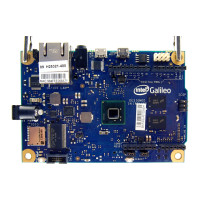
A few seconds after the upload finishes, you will see the green GP LED on the board
(shown above) start to blink. Congratulations! You've gotten your board up and
running.
For more information about Intel
®
Galileo, including online communities and support,
try these links:
http://www.intel.com/support/galileo
http://communities.intel.com/community/makers
11. Booting your board from an SD card (mandatory for WiFi)
Follow these steps to boot your board from an SD card. This setup also allows you to
save your sketch to the Galileo board, so it will be able to repeat sketches after board
power-down. (These steps create a persistent /sketch folder and rootfs.)
Note: If you want to use WiFi, you must follow these steps. The WiFi driver is not present in
the Linux image in SPI flash because it is too large. The Linux SD image also includes
ALSA, V4L2, python, SSH, node.js, and openCV.
Required files are in the LINUX_IMAGE_FOR_SD_Intel_Galileo_v1.0.0.7z zip file
(download link in Section 2).
Note: Your SD card must meet the following requirements:
SD card must be formatted as FAT or FAT32.
 Loading...