Intel
®
Galileo Board Getting Started Guide
2 Order Number: 329685-006US
Getting Started Guide
This document explains how to connect your Intel
®
Galileo board to the computer,
install the software on your computer, and upload your first sketch.
You should be able to do this in under an hour (not counting your download time).
Note: This release uses a special version of the Arduino IDE. The first thing you must do is
download it from the Intel website below and update the SPI flash on the board.
The basic steps you will follow are:
1. Get a board and cables
2. Download the Arduino environment and board firmware
3. Connect the board
4. Install the drivers and other software
5. Launch the Arduino IDE application
6. Update your board firmware
7. Open the blink example
8. Select your board
9. Select your serial port
10. Upload the program
See these sections for advanced tasks:
11. Booting your board from an SD card (mandatory for WiFi)
12. Serial cable (optional)
13. Manually update your board firmware (optional)
14. Troubleshooting Tips
For more information about Intel
®
Galileo, including online communities and support,
try these links:
http://www.intel.com/support/galileo
http://communities.intel.com/community/makers
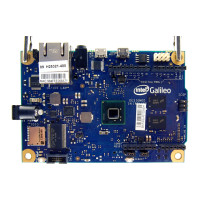
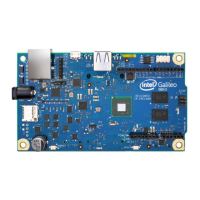
1. Get a board and cables
The kit contains:
• 1x Intel
®
Galileo Customer Reference Board (CRB) (Fab D with blue PCB)
• 1x 5v power supply with cable
Warning: You must use a power supply to power the board! You will
damage the board if you power it with a USB cable.
You also need a USB Type A Male to Micro-B Male cable (not included) to connect the
board to your computer.