Intel
®
Galileo Board Getting Started Guide
Order Number: 329685-006US 9
SD card size must be 32GB (or smaller) and SDHC format.
SDXC format is not supported.
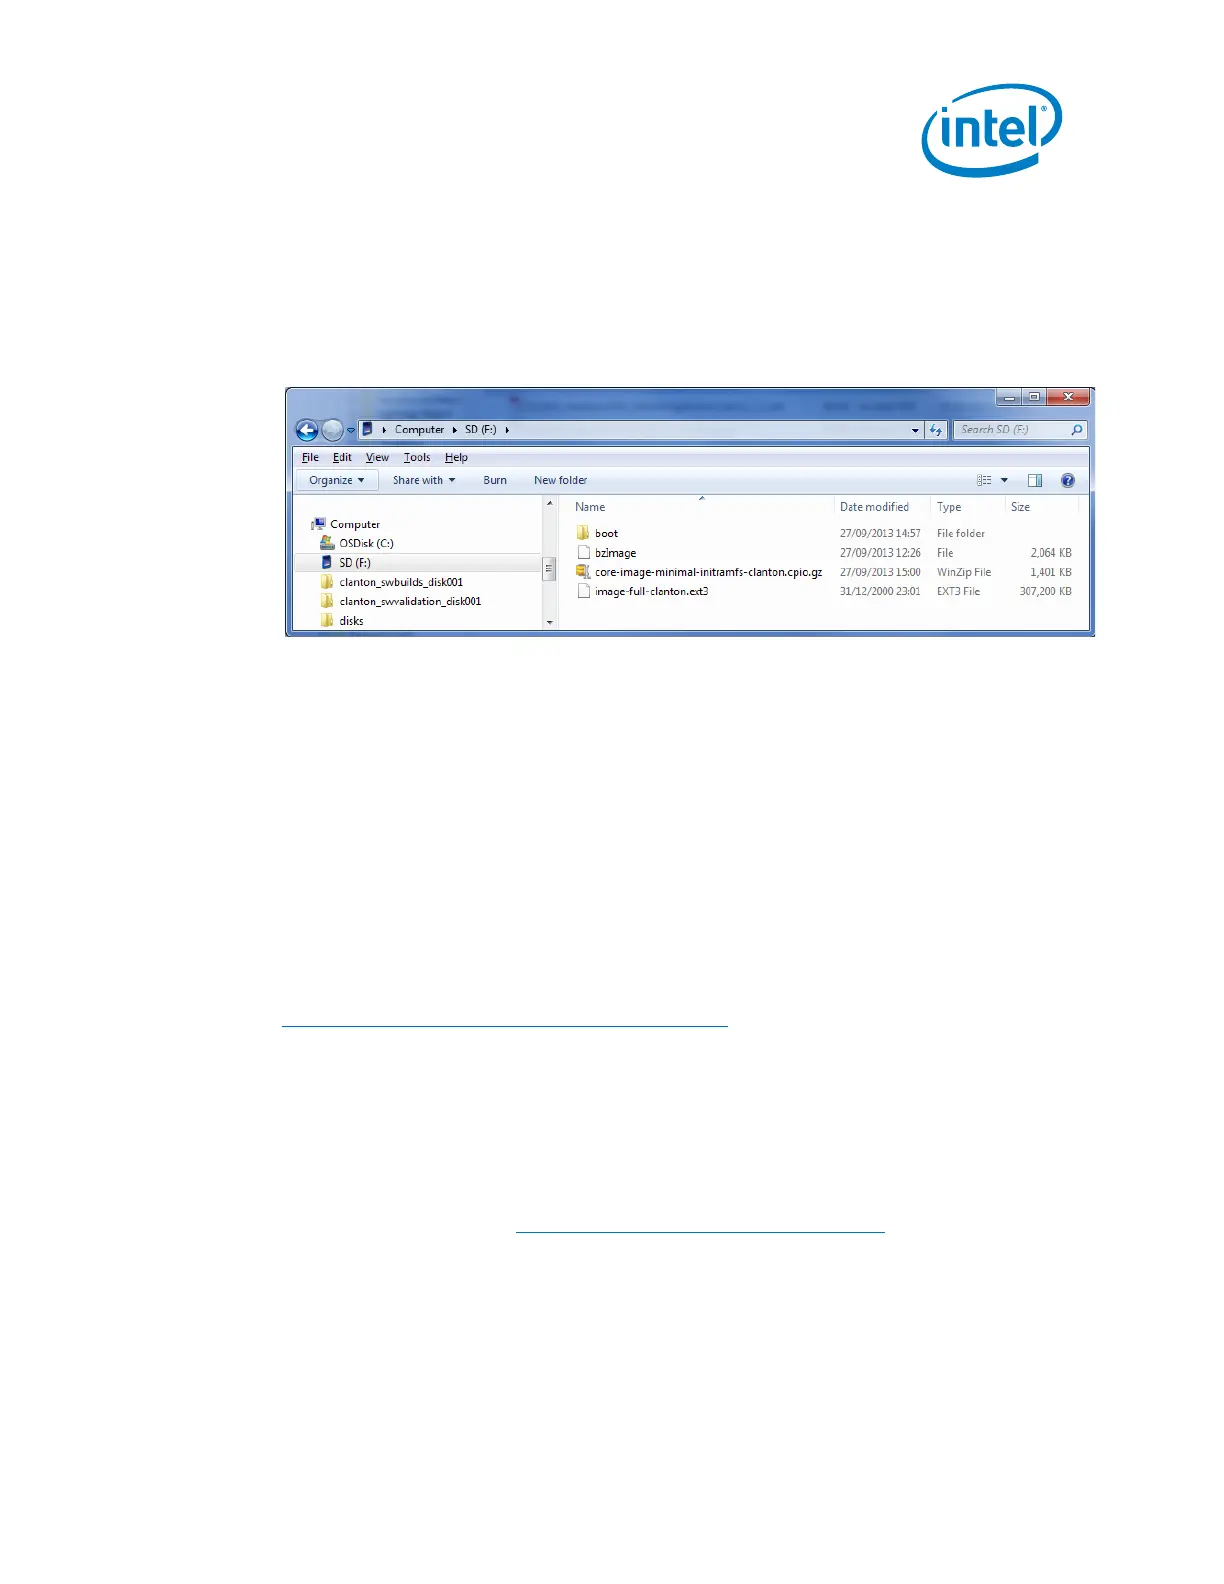
1. Copy all files and directories from the zip file to your SD card.
You do not need to create a directory on the SD card. The zipfile contains all the
necessary files and structure. Be sure it is extracted at the top level of the SD
card. See the screenshot below for a sample view.
2. Insert the SD card, then power on the board.
Note: The first time you boot the board may take several minutes. This is expected behavior
due to the SSH component creating cryptographic keys on the first boot.
Troubleshooting tips:
To boot from SD/USB, the grub instance embedded in the SPI flash is hardcoded to
search for a boot/grub/grub.conf file in partition 1 on the SD/USB card. This is
compatible with the factory formatting of most SD/USB devices. By default, the UEFI
firmware does not try to boot from SD or USB, it is handled by grub.
If you use an SD or USB device that has been reformatted after manufacturing, you
might experience problems booting from it. First, try to boot with a different memory
device and see if the problem goes away. If you isolate the problem to a specific SD
card, you can restore the factory formatting using this tool from the SD association:
https://www.sdcard.org/downloads/formatter_4/
It is not recommended to use normal operating system tools to format flash memory
devices.
12. Serial cable (optional)
You can access the embedded Linux using a serial cable connected to the 3.5 mm
audiojack port on the Galileo board. Be sure that the cable is RS-232 format and not
TTL format (details here: https://www.sparkfun.com/tutorials/215).
For a 3 pin audio jack, the connections are shown below:
• Pin 1 Sleeve = Ground
• Pin 2 Ring = RXD (input)
• Pin 3 Tip = TXD (output)
 Loading...