Part No. 1114822 31 Tilt/Recline Seating Systems®
INSTALLING/REMOVING THE POWER LEGRESTS (FIGURE 7)
NOTE: Power legrests are linked to the recline function of the seating system. Operating the
recline function automatically operates power legs. Power legrests can also be operated indepen-
dently of the recline function.
WARNING
To prevent personal injury, always verify proper positioning of legs and
feet prior to use. Individual user weight may impact the rate of travel for
each legrest assembly. If simultaneous operation is desired, select a speed
which allows for the most uniform travel.
DO NOT insert fingers between legrest components, otherwise personal injury
may occur.
CAUTION
Never allow items to become
trapped between the legrest assem-
blies, otherwise damage to the
power legrests may occur.
Ensure that all parts of both power
legrests are clear of any obstruc-
tions before raising and lowering,
otherwise damage to the power
legrests may occur.
INSTALLING THE POWER
LEGRESTS
1. Turn power legrest to side (open
footplate is perpendicular to wheel-
chair) and position the mounting pin
on the legrest with mounting holes on
the seat frame (DETAIL "A").
2. Insert the mounting pin of power
legrest into the mounting hole of the
seat frame (DETAIL "A").
NOTE: Make sure the legrest sits flush on the
seat frame.
3. Rotate the power legs toward the
inside of the wheelchair until it locks in
place.
NOTE: The footplate will be on the inside of the wheelchair when locked in place.
4. Repeat STEPS 1-3 for the opposite legrest.
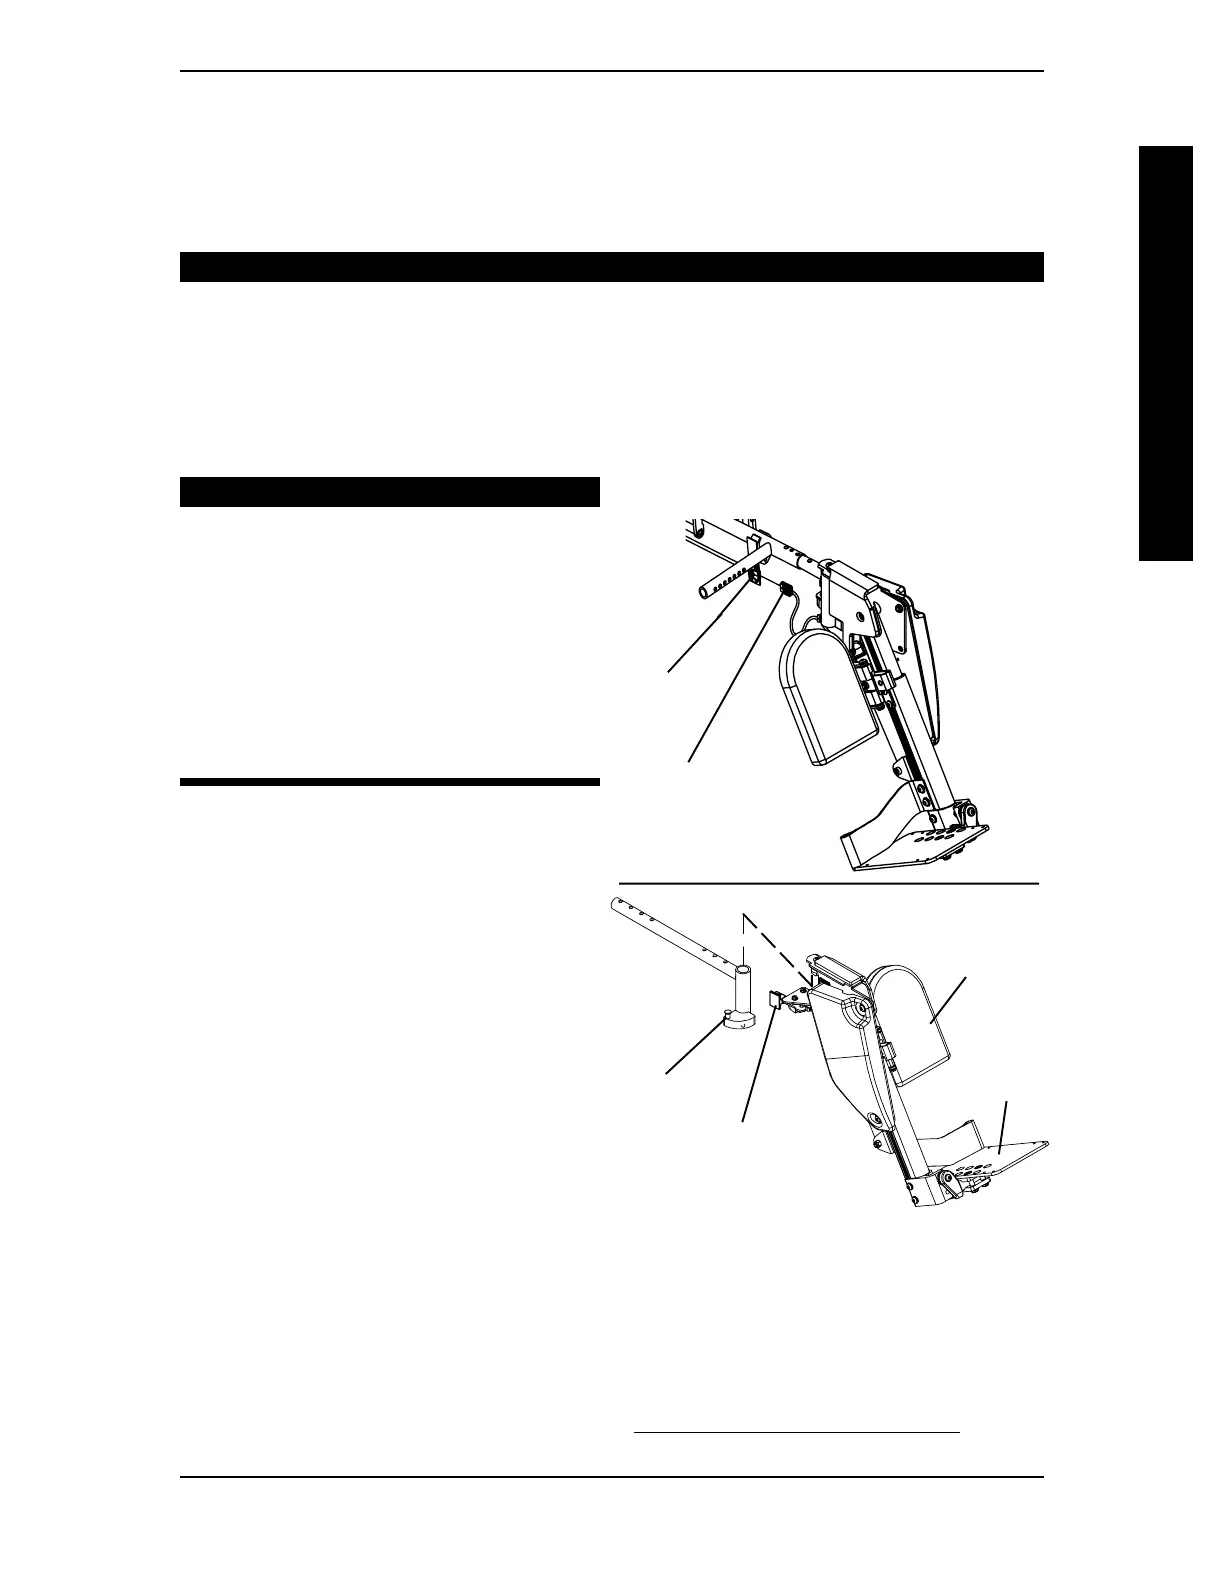
5. Connect power legrest connector to jumper cable (DETAIL "B").
6. If necessary, adjust powered legs. Refer to ADJUSTING POWER LEGRESTS in this
section of the manual.
RIGGINGS SECTION 7
Legrest Release
Handle
Calf pad
Mounting
Pin
Footplate
FIGURE 7 - INSTALLING/
REMOVING POWER LEGRESTS
Jumper
Cable
Power Leg
Connector
DETAIL "A"
DETAIL "B"
RIGGINGS