SECTION 9—FRONT RIGGINGS
Part No 1141450 47 Pronto® M91™ with SureStep®
7. Reinstallthefootrest(s)ontothewheelchair.RefertoInstalling/RemovingFront
Riggingsonpage 45.
8. Reinstallanyaccessoriesontothefootrest(s).
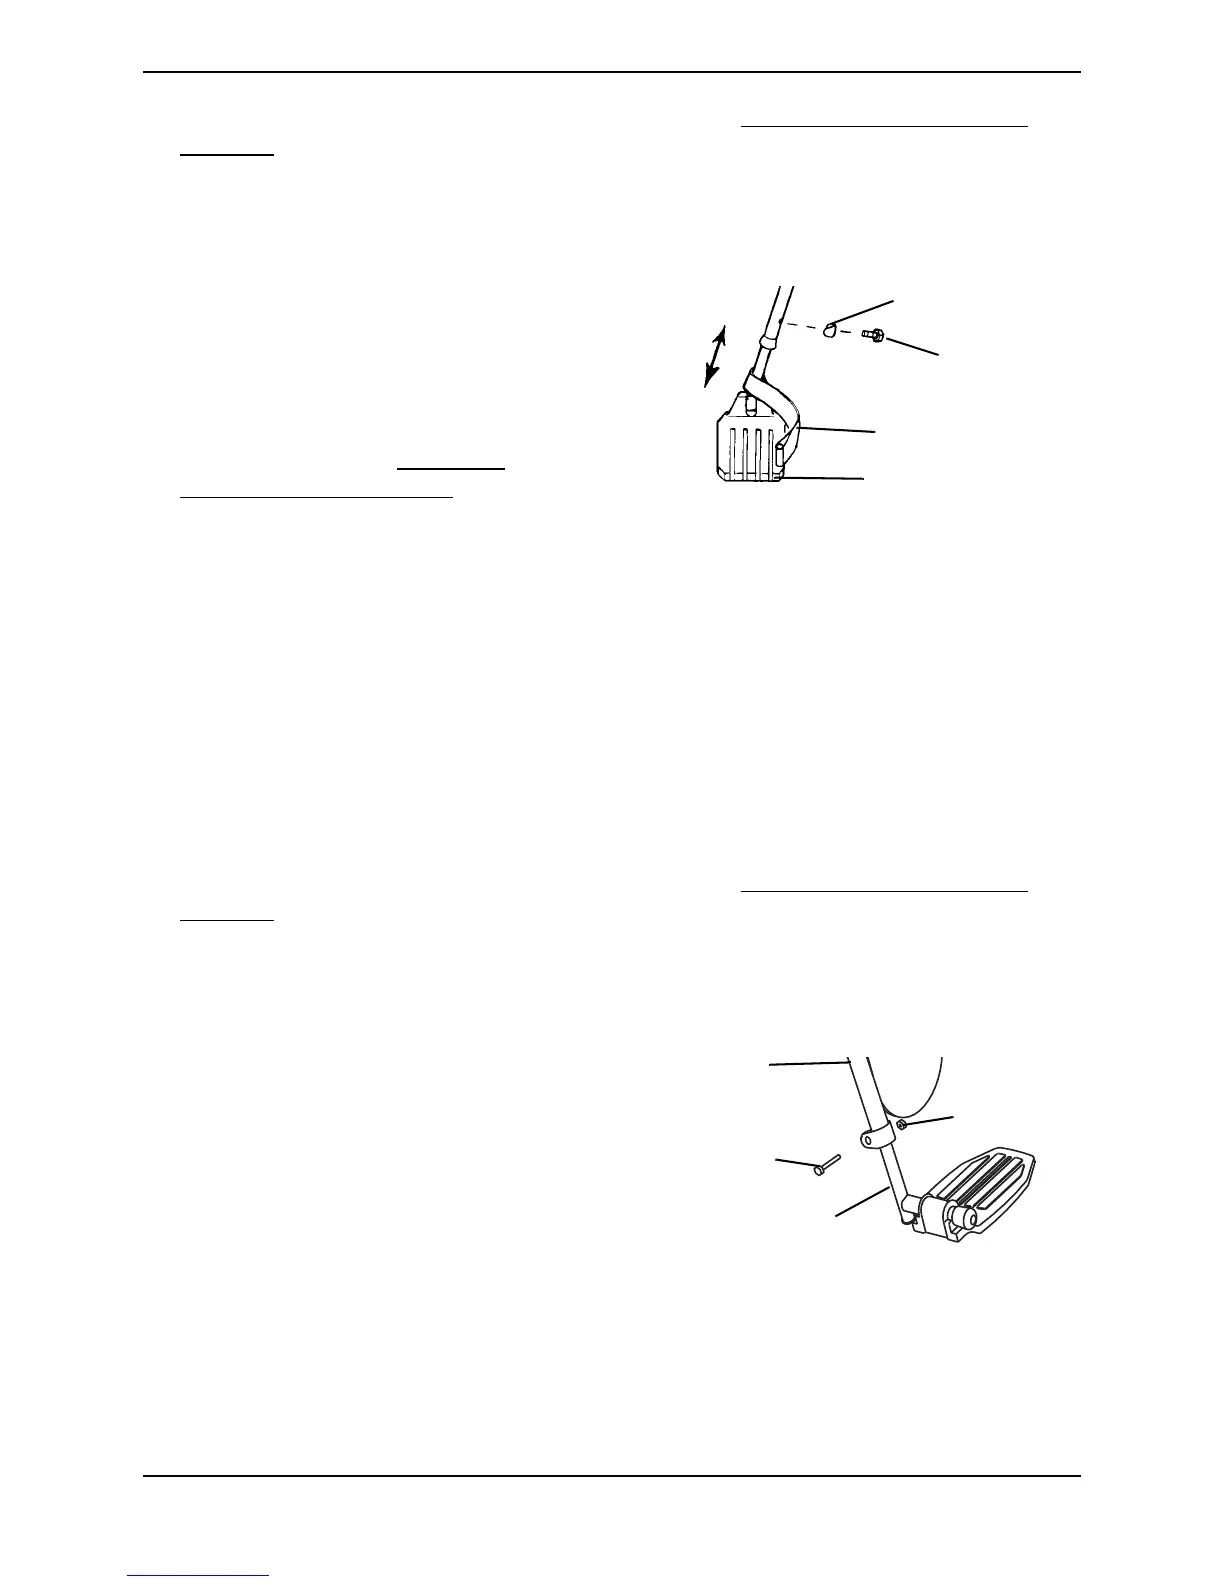
70° Taper
NOTE:Forthisprocedure,referto
FIGURE 9.4.
1. Removeanyaccessoryfromthe
footrest(s).
2. Removethefootrestfromthe
wheelchair.RefertoInstalling/
RemovingFrontRiggingsonpage 45.
NOTE:Laytheassemblyonaflatsurfaceto
improveaccesstothehardware.
FIGURE 9.4 Installing/Removing Front
Riggings - 70° Taper
NOTE:Notethepositionofthespacersbeforedisassembly.
3. Removethemountingscrewandcovedspacerthatsecuresthelowerfootrest
assembly.
4. Positionthefootrestassemblytothedesiredheight.
5. Securelowerfootrestassemblywithexistingmountingscrewandcovedspacer.
Securelytighten.
NOTE:Makesurespacersarepositionedproperlywhenreassemblingtopreventdamagetothe
framemountingtubes.
6. Reinstallthefootrest(s)ontothewheelchair.RefertoInstalling/RemovingFront
Riggingsonpage 45.
7. Reinstallanyaccessoryontothefootrest(s).
Model PH904A and PHAL4A
NOTE:Forthisprocedure,referto
FIGURE 9.5.
NOTE:PH904Astylefrontriggingshown.
PHAL4Afrontriggingadjustthesameway.
1. Loosen,butdonotremovethelugbolt
andlocknutthatsecurethelower
footresttothefootrestsupport.
2. Repositionthelowerfootresttothe
desiredheight.
FIGURE 9.5 Adjusting Footrest Height -
Model PH904A and PHAL4A
3. Securelytightenthelugboltandlocknutthatsecurethelowerfootresttothefootrest
support.
4. RepeatSTEPS1‐3fortheoppositesideofthewheelchairfootrest,ifnecessary.
Coved Spacer
Mounting
Screw
Heel Loop
Footrest
Locknut
Footrest
Support
Lower Footrest
Lug Bolt

 Loading...