Better Packages Section 2
Operation
12
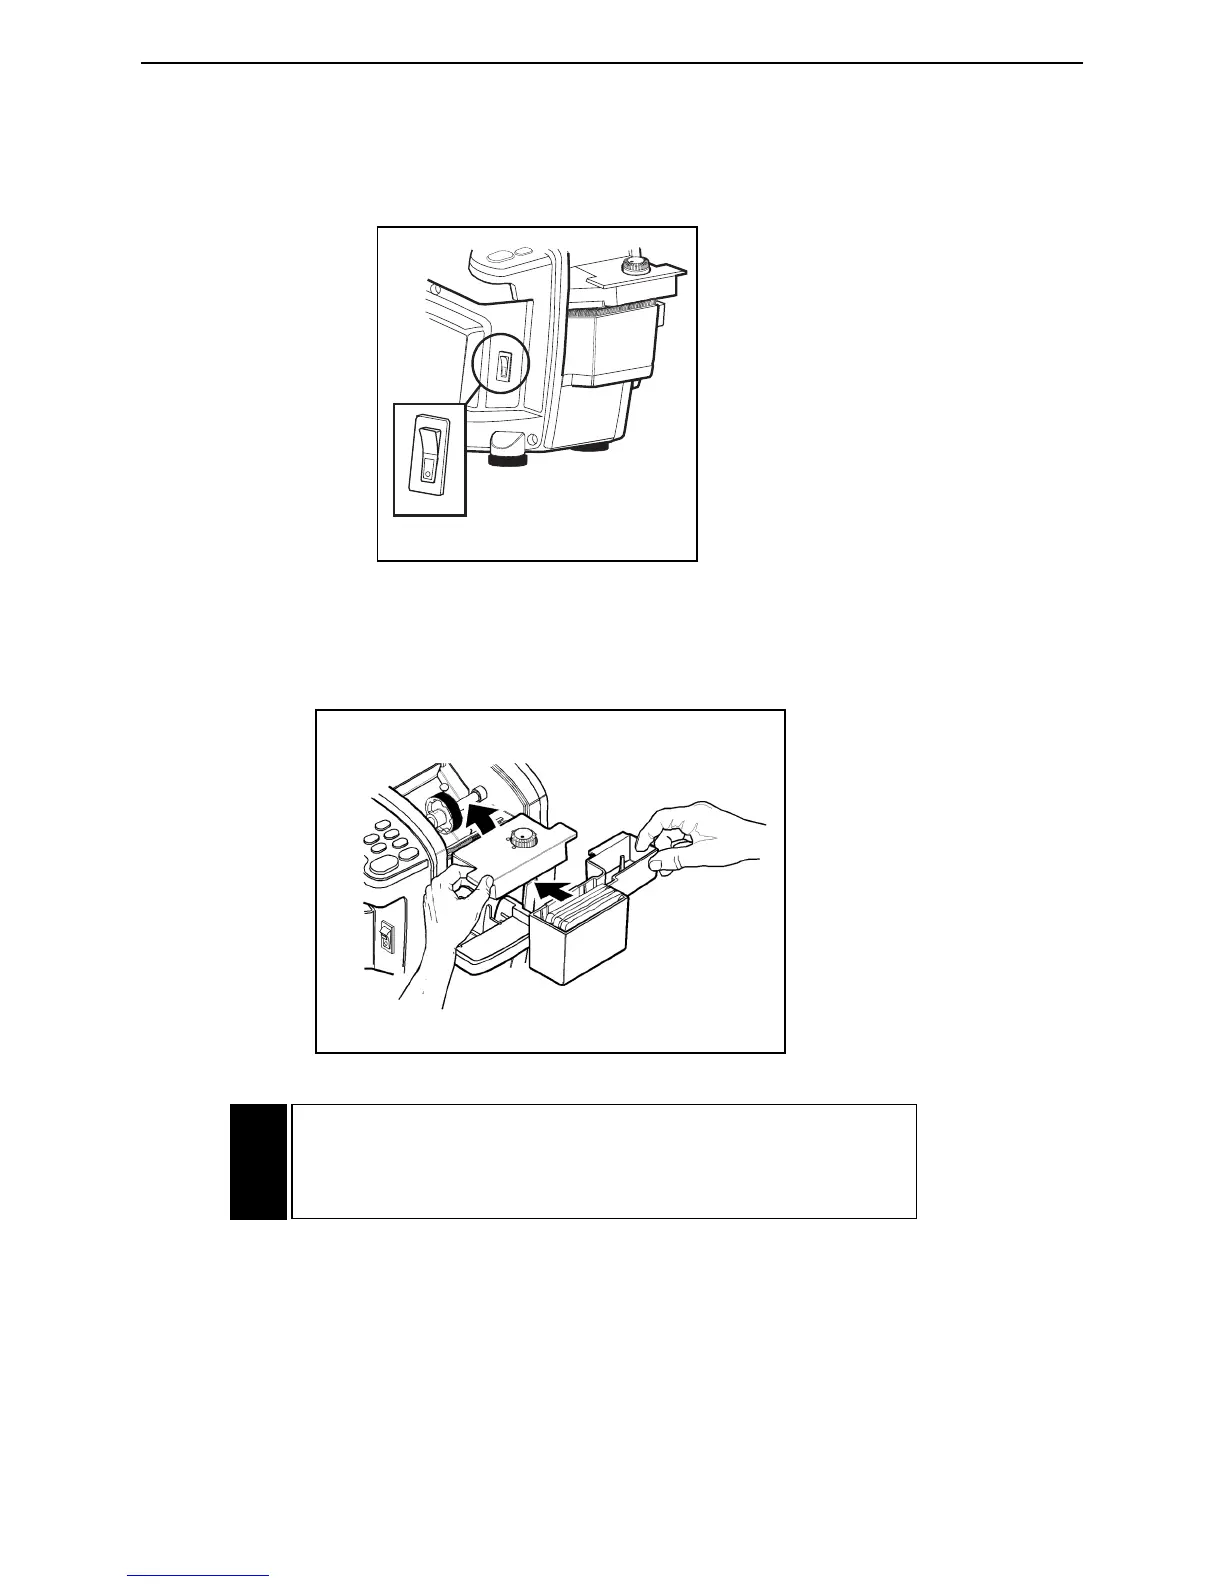
TURN THE SYSTEM “ON”
Turn the power switch to the “ON” (up) position. The switch will light and the dispenser will “beep” once.
See Figure 14.
ADJUST THE SETTING ON THE HEATER ASSEMBLY
Finding the correct setting for the tape you are using is a matter of simple testing. Turn adjustment knob
to highest setting (clockwise), then back off slightly to the lowest temperature setting that best meets your
needs. See Figure 15. Refer to Section 3 “Sealing with Gummed Tape”.
When the heat is properly adjusted, the tape will adhere quickly to the parcel. Too low a setting may
result in the tape taking slightly longer to properly adhere.
Handling the Heater Assembly
Temperature Adjustment Control Knob
CAUTION: The bottom of the heater assembly gets HOT!
Handle the heater only by the tabs protruding from the sides
of its top. See Figure 15.