20
6. Installation/Wiring
CBL-402 Functions list / Wiring
CN1
(Power supply)
Functions
CN2
(Control)
#3
#2
#1
#2
#1
0V
24V DC
STTS
DIR
RUN
Connector descriptions
Connect each cable to CN2 (3 contacts).
Connect the 24V DC and 0 V cables to CN1 (2 contacts).
1
■
Wiring of
power connector (CN1)
Wiring of
control connector (CN2)
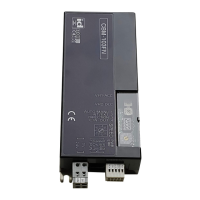
Connecting to the driver card
Do not connect multiple power cables to one contact.
Failure to follow this could result in electric shock, short
circuit, and/or damage due to the capacity of connec-
tors being exceeded.(Connector capacity: 10 A)
■
Do not connect the 24V DC and 0 V cables incorrectly.
■
Do not connect cables when connectors are
plugged in.
2
Connect the power connector (CN1) and control
connector (CN2) to the driver card.
3
Connect with MDR
Connect 6-pin D shaped connector cable coming
from the MDR.
4
■
Refer to the above, wire according to operation.
■
Attach the 6-pin D shaped connector
cable securely and check that the latch
has been locked.
■
Use the same voltage to be input to CN2#1 as the
power supply voltage. (Connector capacity: 4 A)
■
Check the input signal (NPN/PNP) and input the
voltage to CN2.
■
When connecting a relay coil, etc., to the remote
output, use surge protector devices or add diode for
surge protection.
Using devices without surge protection measures
could result in damage to the remote output terminal, if
counter electromotive voltage is generated when
switching the output signal.
0.50〜1.5mm
2
(AWG:20〜14)
7mm
24V DC
(
AWG:28
〜
20
)
0V
7mm
0.08〜0.5mm
2
Power connecto
r
(
CN1
)
Control connector
(
CN2
)
No.
Application
STATUS(Signal output)
Switching of the direction of rotation
Start / Stop (RUN / STOP)
■
Connect 6-pin D shaped connector extension
cable, if necessary. ⇒ Refer to P.13
●Connecting 6-pin D shaped connector
●Disconnecting 6-pin D shaped connector
While holding both ends of 6-pin D shaped
connector cable on the MDR side, check
that the latch on the driver card side has
been released and remove the cable.
Driver card side
Driver card side
MDR side
MDR side
Latch
Latch
Safety precautions
Advance preparation
Check ProductInstallation/Wiring
Maintenance/Inspection
Specifications Control/Operation
CBV30UserManual