Check the level in the overflow bottle when the system is cold. If
the fluid level is visible in the overflow bottle but below the
recommended level and the proper fluid is not available, it can be
brought-up to the correct point by adding distilled water. If fluid
is not visible in the overflow bottle, appropriate heat transfer fluid
should be added until the level is visible. At which point distilled
water or heat transfer fluid can be used to bring the level to the
correct point.
If freezing is a concern the dilution of the heat transfer fluid
should be checked with a refractometer and verified with the
manufactures “Freeze Protection” specifications.
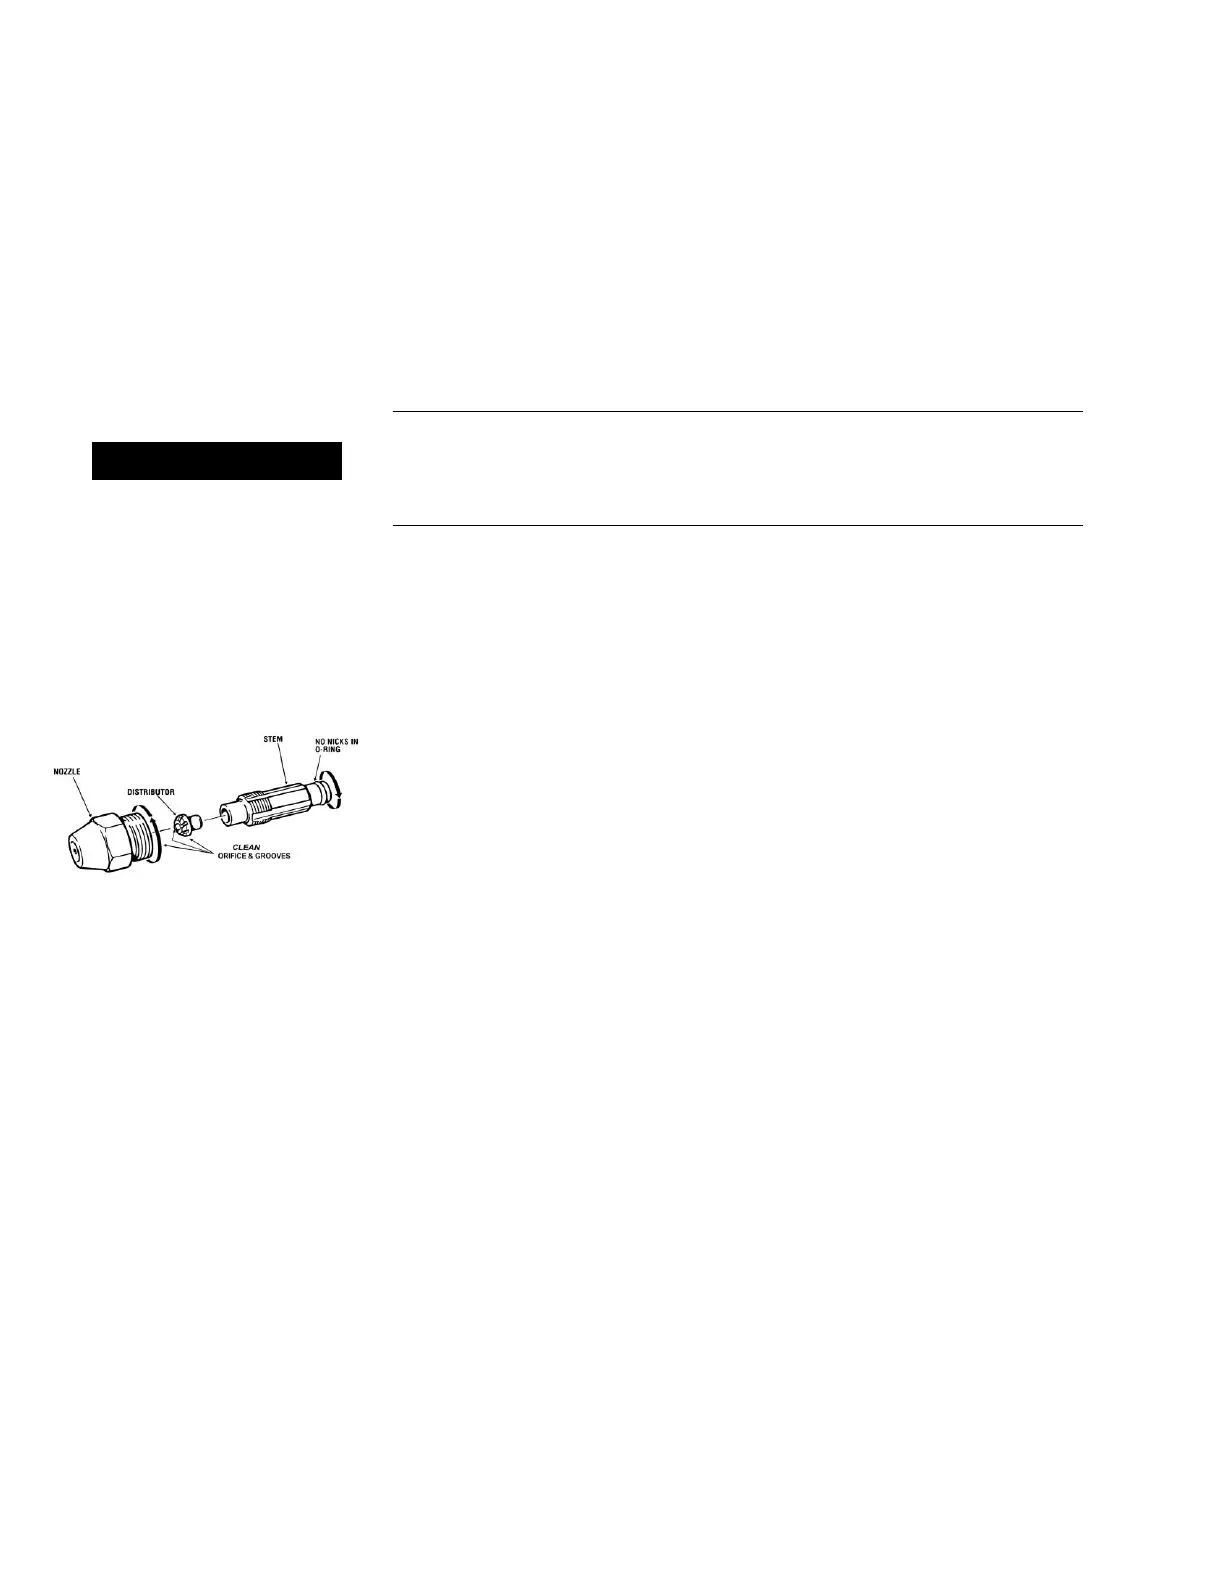
11.3 Nozzle
Nozzle problems such as clogging, will result in a poor, small blue
flame. The nozzle should be taken apart and cleaned during
routine maintenance. Be careful when handling the nozzle. The
brass nozzle material is soft and can be damaged easily from
mishandling and over tightening during reassembly. To
disassemble the nozzle, use a large crescent wrench on the stem
of the nozzle making sure it sits snuggly over the grooves that
run the length of the stem. Don’t place the wrench on the
rounded sections of the stem as this will allow the wrench to slip
and rotate when force is applied possibly causing damage. Use a
5/8 combination wrench on the nozzle head and loosen it from
the stem. Hold the nozzle vertically with the nozzle-head
up, over a surface from which any dropped parts can be
retrieved, carefully disassemble the two parts turning the nozzle
head counter clockwise. Remove the fuel distributor from the
stem, remove the O-ring from the stem and place the three parts
into a container for cleaning. Use brake or carburetor cleaning
solvent to thoroughly clean the parts. Spraying the cleaner
through the individual parts will help clean them. Use a Q-tip or
something similar to clean inside the nozzle head. Use high-
pressure air to dry and blow the parts free of debris. Replace the
O-ring; as with disassembly, hold the nozzle stem vertically,
replace the fuel distributor into the stem and screw the nozzle
head onto the stem. Tighten the two parts together only
slightly tighter than hand-tight.
11.4 Fuel Lines and Filter
You should check your filter every season to determine if it needs
replacement. The frequency depends largely on the quality of
fuel you’ve been using.