13
Step 2
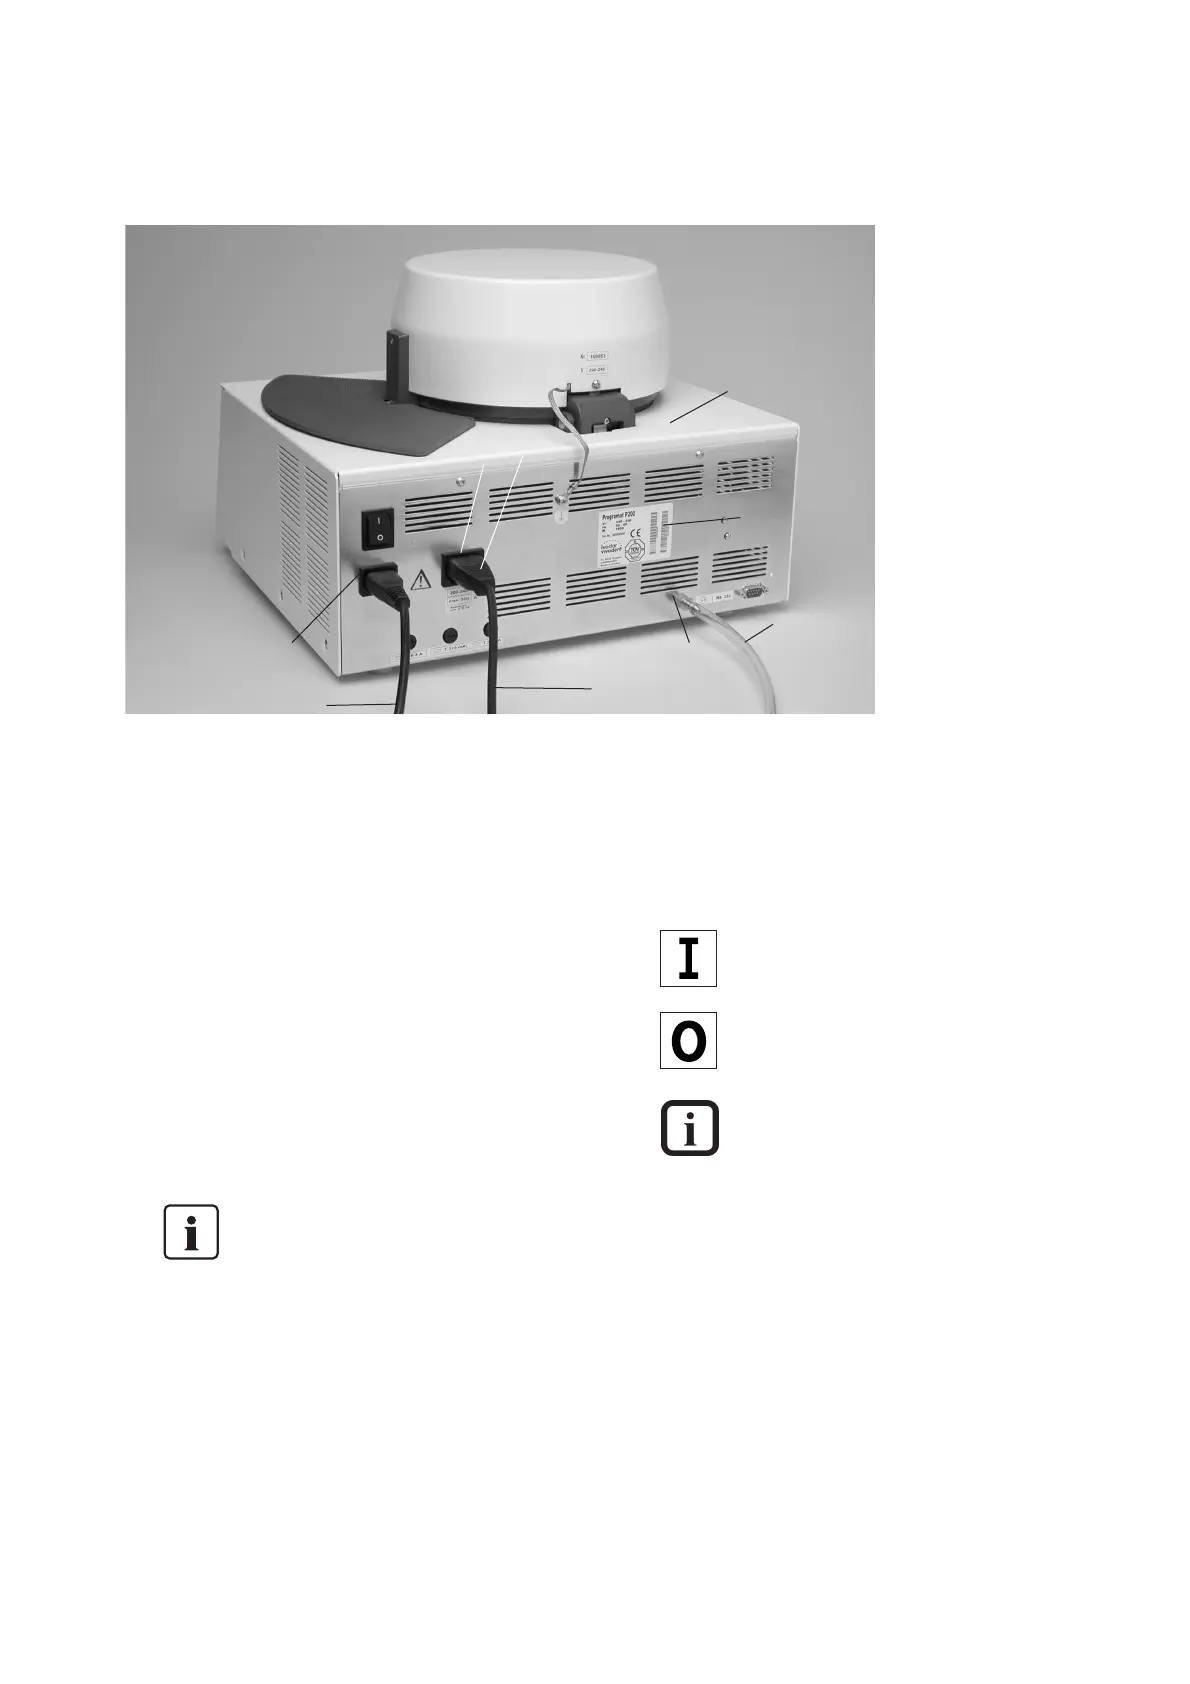
Connections
Power connection
Please make sure that the
voltage indicated on the rating
plate (33) complies with the
local power supply. Should this
not be the case, you must not
connect the furnace. Connect
the power cord (27) with the
power socket (21) of the
furnace.
Vacuum pump connection
Connect the power plug of the
vacuum pump (29) with the
vacuum pump socket (30), and
connect the vacuum hose (32)
with the vacuum hose
connection (31).
For this furnace, we
recommend using
only the VP3 vacuum
pump from Ivoclar
Vivadent (accessory),
since this pump is
especially coordinated
with the furnace. If
other pumps are
used, please observe
and do not exceed
the maximum power
consumption (see
Chapter 9.2).
PC or printer
Use a null modem cable to
connect the furnace with a PC
or a printer. Connect the cable
with the corresponding PC
connection (17).
Null modem cables are available
from computer stores.
Cable configuration
(D-SUB, 9-pin)
P 200 2 3 5
III
PC 3 2 5
Parameter sticker
The parameter sticker in the
desired language may now be
attached to the designated
space (12).
4.4 Initial start-up
Switching on
The furnace may only be
switched on with the On/Off
switch at the rear of the
furnace.
= On
= Off
During operation,
the lamp for the
stand-by temperature
on the firing curve
display is illuminated
(only if the stand-by
temperature has
been reached).
Approximately 1 second after
switching on, the furnace starts
its automatic performance check
(self-diagnosis). During this
check, the field (70) in the
display (7) shows the word
‘SELF’ for approx. 45 seconds
(furnace head already closed). At
the beginning the performance
check, all 11 diodes blink. The
head is automatically closed if
it is still open. During the
performance check, the keys
do not function. The test checks
the function of the individual
components. If all components
work properly, the furnace heats
up to the stand-by temperature
of the last program used. If any
component is defective, the
corresponding error number
(Err No.) will be indicated in the
display (7).
21
27
28
33
29
30
31
32
17