!
tt-:fLJ:~
x•
J :ff
Top
end
of
needle eyelet aligns with
the top surface
of
throat plate.
11)
f?t.HJL
~tr.Jrt1H~ll'!J~~~Z'.f'.
® ,
iffil
~ r
:mt1Ht':J1JLtbf11:m1-11!f
tr.J
rnJtt7
o
*
li'!J~Lr~~8~~~il~~~.
~~~~~£fl'l1tl7
o
·-r:m~.
:mm!f~r•~~.
mm!fLW~tt&LWMftffi.
mtt~-r•~~
.
ttnL~~tt•
L W
5<1
ft,
IW
llJ
tV.
l
r.
lJ
tl7
o
12)
iffil~5c:mmrnJtt7zffi
,
l1f'¥'¥:1tM~rfa~ll'!J~~~f'.f'.
® (
2~)
ll'!J~:l!L
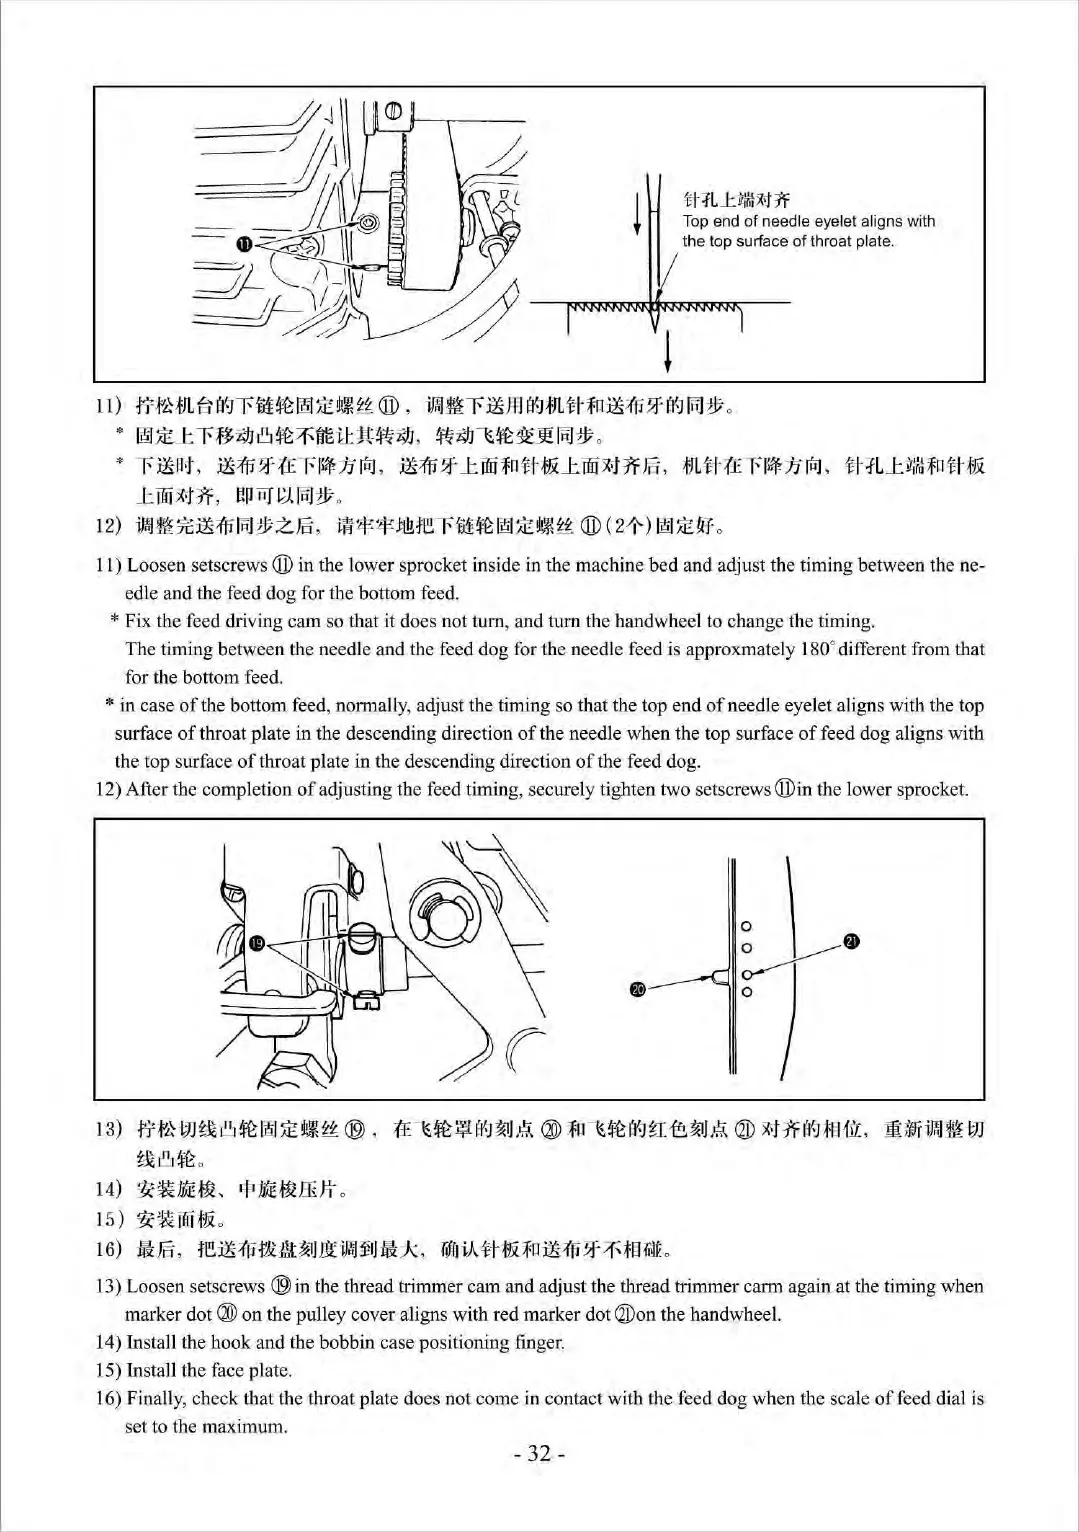
11) Loosen setscrew
s®
in
the lower sprocket inside in the machine bed and adjust the timing between the ne-
edle and the feed dog for the bottom feed.
* Fix the feed driving cam so that it does not tum, and tum the handwheel
to
change the timing.
The timing between the needle and the feed dog for the needle feed is approxmately 180° different from that
for the bottom feed.
*in
case
of
the bottom feed, normally, adjust the timing so that the top end
of
needle eyelet aligns with the top
surface
of
throat plate in the descending direction
of
the needle when the top surface
of
feed dog aligns with
the top surface
of
throat plate in the descending direction
of
the feed dog.
12) After the completion
of
adjusting the feed timing, securely tighten two setscrew
s®
in the lower sprocket.
13)
f?t~W~8~ll'!J~~~Z'.f'.@,
1£
-
~~~H8~L~
®
;f11
-
~~tr.Jn~~L~
®
.5(•Jft~8*1HtJ:,
.filfffr
iffil~W
~8~
o
14)
't:~ME~,
qcrftE~J.liJl
o
1
5)
't:~fJif&
o
16)
Mt
ffi,
1~
mm
mm:
~
'J
J.l
iffd
¥1J
!d
e,
refoiA
tt:fli
~mm
!f
71"~*1'1
r~L
13) Loosen setscrews
@in
the thread trimmer cam and adjust the thread trimmer carm again at the timing when
marker dot
® on the pulley cover aligns with red marker dot
@o
n the handwheel.
14) Install the hook and the bobbin case positioning finger.
15) Install the face plate.
16) Finally, check that the throat plate does not come
in
contact with the feed dog when the scale
of
feed dial is
set
to
the maximum.
- 32 -


 To Next Page